Homemade Backcountry Sloppy Joes: Your Ultimate Dehydrated Backpacking Meal Guide
Backcountry Sloppy Joes offer a delightfully tangy and sweet backpacking dinner idea that’s incredibly easy to prepare and bursting with satisfying flavor. This recipe empowers you to dehydrate all the necessary ingredients at home, transforming them into a lightweight, packable meal that simply requires adding water on the trail. Rich in protein and essential fiber, and boasting a wholesome, comforting taste, these Backcountry Sloppy Joes are the perfect reward after an arduous day of hiking, ensuring you feel nourished and ready for your next adventure.

Welcome to the first entry in our brand-new post category: Backpacking Meals! Given that this is an introductory guide, I’ve included a wealth of foundational information and essential basics for dehydrating foods right in your own kitchen. If you’re eager to skip directly to the culinary creation, feel free to hit the Jump to Recipe button located above, or navigate to a specific section using the table of contents below:
Table of contents
- Embracing the Backpacking Lifestyle
- The Irresistible Benefits of Dehydrating Your Own Backpacking Dinners
- Mastering the Basics of Food Dehydration for the Trail
- Effortless Rehydration: Your Trailside Dinner Solution
- Why This Backcountry Sloppy Joes Recipe is a Winner
- Step-by-Step Guide to Backcountry Sloppy Joes
- Preparing Ingredients for the Dehydrator
- Assembling Your Backpacking Dinner Kits
- Enjoying Your Meal on the Trail
- Expert Tips for Dehydrated Backpacking Meals
- Frequently Asked Questions about Dehydrated Sloppy Joes
Embracing the Backpacking Lifestyle
Backcountry Sloppy Joes proudly inaugurate a thrilling new category on my blog: Backpacking Meals. For years, my passion for the outdoors has steadily grown, evolving into a profound love for backpacking. There’s an unparalleled solitude and peace found deep in the backcountry, far from the urban clamor and constant demands of modern life. As a food blogger deeply immersed in this world, sharing delicious and practical backpacking dinner ideas became an inevitable, exciting step.
My journey into backpacking began modestly, with a few invigorating day hikes in England’s picturesque Lake District. Soon, I yearned for more, progressing to an overnight trip in the majestic Mount Rainier National Park. A day exploring the rugged beauty of Palo Duro Canyon in Texas further solidified my desire for extended adventures. Then, I discovered the extensive Florida Trail, a route that traverses the entire state, from the swampy Everglades to the Panhandle, and, remarkably, passes close to my home. This discovery truly ignited my long-distance hiking aspirations.
Last year marked a significant milestone as I completed 167 miles of the iconic Appalachian Trail. Following that, I tackled Half Dome in Yosemite Valley – a challenging ascent that, while I didn’t reach the very summit due to its sheer intimidation, was an incredible experience. This summer, I’m preparing for an even grander feat: a thru-hike of the 211-mile John Muir Trail, stretching from Yosemite Valley to the towering peak of Mount Whitney. It’s safe to say that backpacking and I have developed a serious relationship, a commitment evident in the overflowing collection of specialized equipment in my laundry room!
Acquiring the right gear, surprisingly, is often the easier part. My collection includes four tents, three stoves, four sleep pads, and four backpacks (I recently sold two, so at one point, I had six!). And let’s not even begin to discuss the myriad items I’ve accumulated for when my dog joins me on the trail. Seriously, the gear list can be endless.
However, the real challenge, much like when I train for long-distance triathlons, lies in mastering food and nutrition. On the trail, it ultimately comes down to calorie intake – a constant focus. Yet, for extended hikes, ensuring adequate protein is equally, if not more, critical. While finding calorie-dense foods is relatively straightforward for backpackers, securing sufficient protein proves more difficult, primarily due to preservation requirements. This is where homemade dehydrated backpacking meals, like these Backcountry Sloppy Joes, become an invaluable solution.
The Irresistible Benefits of Dehydrating Your Own Backpacking Dinners
A crucial rule I adhere to on the trail is: I do not cook. Let me emphasize this point: I absolutely DO NOT cook on the trail. Instead, I focus solely on *rehydration*. After a fulfilling day of hiking, my routine involves setting up camp, boiling water, adding it to a pre-prepared dehydrated backpacking dinner, and then enjoying a delicious, fuss-free meal. This approach is driven by three primary reasons:
- **Minimizing Animal Attraction:** I am extremely cautious about attracting wildlife to my campsite. Most of my trips are solo, and any experienced backpacker will confirm that every sound is dramatically amplified when you’re alone in a tent at night. The rustle of a pinecone can quickly morph into the perceived approach of a bear or other large animal. By rehydrating, cleanup is minimal, leaving no food odors or waste that might pique an animal’s curiosity. This also means no dirty dishwater to dispose of, as I draw the line at drinking grey water.
- **Adhering to Leave No Trace Principles:** I strive to follow Leave No Trace principles as diligently as possible. This commitment extends to minimizing the waste I pack out, which directly translates to significant weight savings. Less trash means a lighter pack and a more responsible impact on the wilderness.
- **Optimized Fuel Consumption:** By only needing to boil 1-2 cups of water per day for dinner (and perhaps a cup for morning coffee), I can significantly reduce the amount of fuel I carry. This directly ties into the weight-saving benefits.
Points 2 and 3 are intrinsically linked: less weight ultimately means more miles covered with less strain, and crucially, a reduced risk of injury. This is a paramount consideration for me on any long-distance hike.
While all these requirements can certainly be met by purchasing pre-packaged backpacker meals from various companies – and I’d be disingenuous if I claimed I never do – this option quickly becomes prohibitively expensive. This is especially true now, as I meticulously plan a demanding 21-day thru-hike across California’s stunning Sierra Nevada Mountains.
By taking the time to dehydrate individual ingredients and expertly assemble my own delicious, lightweight dinners, I unlock immense financial savings. Simultaneously, I fulfill all my trail requirements: maintaining a clean camp, upholding Leave No Trace ethics, minimizing waste, conserving fuel, keeping my pack light, and, of course, saving a considerable amount of money.
Beyond the practical advantages, I also gain the invaluable benefit of complete control over the ingredients, avoiding unwanted additives, precisely managing calorie content, and customizing the flavors to my exact preference. This personal touch makes trail meals not just functional, but genuinely enjoyable.
Mastering the Basics of Food Dehydration for the Trail
While this post won’t delve into an exhaustive treatise on all aspects of food dehydration, I want to dedicate this section to outlining essential basics, ensuring that even a complete novice can confidently tackle this Backcountry Sloppy Joes recipe and embark on their own DIY backpacking meal journey.
First and foremost, a dedicated food dehydrator is your best tool for this endeavor. These appliances are readily available online, incredibly user-friendly – as simple to operate as a slow cooker or an air fryer – and consistently outperform conventional ovens for dehydration purposes. While I’ve experimented with oven dehydration for items like Beef Jerky, I’ve found a dehydrator to be far more efficient and straightforward for preparing backpacking meals.
Secondly, most dehydrators come equipped with mesh tray inserts, ideal for small bits of food. However, I’ve discovered that taking a mere minute to cut out a piece of parchment paper to line your trays significantly enhances the dehydration process. Parchment paper acts as a superior barrier, preventing tiny food particles from falling through the mesh. Crucially, it also allows for better air circulation compared to solid fruit leather trays (unless, of course, you are specifically making fruit leather, in which case those trays are perfect).
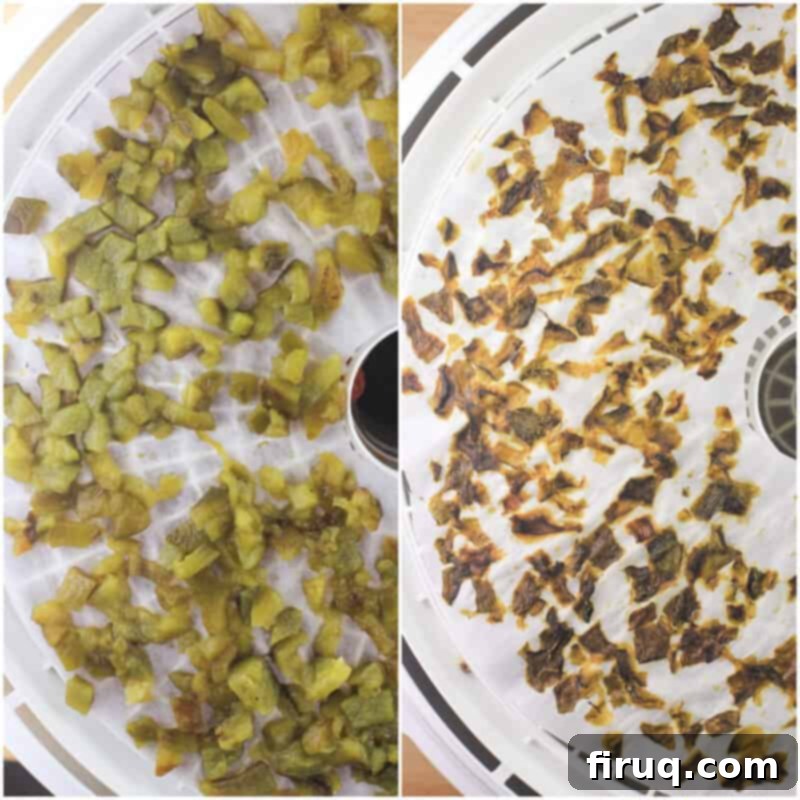
For backpacking dinners, vegetables generally perform much better when they are precooked before dehydration. For this Sloppy Joes recipe, I roast bell peppers until tender. I also opt for canned peas, carrots, and tomatoes. The reason for precooking is simple: the cell walls of these foods are already partially broken down, making them far more receptive to releasing water during dehydration and then efficiently absorbing water during rehydration on the trail. This step ensures a more palatable and consistent texture in your finished meal.
A general best practice for creating DIY backpacking meals is to dehydrate ingredients separately, and then combine them, rather than dehydrating an entire cooked meal at once. This is precisely the method I employed for this Sloppy Joe trail recipe. Different ingredients have varying dehydration times and moisture content, so processing them individually allows for optimal drying and ensures each component is perfectly preserved. This separate approach also grants greater flexibility in meal assembly.
Dehydrating meat can be particularly challenging, but some types work surprisingly well. Canned chicken and canned shrimp (broken into tiny pieces) are reliable options. Ground beef, prepared as described in this recipe, yields excellent results, which is why I’ve chosen it as the star for the inaugural recipe in this series. I haven’t yet experimented with ground turkey or pork, but those will certainly be explored in future posts.
The final, yet equally important, consideration for assembling your own backpacking meals is proper packaging. Always use a quart-sized resealable freezer bag, and ensure it is specifically a *freezer* bag, not a standard *storage* bag. Freezer bags are designed to withstand boiling water without issues. They are also typically made from food-grade, low-density polyethylene, similar to food vacuum bags, ensuring they won’t leach harmful chemicals like BPA into your precious trail food.
Effortless Rehydration: Your Trailside Dinner Solution
Once your ingredients are dehydrated and packed, the process of enjoying dinner on the trail is incredibly simple: just add hot water! This minimalist approach to trail cooking is one of the biggest advantages of dehydrated meals.
I rotate between several lightweight stoves depending on the trip: a BRS 3000T gas can stove (weighing a mere 0.95 oz), an AntiGravity Gear pepsi can alcohol stove (0.63 oz), and I’m eagerly awaiting my new JetBoil Stash ultralight stove, which I’ve ordered specifically for cooking at high altitudes on the John Muir Trail. With each of these, my primary use is boiling 1-2 cups of water for dinner in the evening, and an additional cup for my essential morning coffee.
The most common question regarding rehydration is: how much water should I add to my dinner? On this, I always err on the side of caution. It is far better to add slightly less water initially and then gradually add a bit more as needed, rather than adding too much from the start, as you can’t easily remove excess water once it’s in the bag.
I learned this valuable lesson the hard way during my Appalachian Trail thru-hike. Exhausted after a long day, I haphazardly added a full 2 cups of water to my Stovetop chicken and broccoli dinner, completely forgetting that I had only used half a box of stuffing in its preparation. That night, I reluctantly learned to “drink” my Stovetop stuffing “soup.” The takeaway is clear: always start with the minimum amount of water, as you can always supplement it later to achieve the perfect consistency.
Why This Backcountry Sloppy Joes Recipe is a Winner
My existing Sloppy Joe Pasta recipe and my Bacon Cheddar Beer Grilled Sloppy Joes share a common, defining characteristic: they are both incredibly simple to prepare. In comparison, crafting these Backcountry Sloppy Joes is arguably more involved, primarily due to the necessary dehydration time. However, the effort is well worth it for the trail. This recipe stands out as an excellent choice for several key reasons:
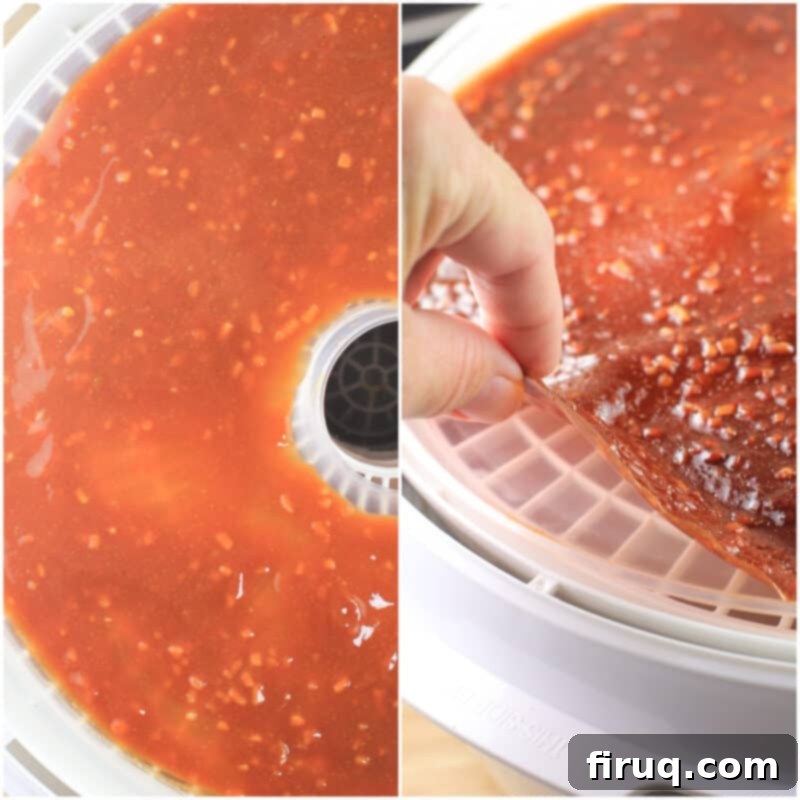
Lean ground beef dehydrates exceptionally well, retaining its texture and flavor after rehydration. Similarly, roasted bell peppers and tomatoes, when properly dehydrated, rehydrate beautifully, adding essential vegetable goodness and vibrant taste to the meal. The real innovation in this recipe, and what initially felt like a significant experiment, was the sauce “leather”—think of it like a savory fruit roll-up. I’m thrilled to report that this technique works absolutely perfectly, providing that essential tangy-sweet Sloppy Joe flavor base in a lightweight, compact form.
The combination of these factors—easy ingredient preparation, straightforward dehydration, and excellent rehydration performance of all components—makes this an ideal starter recipe for anyone looking to create their own homemade dehydrated backpacking meals. It’s a delicious, satisfying, and reliable meal that proves you don’t have to sacrifice flavor for convenience on the trail.
Step-by-Step Guide to Backcountry Sloppy Joes
Creating these satisfying Backcountry Sloppy Joes for your next adventure involves a few simple yet essential steps, ensuring perfectly dehydrated ingredients ready for the trail.
Preparing Ingredients for the Dehydrator
The initial phase focuses on preparing two core ingredients that require cooking before dehydration: the bell peppers and the lean ground beef.
First, we prepare the bell peppers by roasting them under the oven broiler until their skins are blackened and blistered. This method softens the peppers and enhances their flavor, making them ideal for dehydration. After roasting, allow them to steam briefly in a sealed bag, which helps loosen the skins. Once cooled, simply remove and discard the skins and seeds, then chop the softened peppers into small, uniform pieces. These chopped peppers are then ready for the dehydrator tray.
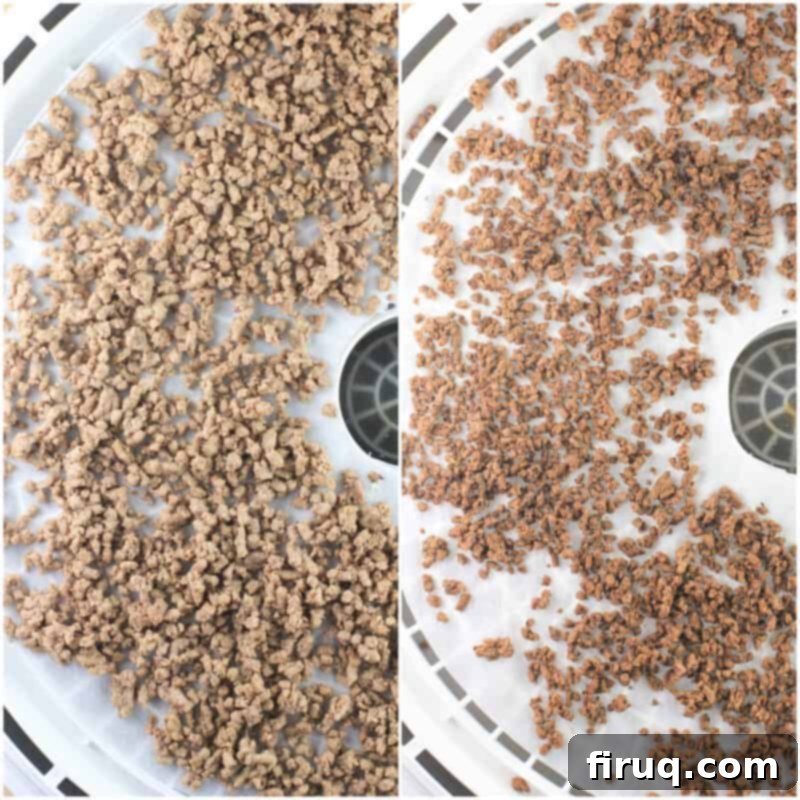
Next, we address the ground beef. In a large nonstick skillet, brown and crumble the lean ground beef thoroughly. The key here is to minimize fat content, as fat does not dehydrate effectively and can cause spoilage. After browning, drain any rendered fat, and then rinse the cooked meat meticulously under hot water in a colander for several minutes. This crucial step washes away as much residual fat as possible, even from lean beef. Using your fingers, break the meat into the smallest possible pieces to facilitate efficient dehydration. Spread the finely crumbled beef evenly on a dehydrator tray; if necessary, use two trays to ensure proper air circulation and even drying.
Subsequently, combine all the ingredients for the Sloppy Joe sauce – sugar, mustard, ketchup, Worcestershire sauce, salt, garlic powder, and dried minced onion – in a small bowl and mix thoroughly. This flavorful sauce will also be dehydrated, transforming into a pliable “leather.” Spread the sauce thinly and evenly onto a dehydrator tray, ideally using a fruit leather insert or parchment paper to prevent sticking and ensure easy removal.
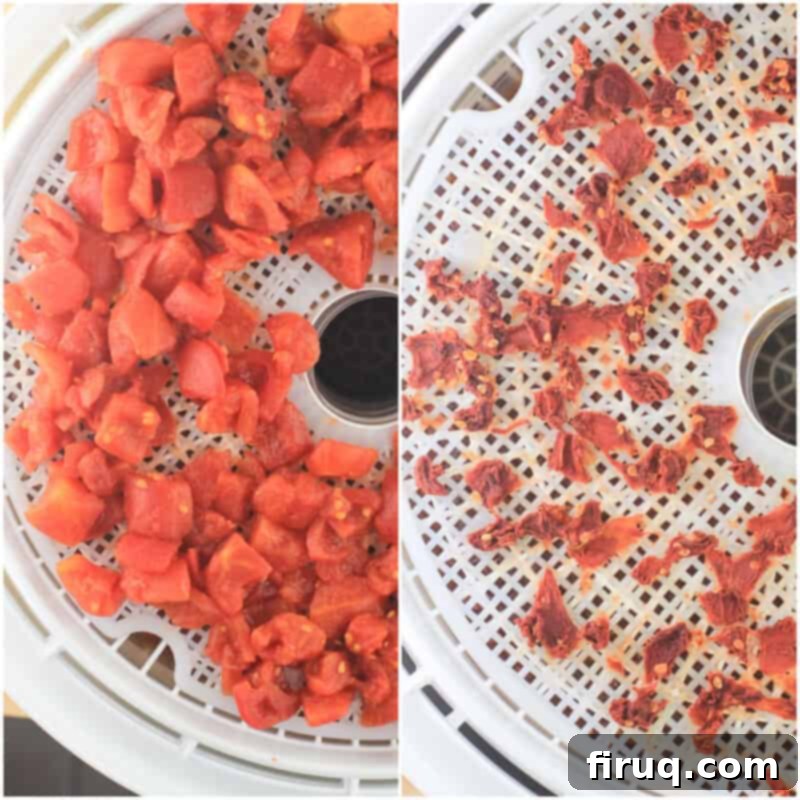
Finally, prepare the drained diced tomatoes by spreading them out in a single layer on a separate dehydrator tray. Small, petite-diced tomatoes are preferable for quicker dehydration, but regular diced tomatoes work perfectly well too. With all ingredients now prepped and arranged on their respective trays, follow your dehydrator’s manufacturer instructions for temperature and initial drying times. As noted above, I often line my trays with parchment paper for easier handling and better airflow, especially for smaller pieces.
Assembling Your Backpacking Dinner Kits
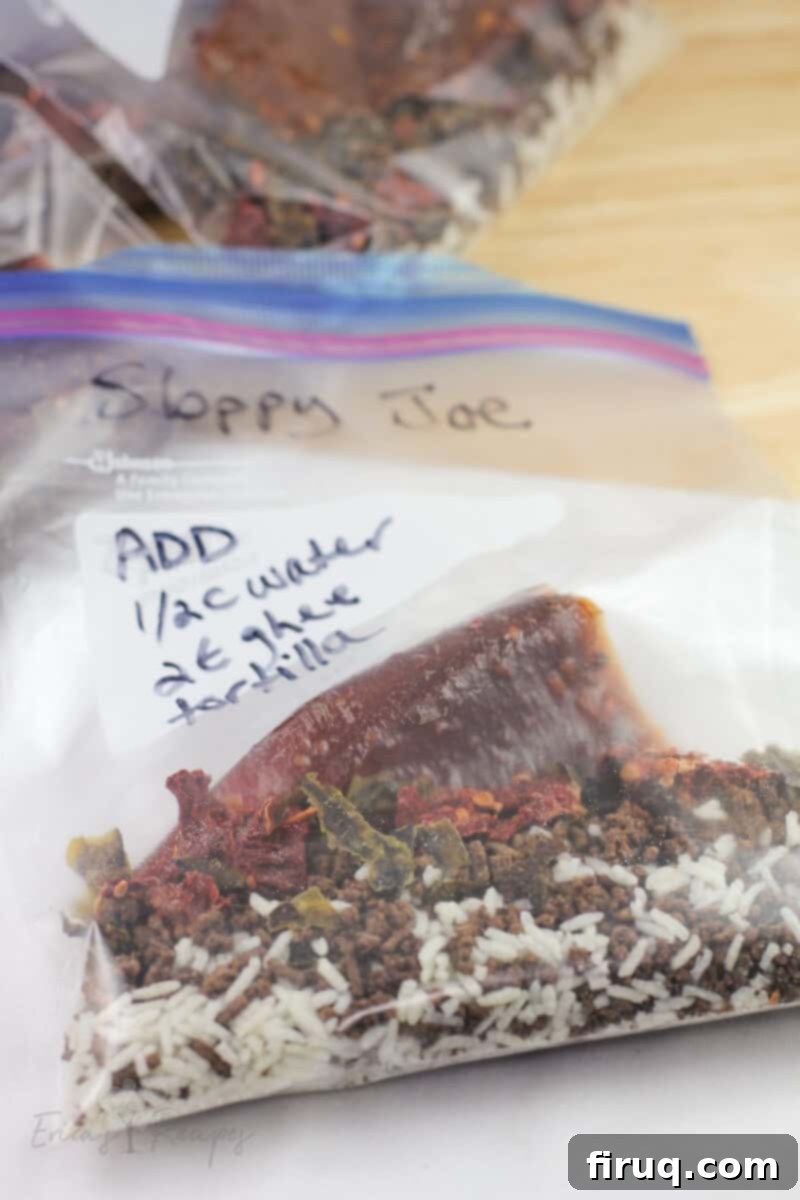
Once all the components of your Backcountry Sloppy Joes are thoroughly dehydrated and completely cool, it’s time to assemble your individual dinner kits. Divide the dehydrated roasted peppers, beef, sauce leather, and tomatoes evenly among four quart-sized resealable freezer bags. To each bag, add ¼ cup of plain Minute Rice. This instant rice is critical for adding bulk and much-needed calories, ensuring you’re well-fueled after a demanding day on the trail.
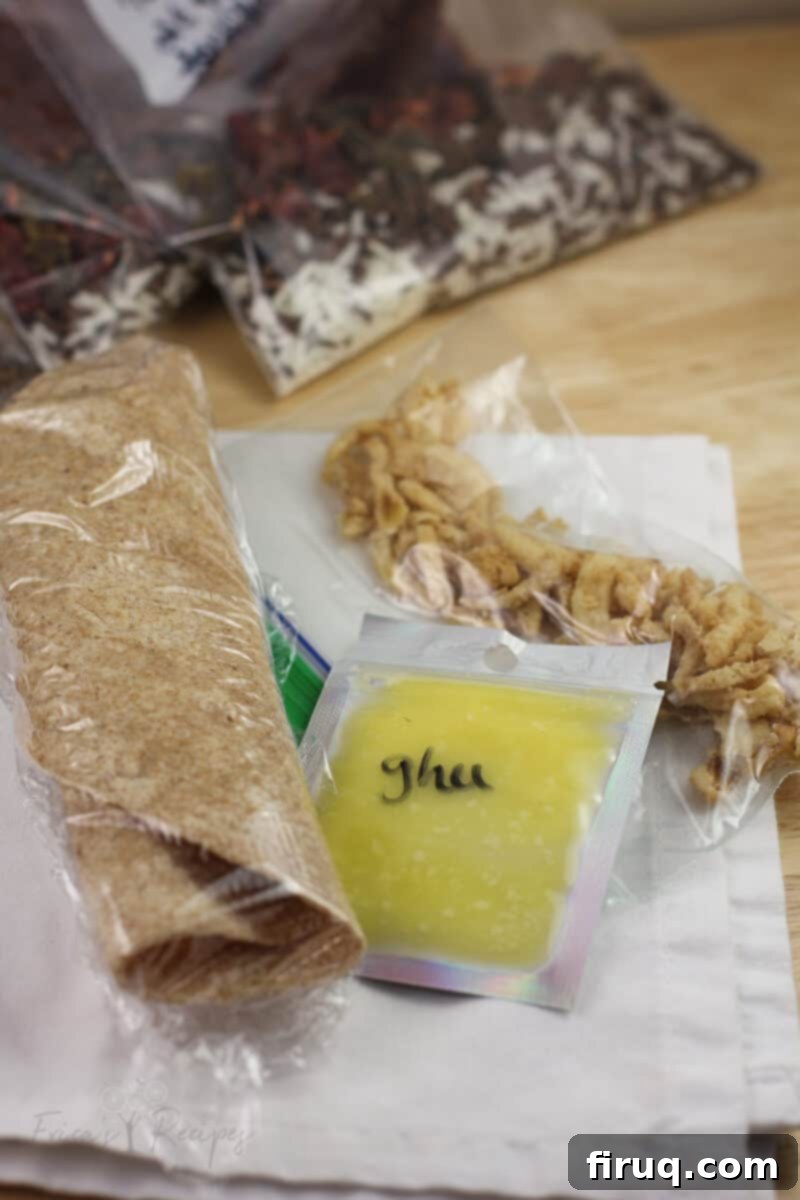
Separately, package your optional accompaniments: a large whole wheat tortilla, a portion of ghee, and a serving of fried onions or Fritos. While these additions are optional, I personally find they greatly enhance the meal experience. The tortilla serves as excellent “bread” for dipping into the rich Sloppy Joe mix. The fried onions (or Fritos) provide a welcome crunch and a boost of savory flavor and salt, which is often craved on the trail. And the ghee not only adds a delicious creaminess and flavor but also a vital caloric punch, essential for sustained energy.
Enjoying Your Meal on the Trail
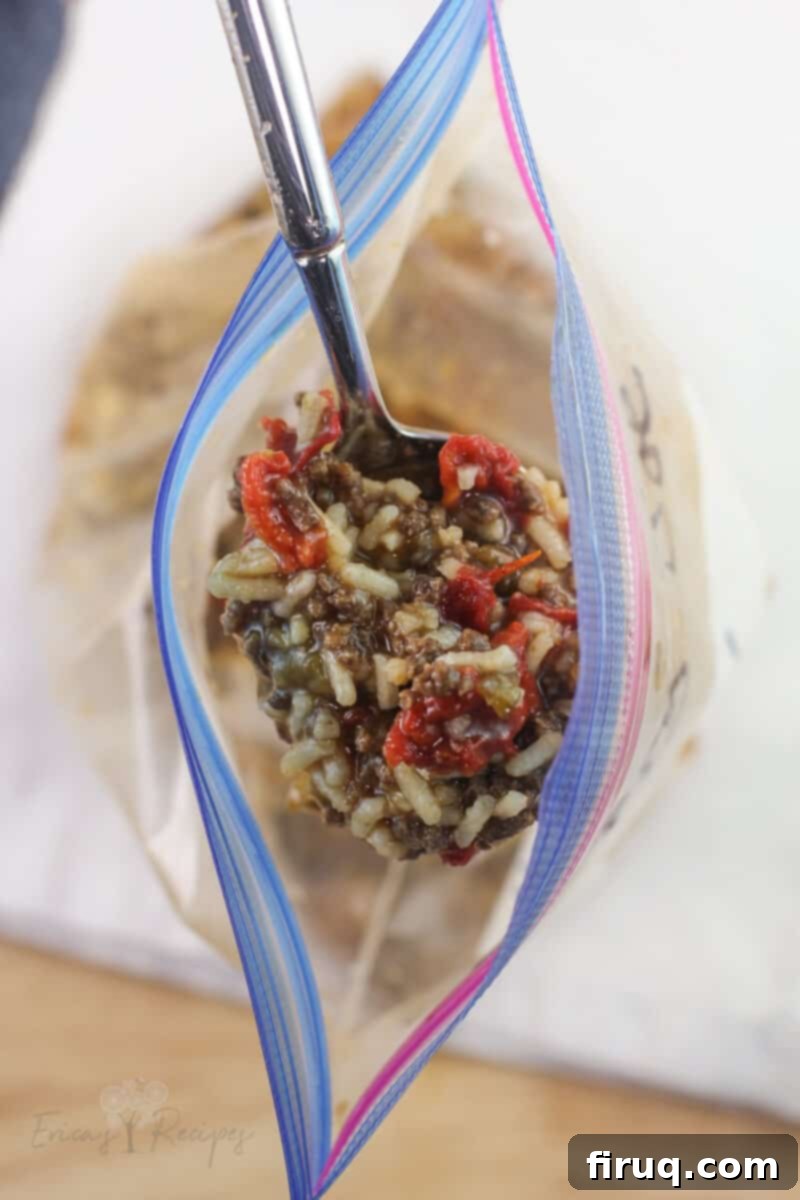
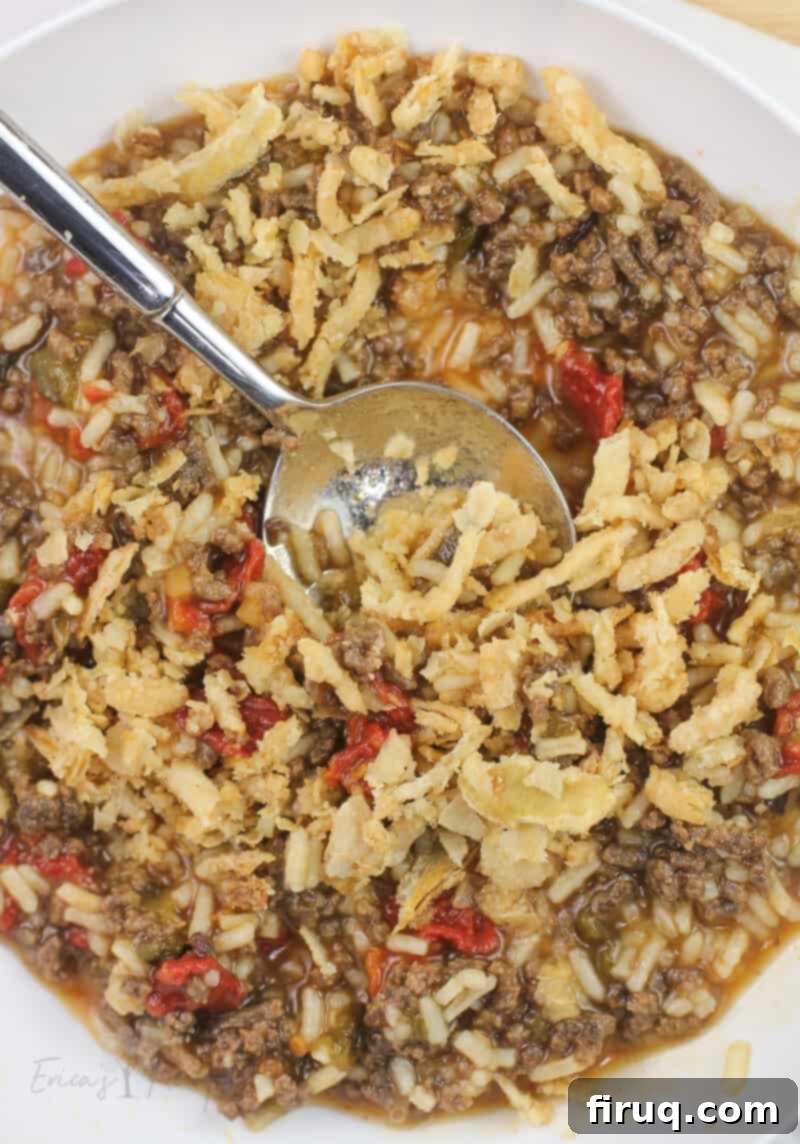
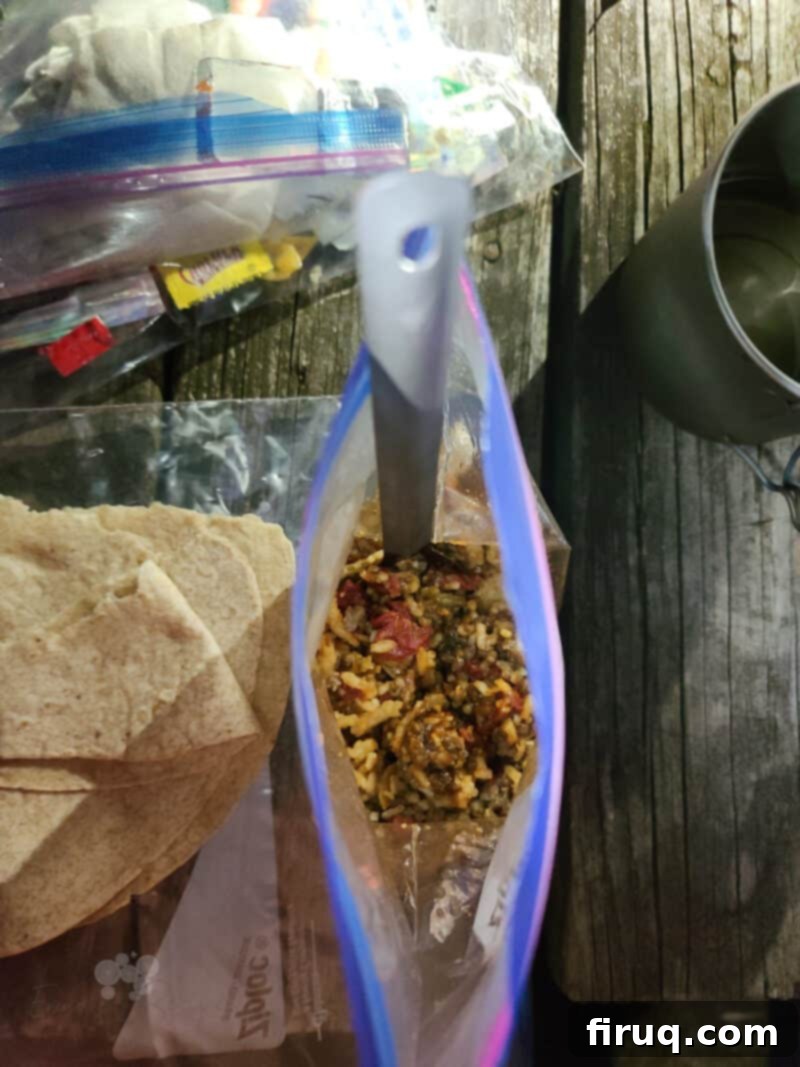
Eating your Backcountry Sloppy Joes on the trail is wonderfully straightforward. To prepare, simply stir in the pre-packaged ghee into your freezer bag containing the dehydrated Sloppy Joe mix and rice. Then, add ¼ to ⅓ cup of boiling water. Ensure the sauce “leather” is fully submerged for optimal rehydration. Seal the bag securely and let it sit for 15-20 minutes, allowing all the ingredients to fully rehydrate and meld together. Halfway through, give the bag a gentle shake or stir to ensure even rehydration, adding a tiny bit more water if the mixture appears too dry. Once rehydrated to your desired consistency, top your delicious Sloppy Joes with the fried onions (or Fritos) for added texture and flavor. Serve immediately with the whole wheat tortilla for scooping up every last bit of this satisfying trail dinner.
Expert Tips for Dehydrated Backpacking Meals
When rehydrating any backpacking dinner, including these Backcountry Sloppy Joes, a golden rule is to always start with less water than you think you’ll need. It’s far easier to add a little more water if the meal is too dry than to contend with a soupy, watery dinner. I typically begin with about half the amount of water suggested by a recipe or instructions. This Backcountry Sloppy Joes recipe specifically accounts for this, recommending a cautious initial water addition.
To significantly reduce the dehydration time for your tomatoes, opt for petite-diced tomatoes instead of regular diced ones. The smaller pieces have a greater surface area, allowing moisture to evaporate more quickly. Regardless of the size, I highly recommend using canned tomatoes over fresh ones for dehydration, as their pre-processed nature allows them to rehydrate exceptionally well on the trail.
The caloric content of your meal can be easily customized to suit your energy needs. You can scale up the calories by adding more Minute Rice to your dinner bag; just remember to add an equal additional amount of water during rehydration to compensate for the extra rice. Conversely, if you’re looking to reduce calories, simply omit the ghee from your meal kit.
A crucial point when cooking ground beef for dehydration: absolutely do not add any oil – whether vegetable oil, butter, olive oil, or cooking spray. Fats and oils do not dehydrate; they can go rancid and spoil your meal. This is precisely why I add a small amount of ghee (clarified butter, which has a very low moisture content and high smoke point) separately on the trail, ensuring both flavor and fat calories without compromising the dehydrated food’s shelf stability.
I consistently find that lining dehydrator trays with parchment paper makes the entire dehydration process much smoother, especially for sticky items like sauce leather or small pieces of meat and vegetables. To do this efficiently, lay a piece of parchment paper on a cutting board, use one of your dehydrator inserts (like a fruit leather tray) as a stencil, and then use a sharp knife to trace and cut out the perfect shape for your trays.
For packaging small quantities of condiments or sauces, small Mylar bags are an excellent and affordable solution, readily available online. These bags are not only robust and leak-proof but also incredibly easy to seal using simple household items like a hair straightener or curling iron, making them perfect for individual portions of ghee, fried onions, or other trail essentials.
Frequently Asked Questions about Dehydrated Sloppy Joes
While I haven’t personally experimented with ground pork or turkey for this specific Backcountry Sloppy Joes recipe yet, I plan to in the future and will update this post with my findings. Logically, given their similar fat content and texture to lean ground beef, I don’t see why they wouldn’t work, provided they are cooked and rinsed thoroughly to remove fat. However, I have tried regular chicken meat (not ground), and it typically does not rehydrate as well as ground beef, often remaining chewy or tough on the trail. Stick to very lean ground meats for best results.
Unfortunately, other types of rice, such as brown rice, or even pasta, are generally not suitable as direct substitutes for Minute Rice in a no-cook, rehydration-only backpacking meal. This is because these ingredients require active simmering or cooking time to become tender, which contradicts my preferred method of simply rehydrating with boiling water on the trail. If you are willing to cook on your stove (e.g., bringing water to a boil and then simmering for 10-20 minutes, like for Ramen or Knorr sides), then you could use them to make your meal more nutritious. However, many backpackers (like myself) opt to avoid cooking to minimize cleanup and fuel usage in the evening, making instant options like Minute Rice indispensable for their quick rehydration.
Theoretically, properly dehydrated backpacking dinners are shelf-stable, much like apocalypse-ready food, and could be stored for extended periods at room temperature. However, to ensure maximum freshness and safety, especially with meat-based meals, I prefer to exercise an extra bit of caution. I store my dehydrated food, sealed securely in quart-sized resealable freezer bags, in a dedicated refrigerator drawer. This keeps them isolated from fresh foods, preventing any odor absorption, until I’m ready to pack them for my next adventure. This method helps maintain quality and extends their usable life.

Backcountry Sloppy Joes
Print
Pin
Rate
Ingredients
For the dehydrator
- 2 large green bell peppers
- 1 ¼ lb lean ground beef such as 93/7
- 2 tsp raw turbinado sugar
- 3 tsp yellow mustard
- ¾ cup ketchup
- 2 Tbsp Worcestershire sauce
- 1 tsp kosher salt
- ½ tsp garlic powder
- 2 tsp dried minced onion
- 1 (28 oz) can diced tomatoes drained
- 1 cup plain Minute Rice divided
For the trail (per dinner)
- 2 tsp ghee
- 2 Tbsp fried onions or Fritos see Notes
- 1 large whole wheat tortilla
Instructions
For the dehydrator
-
Preheat your oven broiler to high.
-
Position the bell peppers approximately 1-inch under the broiler. Roast them, turning every 5-6 minutes, until their skin is completely black and blistered. Carefully transfer the hot peppers to a large resealable bag, seal it, and allow them to steam for 15 minutes. Once cool enough to handle, remove the peppers, discard the skins and seeds, and chop the flesh into small (about ¼-inch) pieces. Spread these chopped peppers onto a dehydrator tray.
-
While the peppers are cooking and cooling: In a large nonstick skillet, brown and crumble the lean ground beef. Drain any rendered fat, then rinse the cooked meat thoroughly in a colander under hot water for a couple of minutes to eliminate as much residual fat as possible. Using your fingers, break the meat into very tiny, fine pieces. Transfer the finely crumbled beef to a dehydrator tray, spreading it out thinly. Use two trays if necessary to ensure the meat is not overcrowded and dries evenly.
-
In a small bowl, combine the turbinado sugar, yellow mustard, ketchup, Worcestershire sauce, kosher salt, garlic powder, and dried minced onion. Mix until well combined. Spread this Sloppy Joe sauce mixture thinly onto a dehydrator tray, ideally using a fruit leather insert or parchment paper liner.
-
Transfer the drained diced tomatoes to a separate dehydrator tray, spreading them in a single, even layer.
-
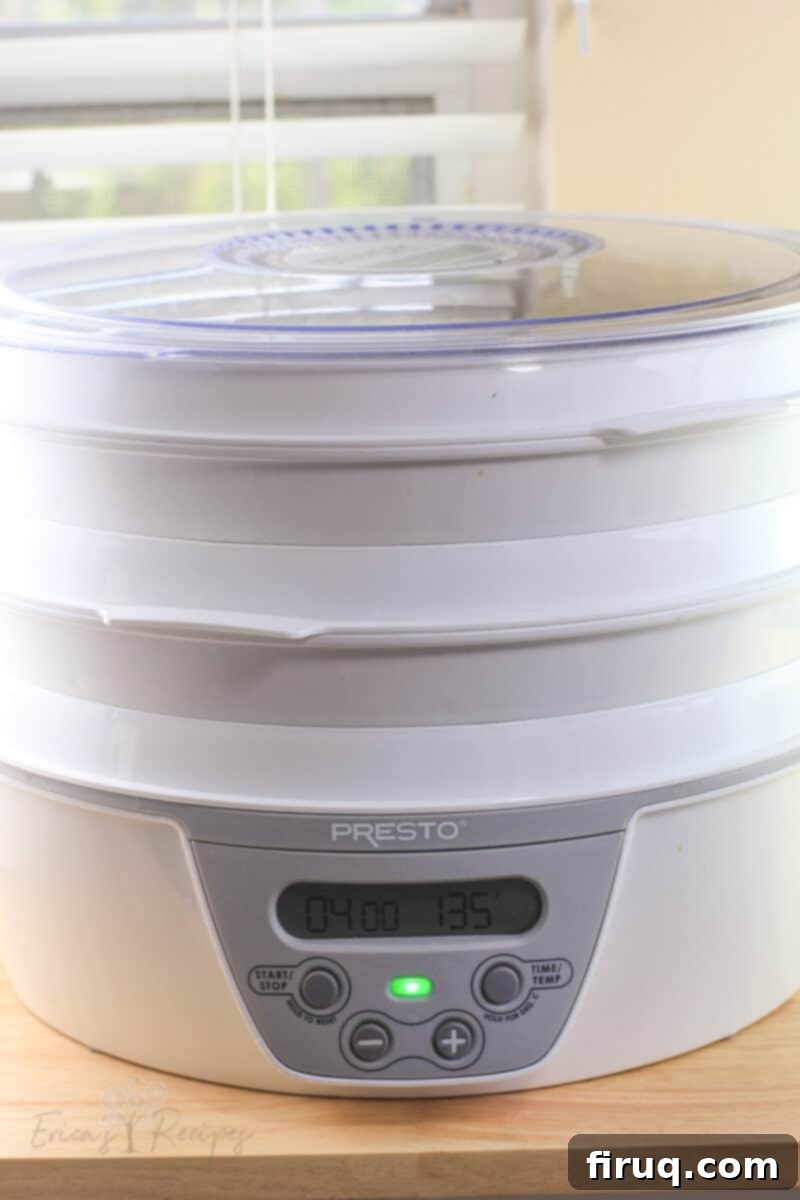
Set your dehydrator to 135°F (57°C) and begin dehydrating all ingredients. Start with an initial dehydration time of 4 hours.
-
Each recipe component will require a different amount of time to fully dehydrate, and this can vary further depending on your specific dehydrator model and environmental conditions. Approximate dehydration times are as follows:
Ground beef: 4-6 hours (until brittle)
Green bell peppers: 3-5 hours (until crispy)
Tomatoes: 6-10 hours (until brittle)
Sloppy Joe sauce “leather”: 10-14 hours (until pliable but no longer sticky to the touch)
-
As each ingredient reaches its fully dehydrated state, remove it from the dehydrator and divide it evenly among 4 quart-sized resealable freezer bags. To each bag, add ¼ cup of plain Minute Rice.
For the trail
-
To your assembled Sloppy Joe bag, add ¼-⅓ cup of boiling water along with the pre-packaged ghee. Ensure the sauce “leather” is completely submerged in the water. Seal the bag and allow the meal to rehydrate for 15 minutes. Gently mix the contents halfway through the rehydration period; if the meal seems too dry, add a small amount more boiling water as needed. Let it rehydrate for an additional 5 minutes.
-
Serve your rehydrated Backcountry Sloppy Joes topped generously with the fried onions (or Fritos) for a satisfying crunch. Enjoy with a large whole wheat tortilla for dipping.
Notes
If you choose to omit the fried onions (or Fritos) from your meal, I recommend adding an extra pinch of kosher salt to each dinner bag before sealing, as these toppings contribute significant savory flavor and sodium that may be missed.
The stated preparation and cook times for this recipe do not include the additional 15-20 minutes required for the meal to rehydrate on the trail.
