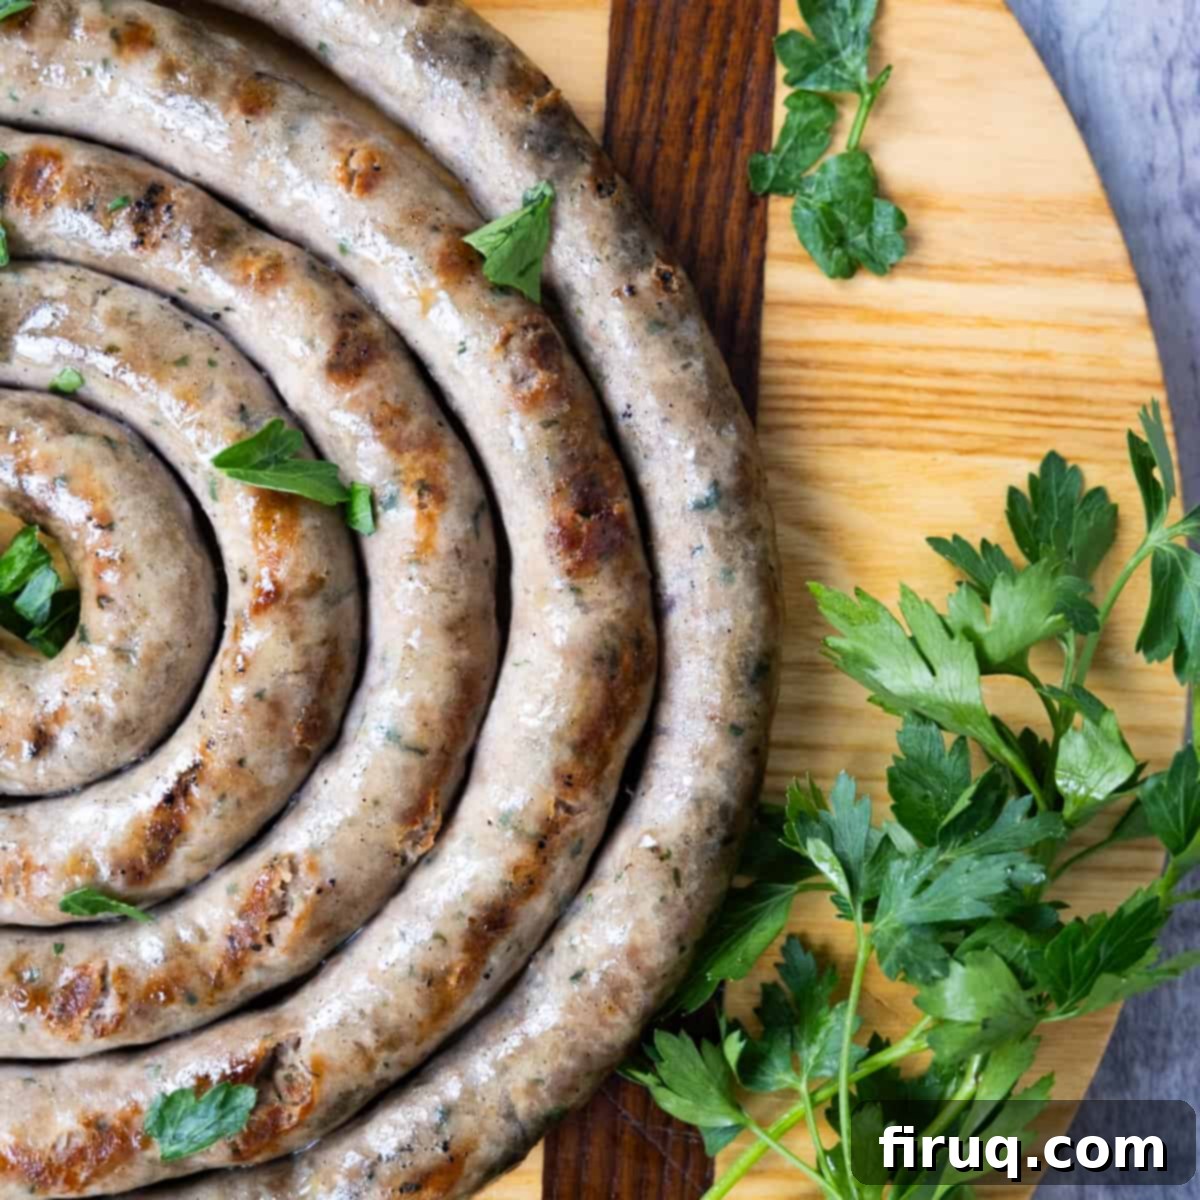
Homemade Italian Ring Sausage (Chevalatta): Crafting Authentic Flavor at Home
Nothing evokes the spirit of summer quite like a perfectly grilled Italian Ring Sausage, known affectionately as Chevalatta. This exquisite Italian sausage, encased in delicate sheep casing, is a true culinary delight. Bursting with cheesy, savory flavors, it’s a specialty that can be enjoyed straight from the butcher or, for the more adventurous, crafted right in your own kitchen.
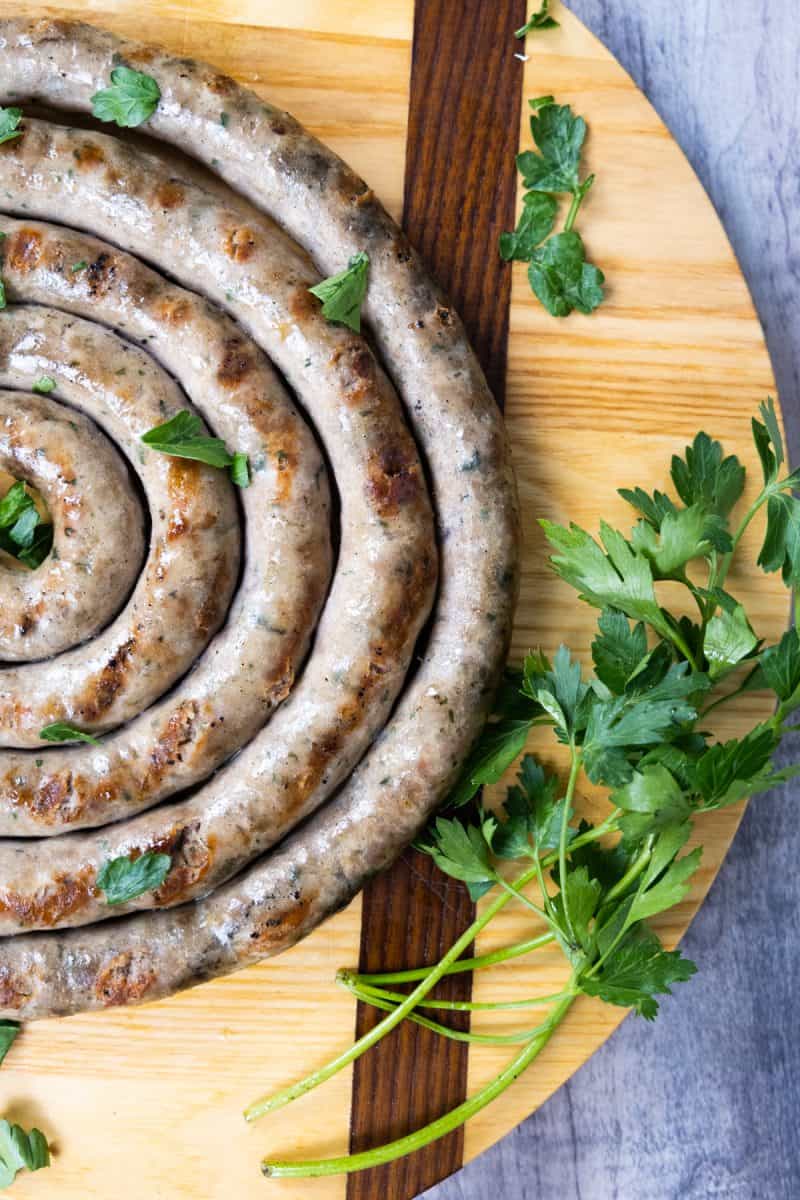
I have vivid memories of every Memorial Day weekend, eagerly anticipating my dad bringing home one of these magnificent Italian sausage rings. It was always presented as our special appetizer, a flavorful prelude to dinner. We’d all gather, slowly cutting away an inch or two at a time, savoring each bite until it was entirely gone. These sausages were not just incredibly delicious; they were a readily available staple in my hometown, a cherished part of our summer traditions.
However, relocating to North Carolina changed my access to this beloved Italian delicacy. Here, country breakfast sausage reigns supreme, making the quest for authentic Italian ring sausage a nostalgic endeavor. Chevalatta was always a highlight of our summer meals, a specialty my dad would source from the butcher just for special family gatherings or events. This unique sausage holds a special place in our family’s culinary heritage, symbolizing shared moments and exquisite taste.
What Exactly is Chevalatta? Unveiling the Italian Spiral Sausage
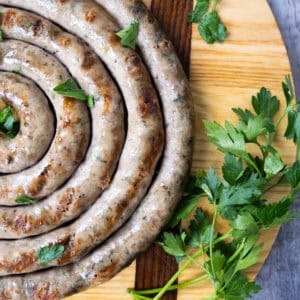
Chevalatta is far more than just a sausage; it’s a testament to Italian culinary artistry. This distinctive Italian spiral sausage is traditionally crafted with a rich filling of finely grated Pecorino Romano cheese, fresh garlic, fragrant basil, a hint of salt, and vibrant parsley. What truly sets Chevalatta apart is its use of sheep casings. Unlike the firmer snap often associated with other sausages, sheep casings impart a remarkably tender, soft bite, contributing to its signature creamy texture. This unique characteristic makes it an incredibly versatile dish, pairing exceptionally well with bitter greens like broccoli rabe. Whether you’re grilling it as an inviting appetizer or serving it as a robust side dish, Chevalatta promises a delightful culinary experience that perfectly embodies the flavors of an Italian summer.
The Art of Making Homemade Chevalatta

While grilling Chevalatta to perfection is an art in itself, this guide delves deeper into the foundational skills of crafting your own homemade sausages from scratch. We’re going to explore every crucial detail: from achieving the ideal meat-to-fat ratios and mastering the precise salt content, to understanding the blend of spices that define an authentic Italian ring sausage. The satisfaction of making your own sausage is immense, offering control over ingredients and a taste that often surpasses store-bought options. Of course, after we’ve walked through the meticulous process of stuffing your delicious homemade sausages, I will also provide comprehensive instructions on how to grill them to golden-brown perfection.
If you’re yearning to recreate that quintessential New York summer sausage flavor, with all its heritage and taste, then you’ve come to the right place. Join me as we embark on this rewarding culinary journey, transforming simple ingredients into a truly special Italian delicacy. The steps might seem detailed, but the reward of a perfectly made, flavorful Chevalatta is absolutely worth the effort.
Essential Ingredients for Authentic Chevalatta
- 5 lbs Pork, Boston butt 75% lean, 25% fat
- 5 cloves garlic, minced
- ⅓ cup chopped parsley
- ¼ cup chopped basil
- ¼ cup olive oil
- 35 g kosher salt approximately 2 tbsp
- ¾ cup pecorino romano
- sheep casings
Choosing Your Pork: The Foundation of Flavor
Any seasoned butcher will attest that selecting the right cut of pork is the single most critical step in making exceptional sausage. Every visit to my butcher becomes a valuable learning experience, revealing new insights into the world of meat. In the past, I would purchase a Boston butt and additional pork fat, then painstakingly cut it all myself. However, a recent conversation with my butcher taught me a more efficient method: he now expertly processes the meat for me, removing the bone and saving me both time and money.
When preparing Chevalatta, maintaining a precise meat-to-fat ratio is paramount for achieving that perfect juicy texture and rich flavor. Aim for a ratio of 70-80% lean meat to 20-30% fat. Expert butchers often advise against going below 25% fat, as fat is essential for moisture and flavor. While I sometimes opt for an 80%/20% ratio for a slightly leaner, healthier sausage, it’s worth noting that it’s usually better to err on the side of slightly fattier when making sausage, as it ensures a more succulent result.
Equally important is the type of fat you choose. For sausage making, you want to use “hard fat,” which possesses a firm, almost solid texture similar to or even firmer than the lean meat itself. Avoid “soft fat,” which tends to be jelly-like and wet, as it can cause problems during the grinding process. Hard fat grinds much more easily and uniformly, contributing to a superior sausage texture. I delve into these details even further in my comprehensive guide on how to make homemade Italian sausage. Once you have carefully selected your pork, you’re ready to head home and begin the exciting process of grinding your meat.
Grinding the Pork: Precision for Perfect Texture
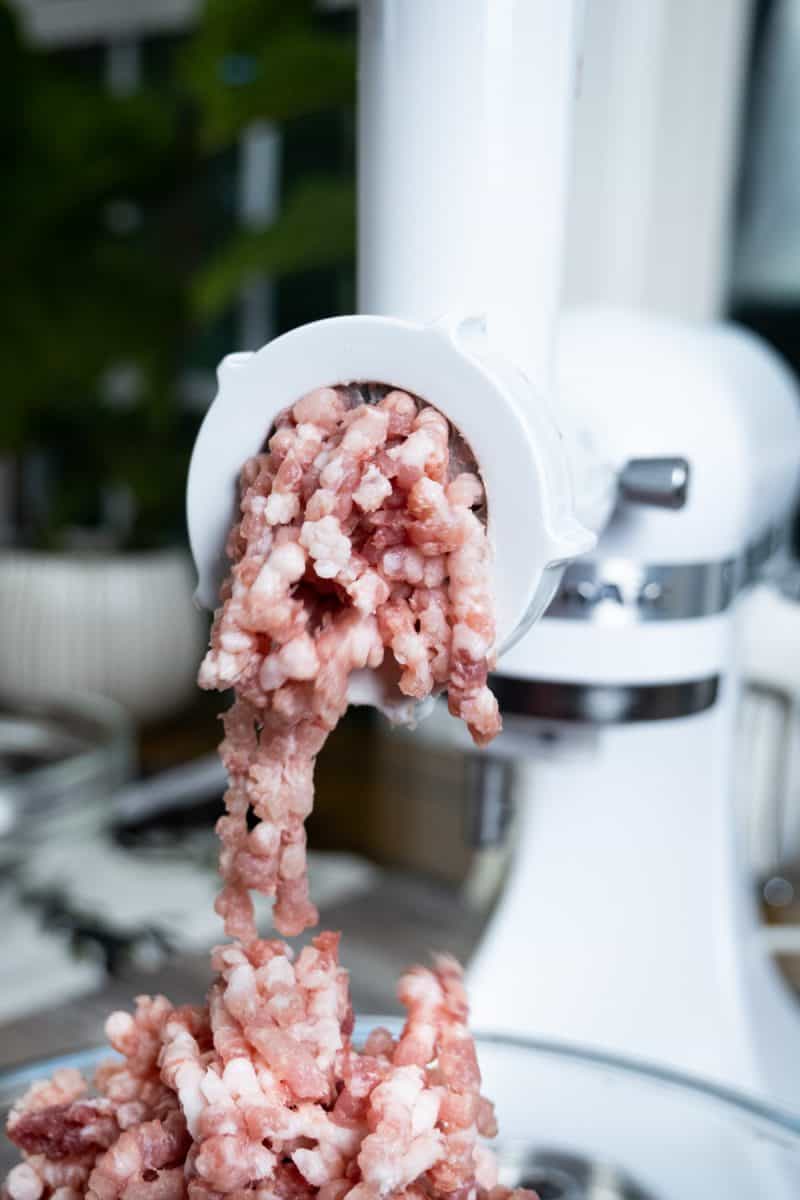
For grinding, I rely on my trusty Kitchen Aid Mixer, which, coupled with its dedicated grinder and sausage stuffing attachments, performs exceptionally well. This robust kitchen appliance has been a workhorse in my kitchen for years, proving its worth time and again.
Before grinding, precision in preparation is key. Begin by chopping your pork into uniform 1-2 inch square pieces. The size of these pieces should be small enough to easily fit into the grinder’s feed tube. To ensure the best texture during grinding, place the chopped pork on a metal tray and chill it in the freezer for about 15 minutes, along with the grinder attachment pieces. Cooling the pork prevents the fat from melting and becoming stringy as it passes through the grinder. If the meat warms up too much, the fat can smear, clogging the grinder and necessitating a messy cleanup, which we certainly want to avoid.
Once the grinder attachment is securely in place, proceed to grind the pork. For Italian ring sausage like Chevalatta, I recommend using the smaller of the two available grinding plates. This yields a finer, more tender texture that is characteristic of this particular sausage. Set the mixer speed to a moderate 6-8 during the grinding process. If you were making a more traditional, coarser sausage, the larger grinding attachment would be more appropriate. Carefully grind all the pork into a large mixing bowl, preparing it for the next crucial step: seasoning.
Seasoning the Pork: The Science of Flavor and Texture
Beyond the quality of the meat, another critical element in crafting perfect sausage is the precise salt content. Salt isn’t just for flavor; it plays a vital role in the sausage’s texture, ensuring it remains snappy, juicy, and well-emulsified. As a general rule, you should aim for 1-2% of the total weight of the meat in salt. This specific ratio is fundamental to developing the sausage’s desired characteristics, making it firm yet tender. While other seasonings contribute to the overall delicious flavor profile, it’s the salt that truly makes the sausage structurally sound and appealing.
Once your meat is freshly ground, it’s time to incorporate the star seasonings for Chevalatta: the measured salt, the rich Pecorino Romano cheese, fresh parsley, aromatic basil, pungent garlic, and a drizzle of olive oil. Using your hands, gently yet thoroughly combine all the ingredients until they are evenly distributed throughout the meat mixture. This hands-on approach ensures every part of the sausage is infused with flavor. After mixing, cover the bowl tightly with plastic wrap and allow the seasoned meat to rest in the refrigerator overnight. This crucial resting period allows the flavors to meld and deepen, resulting in a more complex and satisfying sausage.
Stuffing the Sausage: Mastering the Art of the Ring
Before retrieving your perfectly seasoned meat from the fridge, it’s essential to prepare your sheep casings. Take them out of their packaging and rinse them thoroughly under warm running water. It’s vital to perform this step in a bowl, not directly over the drain, as the entire casing could easily slip away – an absolutely disgusting thought! Rinse both the inside and outside of the casings by running water through them to remove any excess salt. Afterward, allow them to soak in a bowl of warm water for 30-60 minutes; this helps to soften them, making them more pliable and easier to work with.
Next, set up your sausage stuffing attachment on your Kitchen Aid mixer, utilizing the smaller of the two attachments. For smooth threading, apply a little olive oil to both the exterior of the stuffing attachment and the casings themselves. Carefully thread the entire casing onto the stuffer, sliding it all the way on until only an inch or two remains at the end. At this point, do not tie the knot yet. Begin adding your seasoned meat to the mixer and start the machine on a low speed. Allow the meat to slowly fill the stuffer until it reaches the very end of the casing. Only then should you tie the knot securely at the end of the casing. This technique is crucial as it minimizes the amount of air trapped inside the casing, ensuring a denser, more uniform sausage.
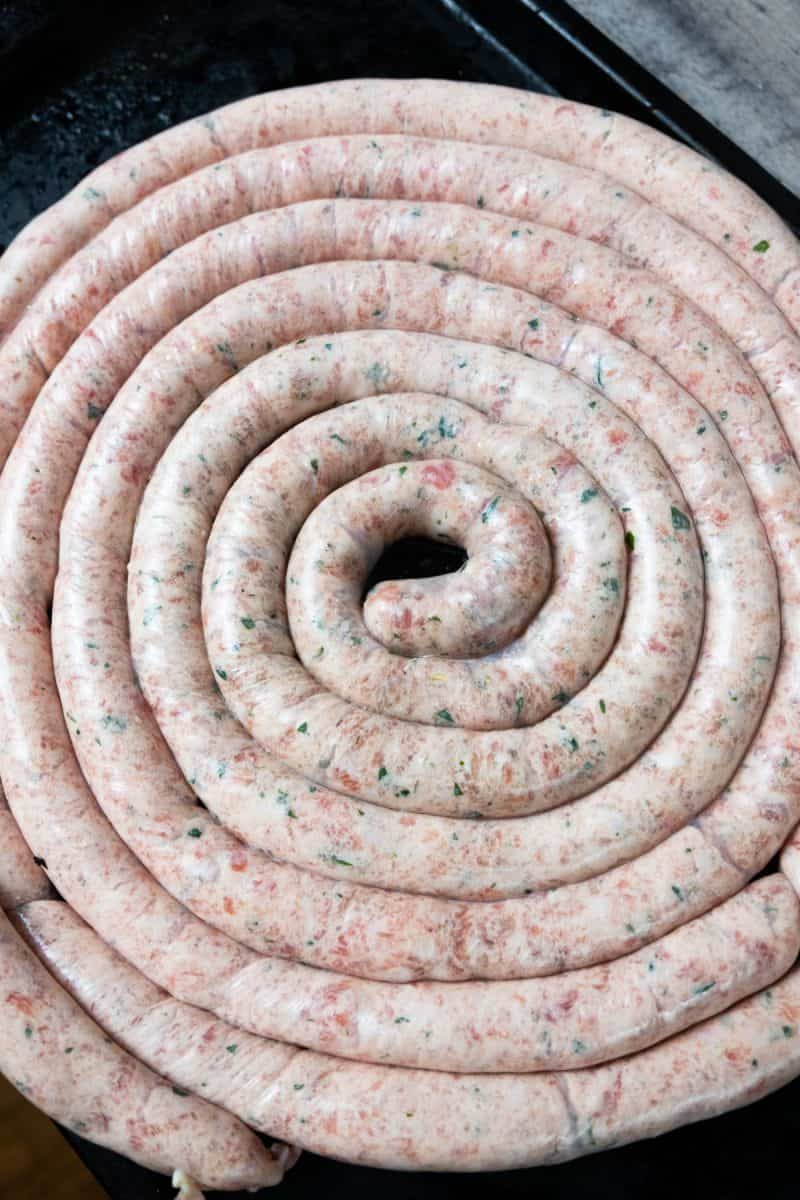
Once the initial knot is tied, increase the stuffing speed to 6-8. Start slowly, gradually increasing the speed as you get a feel for the process. The key is to maintain a consistent pressure, allowing the meat to continuously feed through the machine. As the sausage emerges, gently begin to shape it into a ring. It’s significantly easier to form the spiral as you stuff rather than attempting to coil it at the very end, which risks tearing the delicate casing. With practice, you’ll develop a rhythm and achieve beautifully formed rings. Once all the meat has been stuffed and the sausage forms its characteristic ring, tie another knot at the end. Wrap the freshly stuffed sausage rings tightly in plastic wrap and place them back in the fridge overnight. This final resting period allows the flavors to further develop and the sausage to firm up, preparing it for grilling.
Grilling Italian Sausage Ring to Perfection

Grilling Chevalatta brings out its best flavors and creates a wonderfully caramelized exterior. To start, preheat your grill to high heat, allowing it to reach an optimal temperature of between 500-600℉. This initial high heat is crucial for searing the outside and developing a delicious crust. Once the grill is piping hot, carefully place the Italian ring sausage directly on the grates, then immediately lower the heat to medium. This technique ensures a beautiful sear without burning, allowing the sausage to cook through evenly.
Grill the sausage for approximately 4 minutes on each side, turning it gently to ensure even cooking and browning. The goal is to achieve an internal temperature of 160℉, which indicates it’s thoroughly cooked and safe to eat. You can use a meat thermometer inserted into the thickest part of the sausage to accurately check doneness. Once cooked, remove the Chevalatta from the grill and allow it to rest for about 5 minutes. This resting period is important as it allows the juices to redistribute throughout the sausage, resulting in a more succulent and flavorful bite. After resting, your delicious homemade Italian ring sausage is ready to be served and enjoyed!
Perfect Pairings: What to Serve with Chevalatta
Chevalatta, with its rich, savory, and cheesy notes, is incredibly versatile and pairs beautifully with a wide array of dishes. Here are some of my favorite accompaniments to truly elevate your Italian sausage experience:
- This Italian sausage ring would go great with Maple Bacon Brussel Sprouts. The sweetness of maple and smoky bacon provide a delightful contrast to the savory sausage.
- Easy Steamed Artichokes on the side of this sausage would be the perfect match made in heaven, offering a light, earthy complement to the rich meat.
- I would love to top this sausage with some marinated eggplant and onion or even put them both on a sandwich! The tangy, tender vegetables cut through the richness of the sausage beautifully.
- Have this chevalatta on the side of some lemon pasta with spinach for a bright and herbaceous main, Mushroom Truffle Risotto for an earthy, luxurious meal, or garlicky cauliflower pasta for a hearty and comforting dish!
- Serve it as an appetizer with some air-fried zucchini fritters for a crispy, fresh start, or the OG Macaroni Salad for a classic, creamy side that’s always a crowd-pleaser!
- Having a BBQ? Serve sausage alongside some of our favorite sliders, like the Bacon Onion Jam Blue Cheese Slider for a bold flavor combination, or the Goat Cheese and Fig Jam Burger for a sweet and tangy gourmet bite.
FAQs About the Recipe
How to reheat Italian Ring Sausage?
You don’t, you eat it all in one sitting! Just kidding. For reheating, you can microwave it for a quick solution, or for a crispier texture, slice it up and fry it in a pan before adding it to pasta or serving it on its own.
It’s called Chevalatta! After reading this guide, I hope that’s abundantly clear. Whether you refer to it as spiral sausage, ring sausage, or simply a sausage ring, you’re talking about the delicious Chevalatta.
Can I freeze homemade Chevalatta?
Absolutely! Chevalatta freezes wonderfully. Once stuffed and rested overnight in the fridge, you can wrap each ring tightly in plastic wrap, then place them in a freezer-safe bag or container. They will keep well in the freezer for up to 3 months. Thaw them in the refrigerator overnight before grilling.
What if I don’t have a meat grinder or sausage stuffer?
While a grinder and stuffer make the process easier, you can still enjoy homemade sausage! Many butchers will grind pork for you if you ask, ensuring the correct fat ratio. For stuffing, you can manually form patties or links (without casings) and cook them like regular sausage. The flavor will still be fantastic!
Can I use different cheeses or herbs?
While Pecorino Romano, basil, and parsley are traditional for Chevalatta, you can certainly experiment with your favorite flavors. Parmesan cheese can be used as a milder alternative to Pecorino Romano. For herbs, oregano or a touch of fennel seed could introduce interesting variations. Remember that changing ingredients will alter the classic Chevalatta profile, but it’s a great way to personalize the recipe!
Leave us a Review!
Your feedback is incredibly valuable to us! If you’ve enjoyed making and tasting this recipe, please consider leaving a rating below to let us know what you think. You can also follow us on Instagram @vindelgiudice or TikTok @alwaysfromscratch for more culinary inspiration and delicious recipes. Don’t forget to check out some of our other favorite creations!
- Lemon Pasta with Spinach
- Creamy Pesto Shrimp Pasta
- Pasta with Sausage and Broccoli Rabe
- Italian Pasta Salad
📖 Recipe
Italian Ring Sausage (Chevalatta)
Vincent DelGiudice
Pin Recipe
Equipment
-
Kitchen aid mixer
-
Kitchen aid grinder attachment
-
Kitchen aid sausage stuffing attachment
-
grill
-
large mixing bowl
Ingredients
- 5 lbs Pork, Boston butt 75% lean, 25% fat
- 5 cloves garlic, minced
- ⅓ cup chopped parsley
- ¼ cup chopped basil
- ¼ cup olive oil
- 35 g kosher salt approximately 2 tbsp
- ¾ cup pecorino romano
- sheep casings
Instructions
-
Chop your pork into 1-2 inch square pieces. Place pork in the freezer along with grinder attachment pieces for 15 minutes. While in the freezer combine your cheese, herbs, garlic, and salt in a bowl.
-
After attaching the grinder, grind the pork using the smaller of the two attachment options if possible. Once all the pork is ground, combine it with the seasonings and olive oil. Use your hands to mix everything together until fully incorporated. Wrap with plastic wrap and place in the refrigerator overnight.
-
1 hour before stuffing the casings, remove them from the package and rinse thoroughly, allowing the water to go into the casing to remove excess salt. Then place the casings in a bowl of warm water to soak for 1 hour.
-
Set up the kitchen aid sausage stuffing attachment with the smallest attachment. Apply olive oil to the outside of the stuffing attachment. Hold the casing, cupped in your hand, and pour olive oil over the casing. Thread the casing onto the attachment and slide it all the way on until it gets 1-2 inches from the end. Start the kitchen aid mixer on about 6-8 speed and add the ground meat. Allow the meat to get pushed all the way to the tip of the stuffing attachment, THEN tie a knot. This will prevent air from entering the casing. Once the knot is tied, start stuffing the casing. Try to shape the sausage into a ring while your stuffing. Once you get to the end, tie another knot. You should get 3-4 sausage rings.
-
Rest the sausage in the fridge overnight.
-
Place your grill on high heat. Allow the grill to heat up to between 500-600℉. Place the sausage on the grill and lower the heat to medium. Grill on each side for about 4 minutes or until the temperature reaches 160℉. Allow to cool for 5 minutes and then serve.
Notes
- Paint the sausage with olive oil before placing it on the grill.
