Homemade Bread Kvass: The Ultimate Refreshing & Probiotic Drink from Stale Sourdough
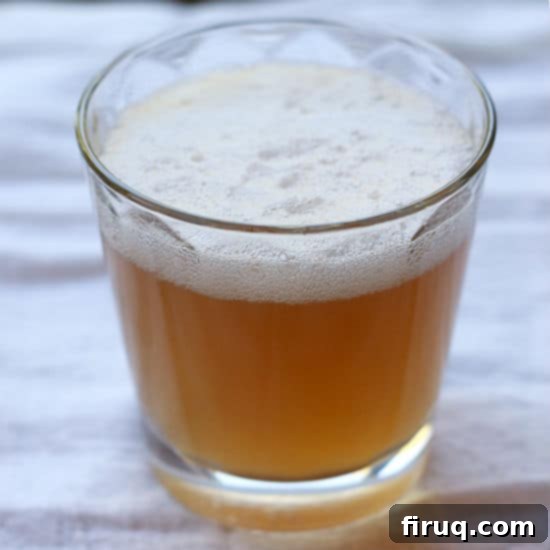
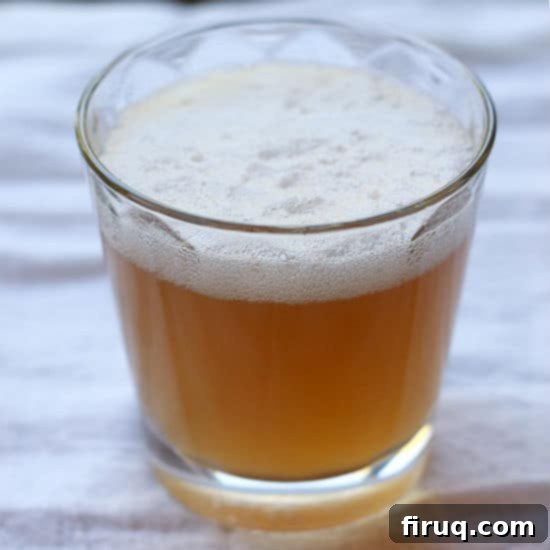
Making bread kvass is a fantastic way to give new life to stale sourdough bread. It’s light, wonderfully refreshing, and delightfully fizzy. Best of all, it’s a naturally fermented beverage, packed with beneficial probiotics for your gut health.
If you’re anything like me, you probably adore your homemade sourdough bread. There’s nothing quite like the aroma and taste of a freshly baked loaf. However, these magnificent loaves often yield a good amount of bread, and sometimes, despite our best intentions, we end up with stale leftovers. Hating to waste food, I’m always on the lookout for creative and delicious ways to repurpose it. I’ve made croutons countless times, and I occasionally freeze extra pieces for stuffing. But when those options aren’t quite right, there’s another incredible transformation that can happen right in your kitchen: turning old, stale sourdough into a wonderfully fizzy and refreshing drink known as Bread Kvass.
What Exactly is Bread Kvass?
What is bread kvass and where does it come from?
In the burgeoning world of fermented beverages, bread kvass might not yet have achieved the mainstream recognition of kombucha or kefir, but it absolutely deserves a spot in your fermentation repertoire. This delightful drink boasts a rich history, originating in Eastern Europe, where it has been a popular staple for centuries.
Commonly found in countries like Russia and Ukraine, kvass is much more than just a historical curiosity. It’s frequently sold by street vendors and served as a refreshing, healthier alternative to sugary sodas. For many, it’s a taste of home and a quintessential summer drink. Its unique, slightly sour, malty, and naturally carbonated profile makes it incredibly satisfying, and once you try it, you’ll understand its enduring popularity.
My own journey into making bread kvass began when I was delving into a book about fermented foods. With bags of leftover stale sourdough often sitting in my pantry, the idea of transforming it into a bubbly drink was incredibly appealing. I figured, what did I have to lose? Just some bread I wasn’t going to eat anyway, and a bit of sugar. The result was a revelation, and I’ve been making it ever since.
Why You Should Make Homemade Bread Kvass
Beyond the simple act of repurposing stale bread, there are several compelling reasons to embrace homemade bread kvass:
- Sustainable & Zero Waste: It’s the ultimate solution for food waste, giving new purpose to bread that would otherwise be discarded.
- Packed with Probiotics: Like other fermented foods, kvass contains live cultures that contribute to a healthy gut microbiome, supporting digestion and overall well-being.
- Naturally Refreshing: Its light, tangy, and fizzy nature makes it a perfect thirst-quencher, especially on a warm day. It’s a fantastic alternative to sugary soft drinks.
- Cost-Effective: You’re using ingredients you already have (stale bread) or are inexpensive, making it a very economical beverage to produce.
- Customizable Flavors: While traditional kvass is delicious on its own, you can easily experiment with adding different fruits, herbs, or spices during fermentation to create unique flavor profiles.
- Simple to Make: The process is mostly hands-off, requiring minimal active preparation once the initial steps are complete.
The Art of Making Bread Kvass: A Step-by-Step Guide
Crafting your own bread kvass is a rewarding process that transforms humble ingredients into something truly special. Here’s a detailed breakdown of how to achieve the perfect brew:
Step 1: The Crucial Toasting of Your Bread
The first and arguably most critical step in making kvass is toasting your sourdough bread. This isn’t just about drying it out; it’s about developing deep, complex flavors that will define your finished kvass. You’re aiming for a dark toast – think mahogany brown – but steer clear of burning it completely black. The moisture content of your bread will dictate the baking time, so keep a close eye on it. This process allows for the Maillard reaction to occur, which is responsible for the rich, nutty, and savory notes that toasted bread provides.
The degree of toasting drastically impacts the final flavor. My first attempt resulted in slightly burnt bread because I got distracted. The kvass was incredibly potent, reminiscent of a very dark, robust beer. While some might enjoy that intensity, I’ve since learned to be more vigilant, pulling the bread from the oven just before it reaches the black stage. This yields a slightly mellower, yet still deeply flavorful kvass, which I personally prefer. Spread your slices in a single layer on a baking sheet to ensure even toasting, flipping them occasionally.
Step 2: Steeping and Initial Straining
Once your bread is perfectly toasted, the process becomes largely hands-off. First, you’ll steep the toasted bread in hot water. This step extracts all those wonderful flavors and colors from the bread. Allow it to steep, ideally overnight, to ensure maximum flavor infusion. The bread will absorb a significant amount of water, so be prepared to add more to keep it fully submerged.
After steeping, it’s time for the first strain. This is where a good quality cheesecloth comes in handy. Line a fine-mesh strainer with two layers of cheesecloth and pour the bread mixture through it. This will separate the liquid from the “bread mash.” Trust me, you don’t want bits of mashed bread in your kvass; a clear, golden-brown liquid is what you’re after. Gently squeeze any remaining liquid from the bread mash to maximize yield.
Step 3: The First Fermentation with Sourdough Starter
Now, the magic of fermentation begins. To the strained liquid, you’ll add sugar, honey, and your active sourdough starter. The sourdough starter is crucial as it introduces the necessary wild yeasts and beneficial bacteria that will kickstart the fermentation process. Stir everything thoroughly until the sugars are dissolved. Optionally, you can add a sprig of mint or other flavorings at this stage to infuse additional aromas.
Cover the mixture lightly and place it in a warm spot in your kitchen. This environment encourages the yeast and bacteria to become active. You’ll know fermentation is underway when you start to see a slight foam or small bubbles forming on the surface, typically within 8-12 hours. This initial ferment allows the starter to consume some of the sugars, developing the characteristic tangy flavor and producing a small amount of carbonation.
Step 4: Bottling and Second Fermentation (Carbonation)
After the initial fermentation, strain the kvass once more through cheesecloth to ensure it’s free of any remaining sediment or mint leaves. Then, carefully pour the liquid into very clean plastic or sturdy glass bottles. Since the kvass will become carbonated during this stage, your choice of bottles is important. Reused 2-liter plastic soda bottles are excellent because they are designed to withstand pressure. Alternatively, glass bottles with swing-tops are ideal, but you must be diligent about venting any excess pressure. Only fill bottles about two-thirds full to leave ample headspace for carbonation.
Place the bottled kvass in the refrigerator for 2-3 days for the second fermentation. The cooler temperature of the fridge slows down the yeast activity, allowing for a slower, more controlled carbonation process. This is where the fizz develops. It’s absolutely essential to check your bottles every day or two. If they feel extremely firm (for plastic bottles) or if you hear a slight hiss when gently opening glass swing-tops, carefully loosen the lid slightly to release any built-up pressure, then reclose it. This “burping” prevents potential bottle explosions, which can be messy and dangerous.
Step 5: Enjoying Your Kvass
Your bread kvass will be ready to drink after 2-3 days of refrigeration. However, it will continue to ferment slowly in the fridge, becoming fizzier and more sour over time. The flavor will evolve, developing deeper, more complex notes. Feel free to taste it periodically to find your preferred level of fizziness and tang. It can be stored in the refrigerator for up to a month, though I doubt it will last that long!
Does Bread Kvass Contain Alcohol?
What is the alcohol content of homemade bread kvass?
Yes, kvass does contain a very small amount of alcohol, but typically it’s quite low, usually ranging from 0.5% to 2%. This alcohol content is similar to or even lower than that found in many store-bought kombuchas or “non-alcoholic” beers. The fermentation process, driven by the yeast in your sourdough starter, converts sugars into both acid and alcohol.
However, because of the relatively short fermentation time and the conditions (especially refrigeration during the second ferment), the alcohol production is limited. The amount is so low that you generally cannot taste it, nor will you feel any intoxicating effects. I personally feel completely comfortable offering it to my children in small amounts as a refreshing, probiotic-rich drink. If you prefer even less alcohol, you can ferment it for a shorter period or keep it colder.
Flavor Variations for Your Kvass
While classic bread kvass is delightful, don’t hesitate to get creative with flavor additions during the first fermentation. This is where you can truly personalize your brew:
- Mint & Herbs: As in the recipe, a sprig of fresh mint adds a lovely, cooling aroma. Basil or a hint of rosemary could also be interesting.
- Dried Fruits: Add a handful of raisins, dried cranberries, or apricots. These not only impart flavor but also provide extra sugar for the yeast, potentially boosting fizz.
- Citrus Zest: The zest of an organic lemon or orange can add a bright, zesty note without the bitterness of the pith.
- Ginger: A few slices of fresh ginger can give your kvass a warm, spicy kick, similar to ginger beer.
- Spices: For a more complex flavor, try adding a cinnamon stick, a few cloves, or a star anise pod.
Experiment with small batches to discover your favorite combinations!
Kvass Nutrition Notes: More Than Just a Drink
While providing exact nutritional information for homemade fermented beverages like bread kvass is challenging – I have no idea how many nutrients are extracted from the bread, nor can I precisely predict how much sugar is consumed during fermentation – we can still highlight its general health benefits. The longer kvass ferments, the more the sugar content will decrease as it’s converted into beneficial acids and a tiny amount of alcohol.
The primary nutritional advantage of kvass lies in its probiotic content. As a fermented drink, it introduces beneficial bacteria and yeasts into your digestive system, which can aid in digestion, nutrient absorption, and contribute to a balanced gut microbiome. It also contains B vitamins, which are byproducts of yeast metabolism. Compared to commercially produced sugary sodas, kvass offers a far healthier and more natural way to enjoy a bubbly drink.
Want more recipes that use Sourdough Starter?
If you love working with sourdough starter and are looking for other delicious ways to use it, here are a couple of my favorite recipes:
How to Make Bread Kvass

Print Recipe
Pin Recipe
Ingredients
- 1 lb sourdough bread sliced (stale is fine)
- 3 L water
- 1 cup sugar
- 1/4 cup honey
- 1 Tbsp sourdough starter
- sprig of mint (optional for flavor)
- 2 2 L plastic pop or juice bottles thoroughly cleaned
Instructions
-
Preheat your oven to 350°F (175°C). Arrange your sourdough bread slices in a single layer on a wire rack set over a baking sheet. Bake until the slices are completely dry and deep brown in color, but ensure they don’t turn black. Flip the slices occasionally for even toasting. The baking time will vary depending on the initial moisture content of your bread (approximately 20-30 minutes).
-
Boil 3 liters of water using a kettle or a large pot. Place the toasted bread pieces into a large, heat-proof bowl. Pour enough boiling water over the bread to just cover it. After about half an hour, add more hot water as needed to ensure the bread remains fully submerged, as it will absorb some liquid. Let the bread steep in the water overnight at room temperature.
-
Line a wire mesh strainer with 2 layers of clean cheesecloth. Place the strainer over a large pitcher or bowl. Carefully pour the steeped bread mixture through the strainer, allowing the liquid to collect. Gently squeeze the bread solids in the cheesecloth to extract as much liquid as possible. Add additional warm (not hot) water to the liquid in the pitcher until it reaches a total volume of 3 liters. Stir in the sugar, honey, and sourdough starter until fully dissolved. Add the optional sprig of mint for flavor. Cover the pitcher lightly and let it sit in a warm spot for 8-12 hours, or until a slight foam forms on the surface, indicating active fermentation.
-
Strain the mixture again through 2 layers of cheesecloth to ensure a clear kvass. Carefully pour the strained liquid into thoroughly cleaned plastic soda bottles or glass swing-top bottles. Be careful not to fill each bottle more than 2/3 full, leaving headspace for carbonation. Place the bottles into the fridge. Allow them to ferment for 2-3 days for the carbonation to develop. Crucially, check the bottles occasionally for pressure buildup. If plastic bottles feel very firm, or if using swing-top glass bottles, carefully loosen the lid slightly to release excess pressure (“burp” the bottles) then immediately reclose. This prevents potential bottle explosions.
-
Your homemade bread kvass is ready to drink after 2-3 days of refrigeration, but its flavor and fizz will continue to develop the longer it ferments. The alcohol content will remain low, typically between 0.5-2%. You can store the kvass in the fridge for up to a month, enjoying its evolving taste and effervescence. Serve chilled, over ice, and enjoy!
Tried this recipe?
Please Consider Leaving a Review!

Conclusion: A Delicious Way to Reduce Waste and Boost Health
Making homemade bread kvass is more than just a recipe; it’s a testament to creativity in the kitchen and a commitment to reducing food waste. This traditional Eastern European fermented beverage offers a unique combination of refreshing fizziness, a delightful tangy-malty flavor, and the undeniable benefits of probiotics. It’s a truly satisfying drink that brings history and health together in a glass.
So, the next time you find yourself with an abundance of stale sourdough, don’t throw it away! Embrace the simple, rewarding process of making bread kvass. You’ll not only be giving new life to old bread but also creating a delicious, gut-friendly drink that will undoubtedly become a favorite in your household. Give it a try, experiment with your favorite flavors, and enjoy the bubbly rewards!
