How to Make Perfect Stovetop Hard-Boiled Eggs Every Single Time: A Foolproof Guide
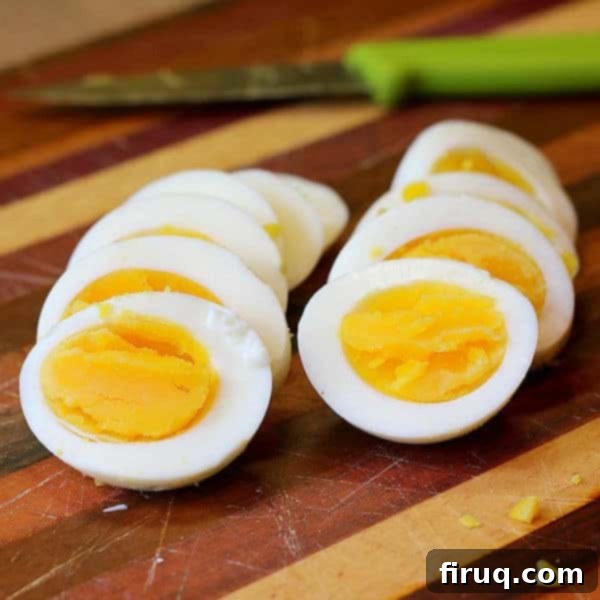
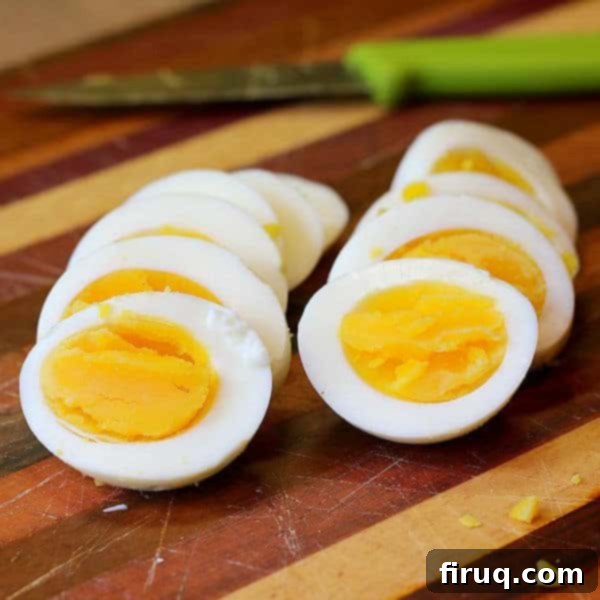
Master the art of making flawless hard-boiled eggs with this simple stovetop method. Ideal for creamy egg salad, impressive deviled eggs, or just a quick, healthy snack, these eggs are guaranteed to be perfectly cooked, easy to peel, and free from the dreaded green ring.
It might sound surprising, but even with all the elaborate dishes I prepare, both savory and sweet, nothing garners more praise from my husband than my Perfect Stovetop Hard-Boiled Eggs. It’s a simple triumph, yet it’s what largely earned me the “Domestic Dreamboat” title in our home. And truthfully, once you try this method, you’ll understand why. It’s truly a game-changer for anyone who loves perfectly cooked eggs.
You might be thinking, “Aren’t hard-boiled eggs one of the easiest things to make? And aren’t all hard-boiled eggs pretty much the same?” While they seem straightforward, the truth is, not all hard-boiled eggs are created equal. We’ve all encountered those disappointing eggs: the ones with a rubbery texture, a tough white, or worse, that unappealing greenish-black ring around the yolk. This discolored ring is a clear sign of an overcooked egg, caused by a reaction between sulfur in the egg white and iron in the yolk when heated for too long.
On the flip side, there’s nothing more frustrating than cracking open an egg, expecting a firm, hard-boiled yolk, only to find it still runny and dripping. This undercooked state is fine if you’re aiming for a soft-boiled egg, but it certainly won’t work for your classic egg salad sandwich or elegant deviled eggs. The goal is a firm, creamy yolk with a tender white, every single time.
The secret to perfect hard-boiled eggs lies in understanding a little bit of science, specifically getting the timing and temperature just right. This isn’t just a kitchen hack; it’s a technique I refined in my Food Fundamentals and Quality course at University. That class was invaluable, teaching me how different ingredients and cooking methods profoundly affect the final outcome of various foods. Who knew making a hard-boiled egg could be so scientific, yet so simple once you know the rules?
How to Make Perfect Stovetop Hard-Boiled Eggs: The Step-by-Step Guide
You don’t need any fancy gadgets or exotic ingredients to make impeccable stovetop hard-boiled eggs. If you have eggs in your refrigerator, chances are you already have everything required to achieve this culinary staple. The key is in the method, not the equipment.
Essential Ingredients and Equipment for Flawless Hard-Boiled Eggs:
- Eggs: Fresh or older, the choice impacts peeling ease (more on this below!). You can boil as few or as many as you need, as long as they fit in a single layer.
- Cold Water: Absolutely essential for even cooking from the start.
- A Saucepan with a Lid: Choose one that comfortably accommodates your eggs in a single layer and has a tightly fitting lid to trap steam and heat.
- Ice: For a critical ice bath that halts the cooking process and ensures easy peeling.
One critical tip for making hard-boiled eggs, especially if you want them to peel effortlessly, is to use eggs that are a little older. Eggs that are closer to their “best before” date, or even slightly past it (still safe to eat, of course!), tend to peel much more easily than very fresh eggs. This is due to a change in pH levels as eggs age, which causes the egg white to shrink slightly and separate more readily from the shell membrane. So, when deciding between a freshly purchased carton and one that’s been in your fridge for a week or two, opt for the older ones for a smoother peeling experience.
The number of eggs you decide to boil will influence your pot selection. Always choose a saucepan that allows your eggs to rest in a single layer at the bottom. Crowding the pot can lead to uneven cooking and cracked shells. Once your eggs are in the pot, fill it with enough COLD water to cover the eggs by about an inch. Starting with cold water is key; it ensures the eggs heat up gradually with the water, preventing the whites from becoming rubbery and the shells from cracking due to sudden temperature changes.
When it’s time to turn on the stove, resist the urge to crank it to maximum heat, especially if you have a powerful induction or gas burner. Bringing the water to a boil too quickly can cause the egg shells to crack, leading to messy, watery eggs. Instead, opt for a medium-high heat setting. For reference, if your stove goes up to 10, I typically use a setting of 8.
Cover the pot with its lid and allow the water to come to a full boil. The moment the water starts to vigorously boil, immediately reduce the heat to low. This step is crucial for gentle, even cooking. Set your timer for exactly 9 minutes. This simmer time is the sweet spot for a firm, creamy yolk and tender white without any discoloration.
While your eggs are simmering, prepare an ice bath. Fill a large bowl with ice and water. This step is absolutely essential. As soon as the timer dings, you need to stop the cooking process immediately. If you let the eggs sit in the hot water for too long, even off the heat, or don’t cool them down quickly, you’ll end up with that dreaded grayish-green ring around the yolk, a hallmark of an overcooked egg.
Once the 9 minutes are up, carefully drain the hot water from the pot and transfer the eggs directly into the ice bath. Allow them to cool completely in the ice water; this usually takes about 10-15 minutes. If you plan to eat them immediately, you can peel them as soon as they’re cool enough to handle. The rapid cooling also helps the egg whites contract, making the eggs much easier to peel.
To peel your perfectly cooked eggs, gently tap one end of the egg on a hard surface to crack the shell. Then, roll the egg firmly back and forth across the counter to create a network of cracks all around the shell. Under cold running water, gently peel the shell completely off. The water helps to wash away any tiny shell fragments and makes the peeling process smoother. Hard-boiled eggs are fantastic to have on hand in the fridge for a quick, high-protein snack, a healthy addition to salads, or to whip up speedy egg salad sandwiches.
Creative Ways to Enjoy Your Perfect Stovetop Hard-Boiled Eggs:
Beyond being a delicious standalone snack, perfectly cooked hard-boiled eggs are incredibly versatile in the kitchen. Here are just a few ideas to get you started:
- Deviled Eggs: A party favorite! The firm, creamy yolks are ideal for mashing and mixing with your favorite seasonings.
- Cobb Salad: Diced hard-boiled eggs are a staple ingredient, adding texture and protein.
- Ramen Topping: Halved hard-boiled eggs are a delicious and satisfying addition to a bowl of ramen.
- Avocado Toast: Slice and arrange on avocado toast for a nutritious and aesthetically pleasing breakfast or lunch.
- Simple Snack: A few hard-boiled eggs with a sprinkle of salt and pepper make for an excellent, guilt-free snack any time of day.
Perfect Stovetop Hard-Boiled Eggs: Nutrition Notes
Hard-boiled eggs are more than just a culinary delight; they are a nutritional powerhouse. They offer a fantastic package of low-fat protein, essential vitamins, and minerals, making them an excellent choice for a healthy snack or as part of a balanced meal.
For many years, eggs faced scrutiny due to their cholesterol content, with many health guidelines advising moderation. However, modern nutritional science has largely debunked the myth that dietary cholesterol significantly impacts blood cholesterol levels in most people. Research now indicates that saturated and trans fats have a much greater impact on blood cholesterol than the cholesterol found in eggs. Eggs are now celebrated for their high-quality protein, which is vital for muscle repair and satiety, as well as being rich in choline (important for brain health), Vitamin D, and B vitamins. Enjoy your hard-boiled eggs knowing they are a healthy and beneficial addition to your diet!
Perfect Stovetop Hard-Boiled Eggs

Print Recipe
Pin Recipe
Ingredients
- Whole eggs see note
Instructions
-
Place eggs in a saucepan large enough to accommodate the number of eggs you are boiling, in a single layer.
-
Cover eggs almost completely with COLD water. Cover saucepan and place on the stove over medium high-high heat (I use setting 8, where 10 is maximum).
-
When the water comes to a boil, reduce heat to low and set the timer for 9 minutes. Do not uncover the saucepan.
-
While you are waiting for the timer to go off, fill a large boil with ice water.
-
As soon as the timer goes off, drain the hot water from the pot and transfer the eggs to the ice water. If you are eating any of the eggs immediately, do so while still warm. Otherwise, keep the eggs in the ice water until completely cooled, changing water if needed. Refrigerate boiled eggs until ready to use.
-
To peel: Tap each egg gently on a flat service to crack. Firmly roll the egg back and forth in order to crack the egg all around. Gently peel the shell from the egg, rinsing the egg to remove any small shell particles as needed.
Nutrition
Notes
Tried this recipe?
Please Consider Leaving a Review!

With this foolproof method, you’ll be able to produce consistently perfect hard-boiled eggs that are a joy to eat and use in any dish. Say goodbye to rubbery whites, greenish yolks, and frustrating peeling. Enjoy your perfectly cooked eggs, and perhaps you too will earn a “Domestic Dreamboat” title!
