The Best Homemade Ladyfingers Recipe: Light, Fluffy Savoiardi for Authentic Tiramisu
Imagine a truly authentic Tiramisu, where every layer is perfectly crafted, and each spoonful melts in your mouth, delivering a harmonious blend of coffee, rich mascarpone, and a delicate, airy cookie. The cornerstone of this beloved Italian dessert lies in its base: the Ladyfingers. While convenient store-bought options exist, nothing quite compares to the superior taste, tender texture, and incredible absorption capacity of homemade Ladyfingers (Savoiardi). This comprehensive guide will empower you to bake these essential, light, and fluffy sponge cakes right in your own kitchen, ensuring your next Tiramisu is an unforgettable culinary masterpiece.
These elegant, finger-shaped sponge cookies are celebrated for their unique ability to soak up liquids like espresso, liqueur, and vanilla without becoming soggy. This characteristic makes them the ideal choice for creating the perfect balance of moisture and structure in classic Italian desserts. Forget the sometimes dry and often bland commercially produced versions; our carefully developed recipe promises a delicate crumb and a subtle sweetness that perfectly complements any dessert they grace. Get ready to elevate your home baking skills and impress your family and friends with these exquisite homemade treats!
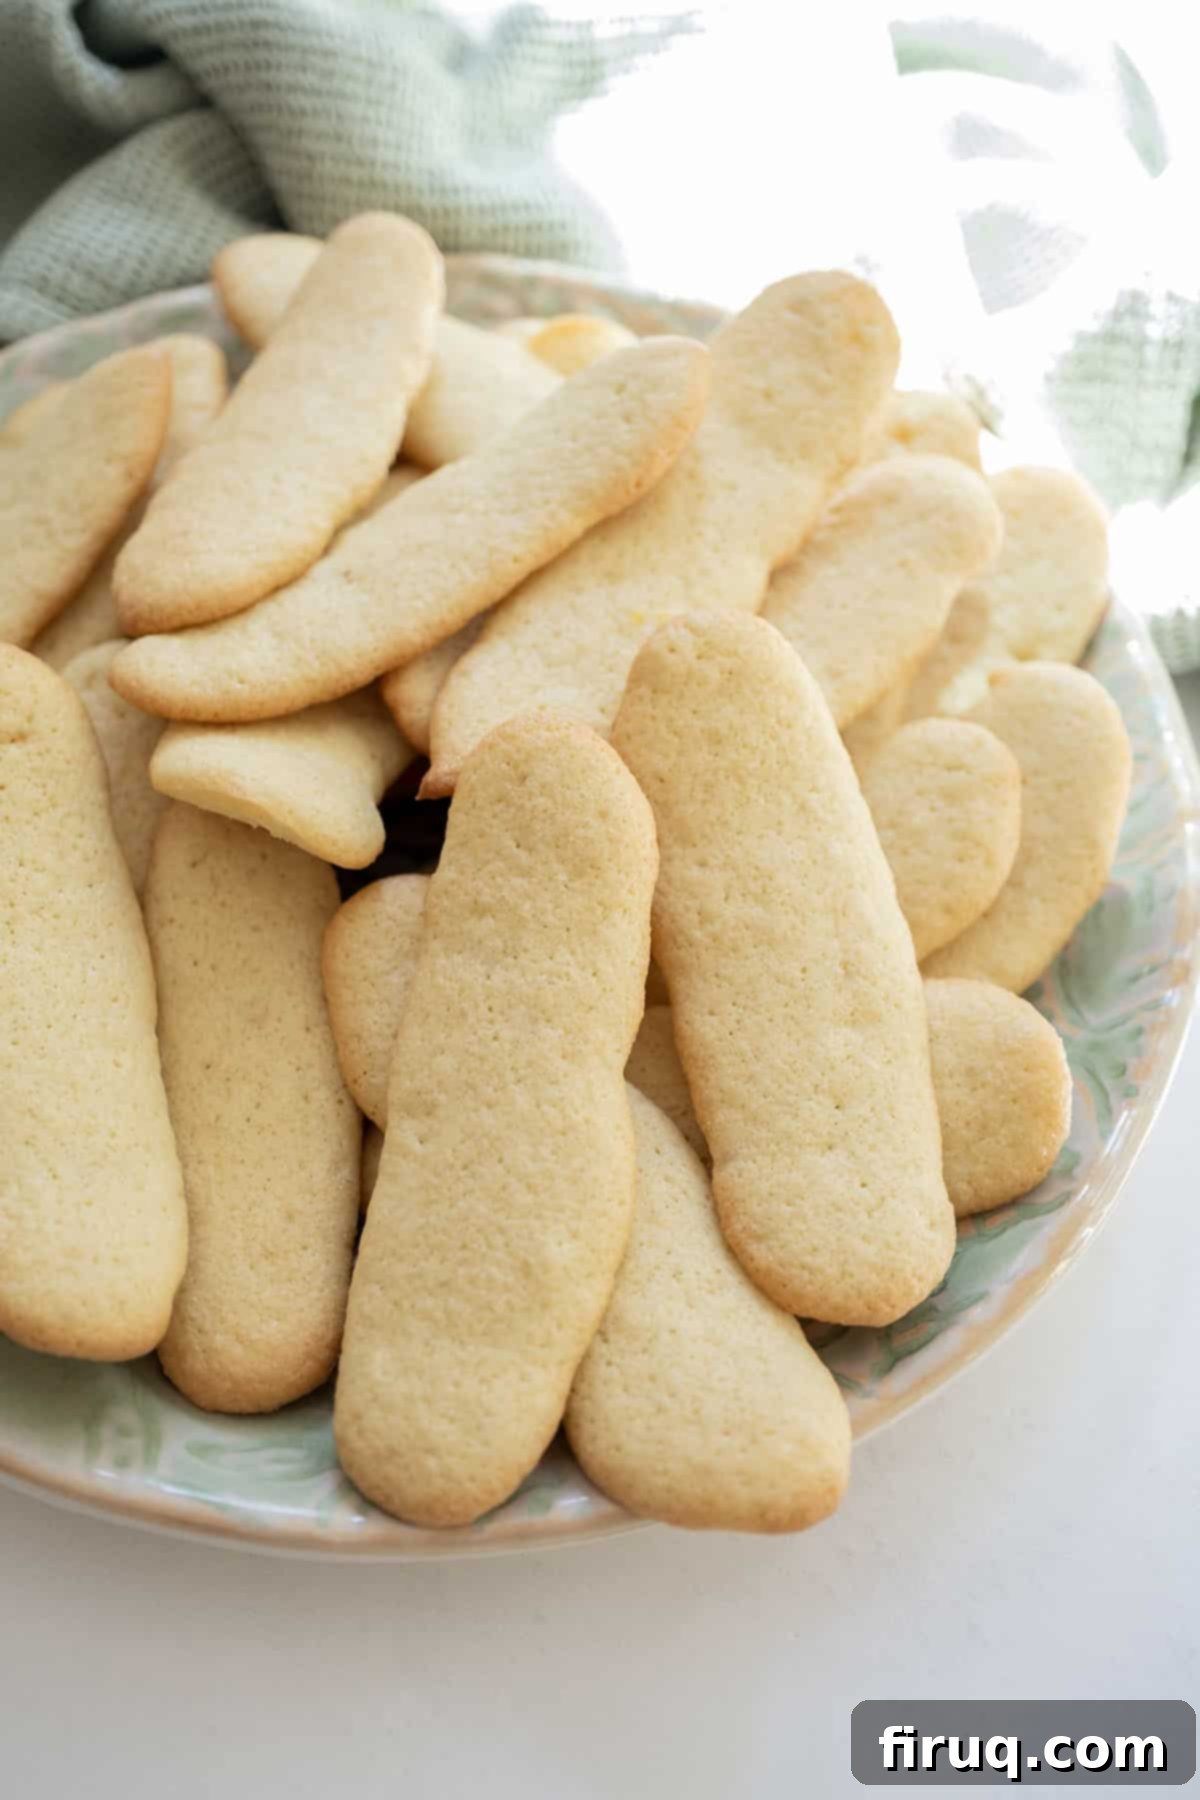
Are you passionate about making more of your ingredients from scratch, reducing reliance on store-bought alternatives? We have more fantastic homemade recipes to explore! Try our savory Homemade Italian Sausage Seasoning to flavor your meats, or master the art of our versatile Seasoned Ricotta Filling for your favorite pasta dishes and pastries.
[feast_advanced_jump_to]
Beyond Tiramisu: Versatile Uses for Homemade Ladyfingers (Savoiardi)
Ladyfingers, or Savoiardi as they are known in Italy, are most famously recognized as the quintessential base for Tiramisu. This homemade ladyfingers recipe was specifically developed to provide the perfect dry, yet fluffy, cookie for our decadent Pistachio Cream Tiramisu. Their unique texture allows them to absorb a delightful blend of espresso, Disaronno, and vanilla, imparting deep flavor without becoming mushy, which is key for a well-structured and incredibly delicious Tiramisu.
However, the versatility of these delicate sponge cookies extends far beyond Tiramisu. Ladyfingers are an incredibly adaptable ingredient that can be incorporated into a wide variety of sweet recipes. Their light texture and subtle sweetness make them an ideal foundation for numerous cakes and layered desserts. Here are several popular and creative ways to utilize your delicious homemade ladyfingers:
- Classic Tiramisu: Of course, this remains their most iconic application. Layer them with mascarpone cream, espresso, and a dusting of cocoa powder for the traditional Italian delight.
- Elegant Strawberry Shortcake: For a lighter, more sophisticated take on this beloved summer dessert, replace traditional biscuits with ladyfingers that have been lightly brushed with a simple syrup or fruit juice. They beautifully hold fresh strawberries and whipped cream.
- Charlotte Russe Cake: These beautiful molded cakes often feature ladyfingers lining the entire mold, filled with creamy Bavarian cream, fresh fruit, or light mousse. Using homemade ladyfingers will truly elevate this impressive dessert.
- Decadent Chocolate Trifles: Break your ladyfingers into bite-sized pieces and layer them with rich chocolate pudding, luscious whipped cream, and seasonal berries or chocolate shavings for an easy yet indulgent dessert.
- No-Bake Cheesecake Base: Move beyond graham crackers! Crushed ladyfingers mixed with a little melted butter can provide a unique, lighter, and more delicate base for your favorite no-bake cheesecakes.
- Coffee or Tea Companion: Sometimes, simplicity is best. Enjoy your homemade ladyfingers on their own as a delicate, crisp cookie, perfect for dipping into your morning coffee, afternoon tea, or a glass of dessert wine.
In essence, ladyfingers are a fantastic mechanism to absorb and enhance other flavors, making them a superb base or a complementary component in countless baking and dessert creations. Their airy crumb offers a wonderful canvas for culinary creativity. We’re always eager to discover new ideas, so please share your favorite ways to use homemade ladyfingers in the comments section below!
Essential Ingredient Notes and Smart Substitutions for Ladyfingers
Crafting perfect homemade ladyfingers requires just a handful of basic ingredients, but understanding the specific role each plays is vital for achieving that signature light, fluffy, and tender texture. Here’s a closer look at the key components and any recommended substitutions:
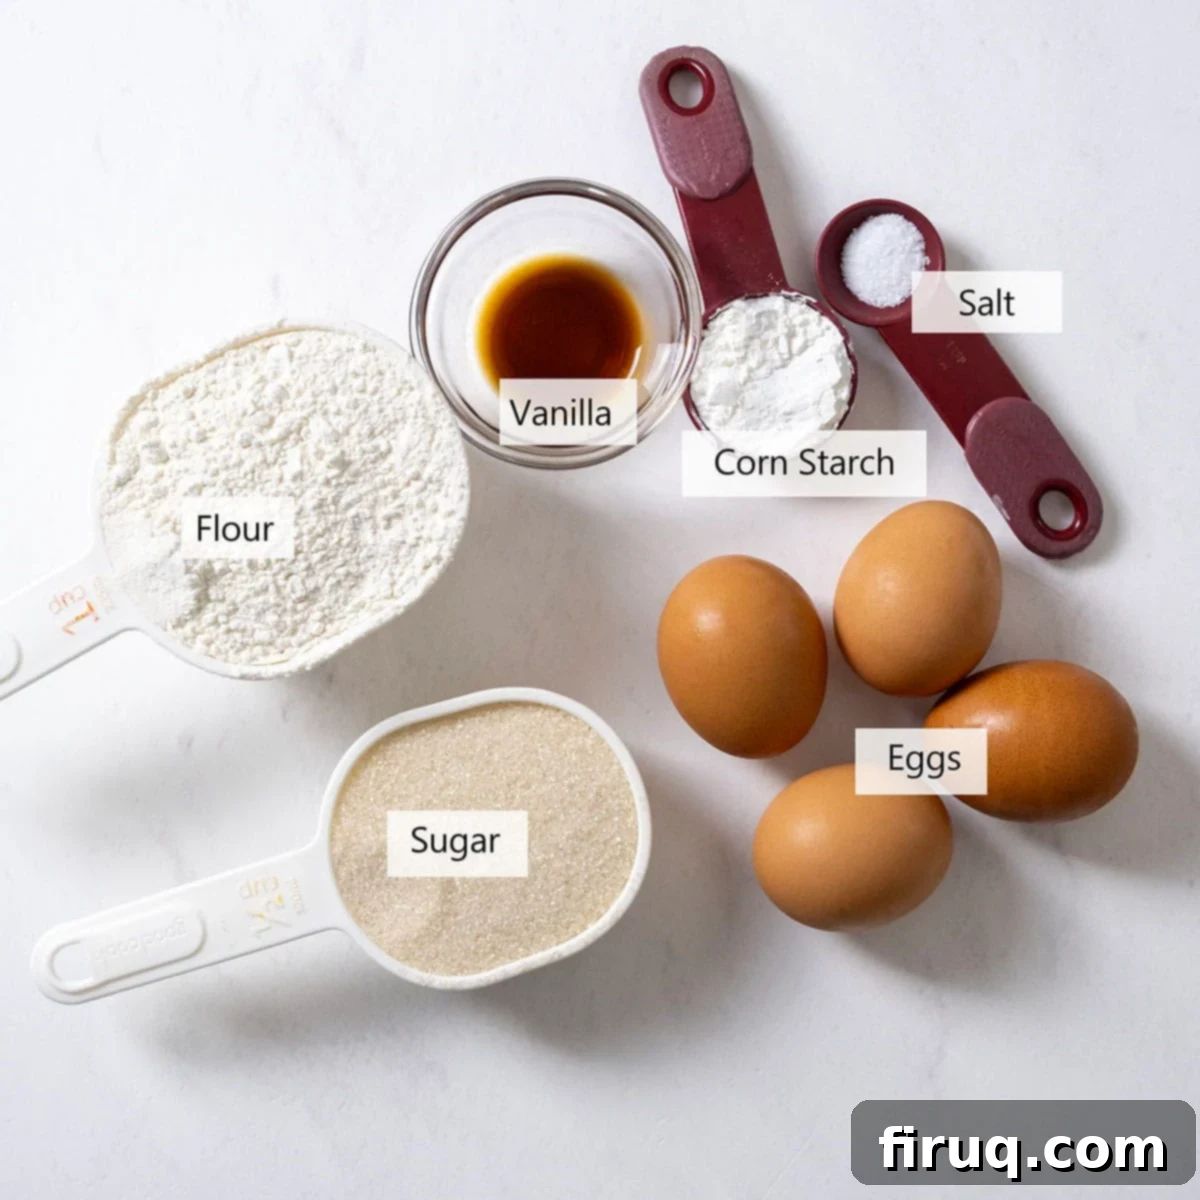
- Eggs: The backbone of these light and airy cookies! It is absolutely crucial to carefully separate the egg yolks from the egg whites. The magic of a fluffy ladyfinger happens when the egg whites are beaten separately until stiff peaks form. This process incorporates a significant amount of air, creating a stable foam that provides the characteristic delicate, cloud-like structure. Ensure there is no trace of yolk or grease in the whites, as fat can prevent them from whipping properly. Using room temperature eggs will also yield better volume.
- Granulated Sugar: Sugar serves multiple purposes here. It not only provides the necessary sweetness to the ladyfingers but also helps to stabilize the whipped egg white foam, preventing it from collapsing. Additionally, sugar contributes to the lovely golden-brown color and a slightly crisp exterior when baked. Both standard granulated white sugar and fine granulated cane sugar are perfectly suitable for this recipe.
- Vanilla Extract: This ingredient adds a beautiful, classic aromatic depth and warmth to the ladyfingers, enhancing their overall flavor. For the richest taste, we recommend using pure vanilla extract.
- Cornstarch: Cornstarch plays a vital role in achieving the desired tender crumb texture and helps absorb any excess moisture within the batter. This absorption contributes to the dry, slightly crisp exterior that is ideal for soaking up liquids without becoming overly soft or disintegrating. If you don’t have cornstarch on hand, Arrowroot starch is an excellent substitute and can be used in a 1:1 ratio.
- All-Purpose Flour: This provides the fundamental structure for the ladyfingers. Accurate measurement is important to avoid a dense cookie. Always spoon the flour into your measuring cup and level it off with a straight edge, rather than scooping directly from the bag, which can compact the flour and lead to an excess amount.
- Salt: A small pinch of salt is essential for balancing the sweetness and enhancing all the other delicate flavors in the cookies. It subtly rounds out the profile, making the vanilla and egg notes more pronounced.
*For precise measurements of each ingredient and detailed nutritional information per serving, please refer to the comprehensive recipe card located further down on this page.
Baking Perfect Ladyfingers from Scratch: A Step-by-Step Guide
Making your own ladyfingers at home is not only an incredibly rewarding experience but also surprisingly simple! This recipe is specifically designed to be straightforward and easy to follow, making it the best way to bypass expensive, often stale, store-bought options. These homemade Savoiardi will be wonderfully delicious and exceptionally fluffy, perfectly engineered to be the ideal vessel for absorbing the rich flavors of espresso, Disaronno, or any other liqueur you use when crafting your tiramisu. Follow these detailed steps to achieve ladyfinger perfection:
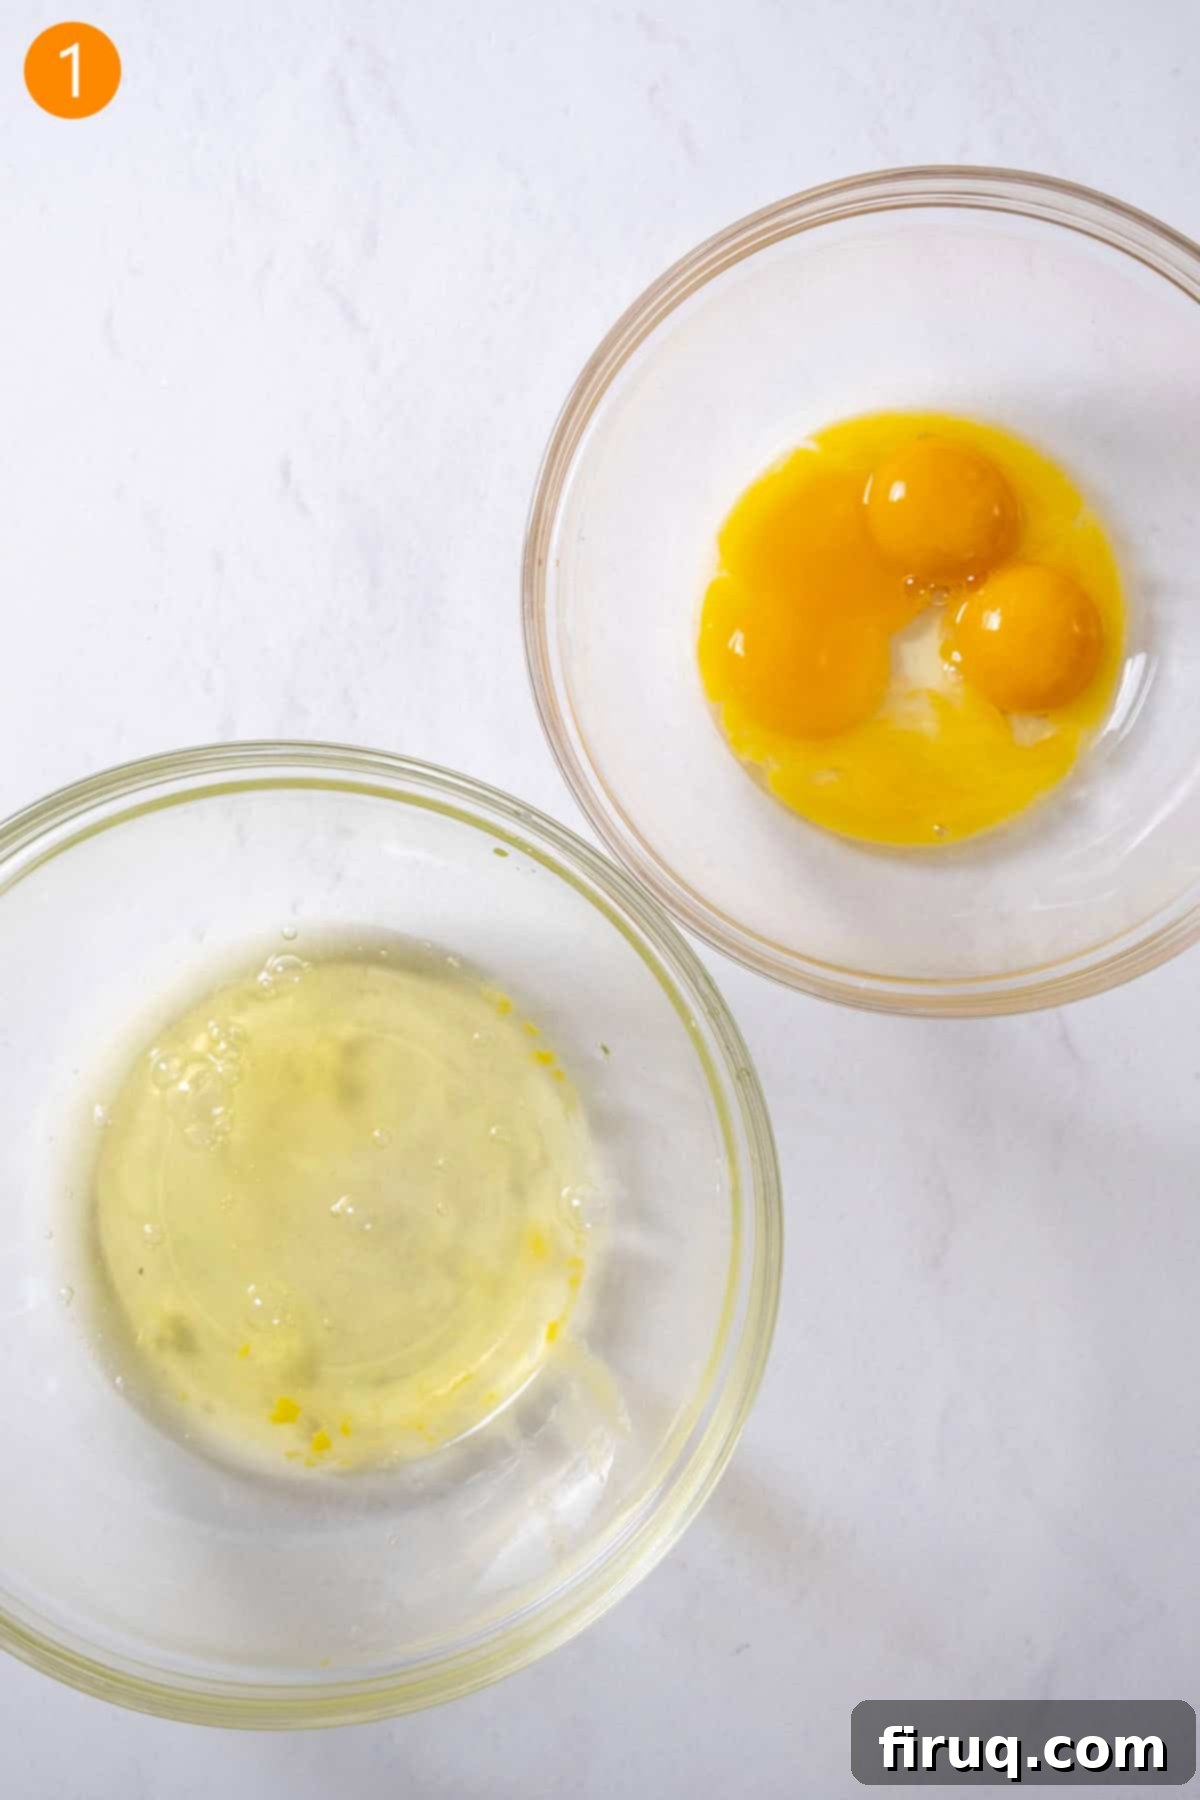
Step 1: Prepare Your Workspace and Eggs. Begin by preheating your oven to 375°F (190°C). This ensures it’s at the optimal temperature as soon as your batter is mixed, preventing any loss of volume. Next, line a large baking sheet with parchment paper. This prevents sticking and ensures easy removal. Meticulously separate the egg yolks from the whites into two completely separate, impeccably clean, and dry bowls. It’s vital that no trace of yolk or grease contaminates the whites, as fat can prevent them from whipping up properly – a crucial step for the ladyfingers’ fluffy texture. Using room temperature eggs will make separation easier and improve whipping volume.
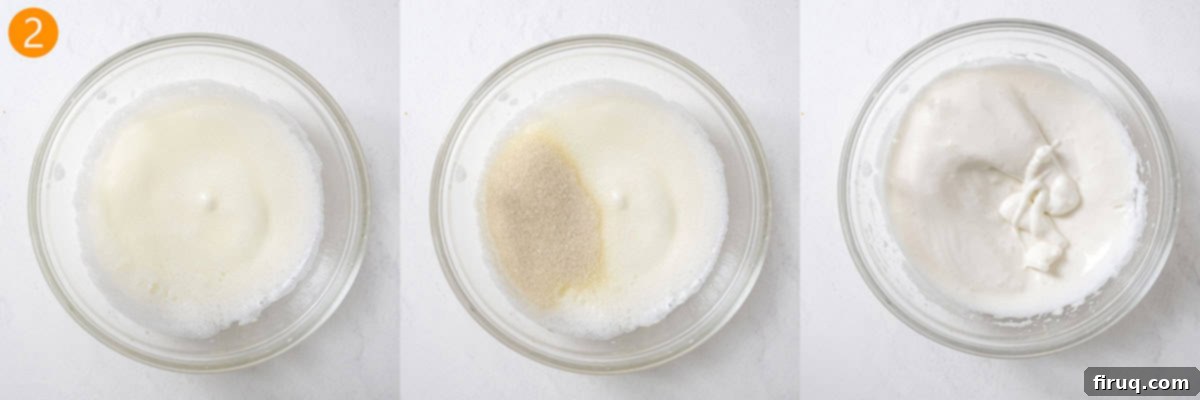
Step 2: Whip the Egg Whites to Perfection. Using a hand-held mixer (or a stand mixer fitted with a whisk attachment), begin beating the egg whites on medium-high speed. Continue beating until they form soft peaks – this means that when you lift the beaters, the peak of egg white gently folds over onto itself. At this stage, gradually add ¼ cup of the granulated sugar, one tablespoon at a time, while continuing to beat. Increase the mixer speed slightly and beat for another 3-5 minutes until stiff, glossy peaks develop. This indicates that the peaks will stand firm and tall, holding their shape when the beaters are lifted from the bowl.
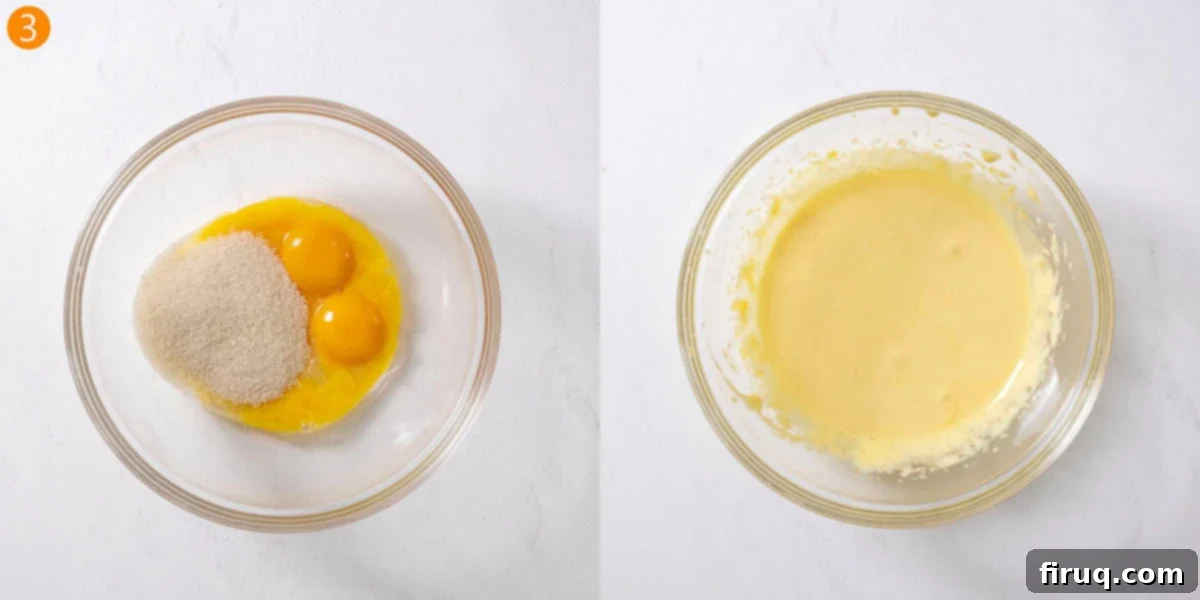
Step 3: Cream the Egg Yolks. In the second bowl, combine the egg yolks with the remaining ¼ cup of granulated sugar. Using your hand mixer, beat them together until the mixture transforms into a pale yellow color and becomes noticeably fluffy and aerated. This process incorporates air and lightens the yolks, creating a rich yet airy base for your ladyfinger batter.
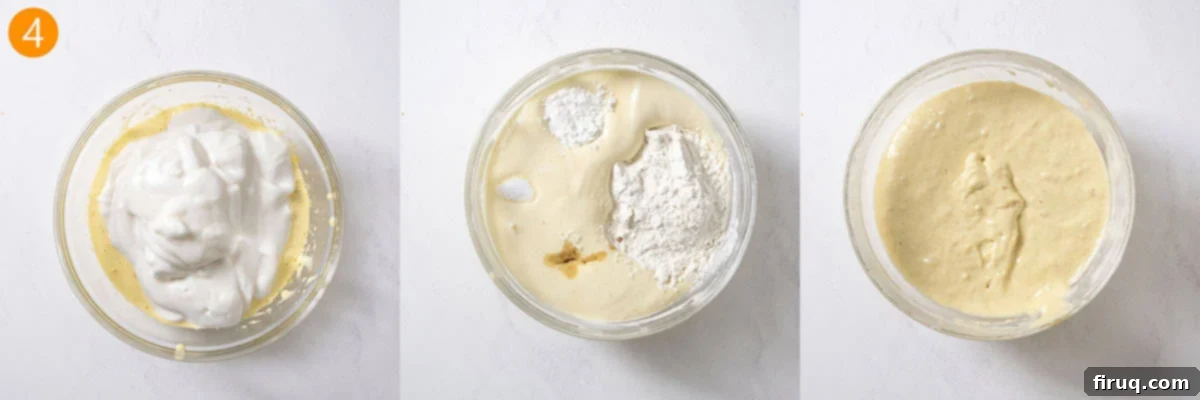
Step 4: Gently Combine and Fold. This is perhaps the most critical step for maintaining the ladyfingers’ signature airy texture. Very gently fold the beaten egg whites into the pale, fluffy egg yolk mixture using a rubber spatula or a large spoon. Do this in two or three additions, slowly incorporating the whites to avoid deflating them. Once lightly combined, add the vanilla extract, cornstarch, all-purpose flour, and salt. Continue to fold delicately until all ingredients are just incorporated and no streaks of flour remain. Be extremely careful not to over-mix, as this will quickly cause the batter to lose its airy volume. The resulting consistency should be light, thick, and beautifully custardy.
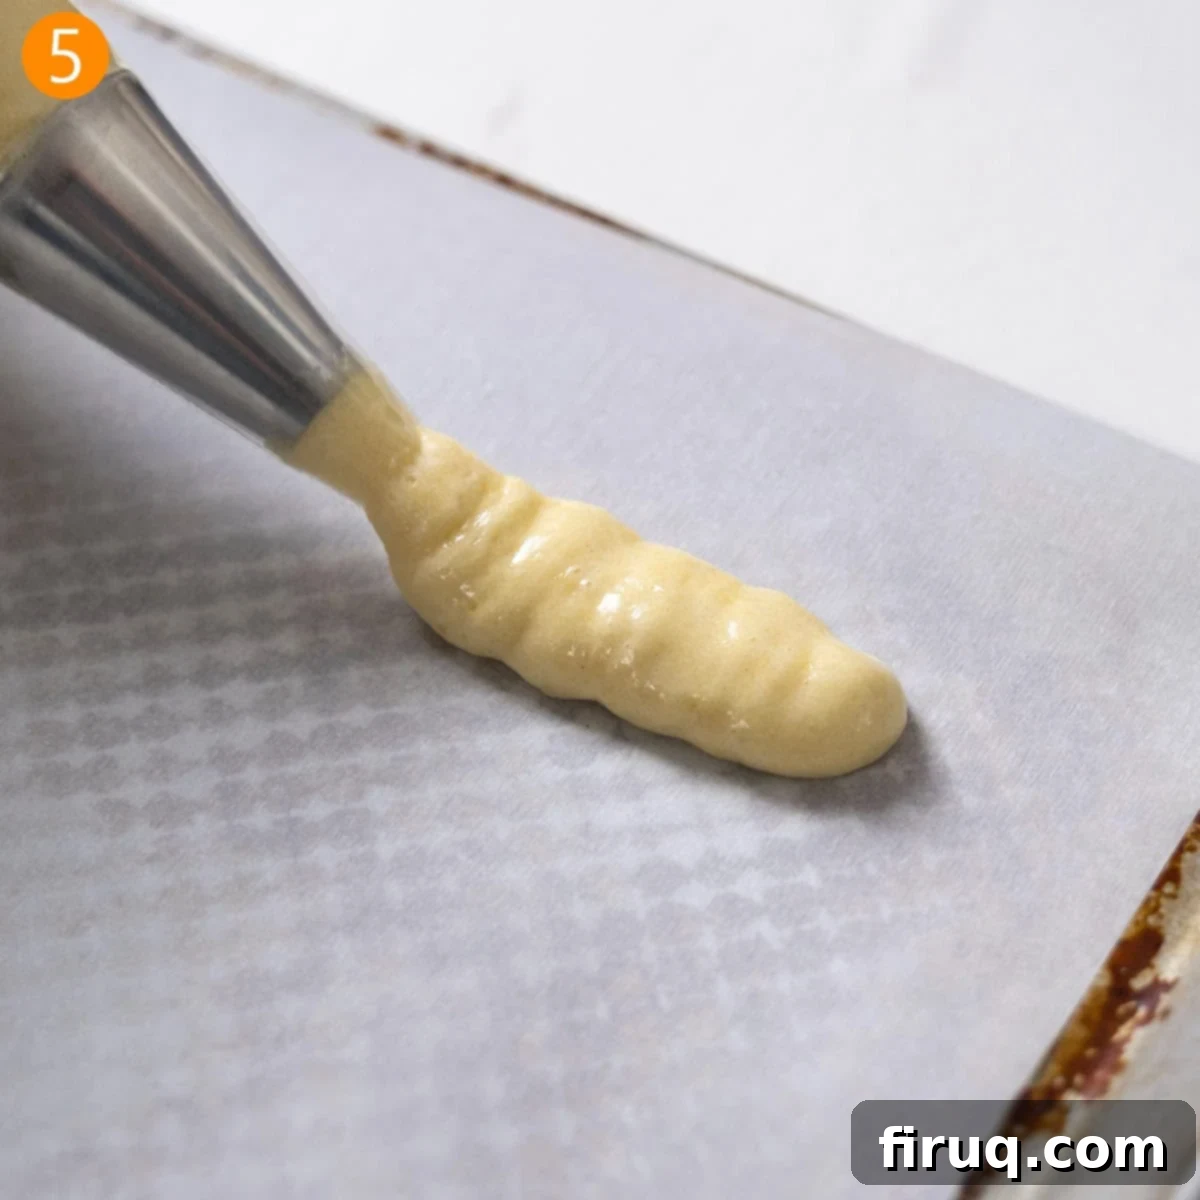
Step 5: Pipe the Ladyfingers. Transfer the custardy batter into a piping bag fitted with your chosen tip (a round or star tip, approximately a half-inch opening, works best for classic ladyfinger shapes). Pipe uniform 4-inch long “fingers” onto the prepared baking sheet. It’s important to leave about 2 inches of space between each ladyfinger, as they will expand slightly during baking. Aim for consistency in size and shape for even baking and a beautiful final presentation.
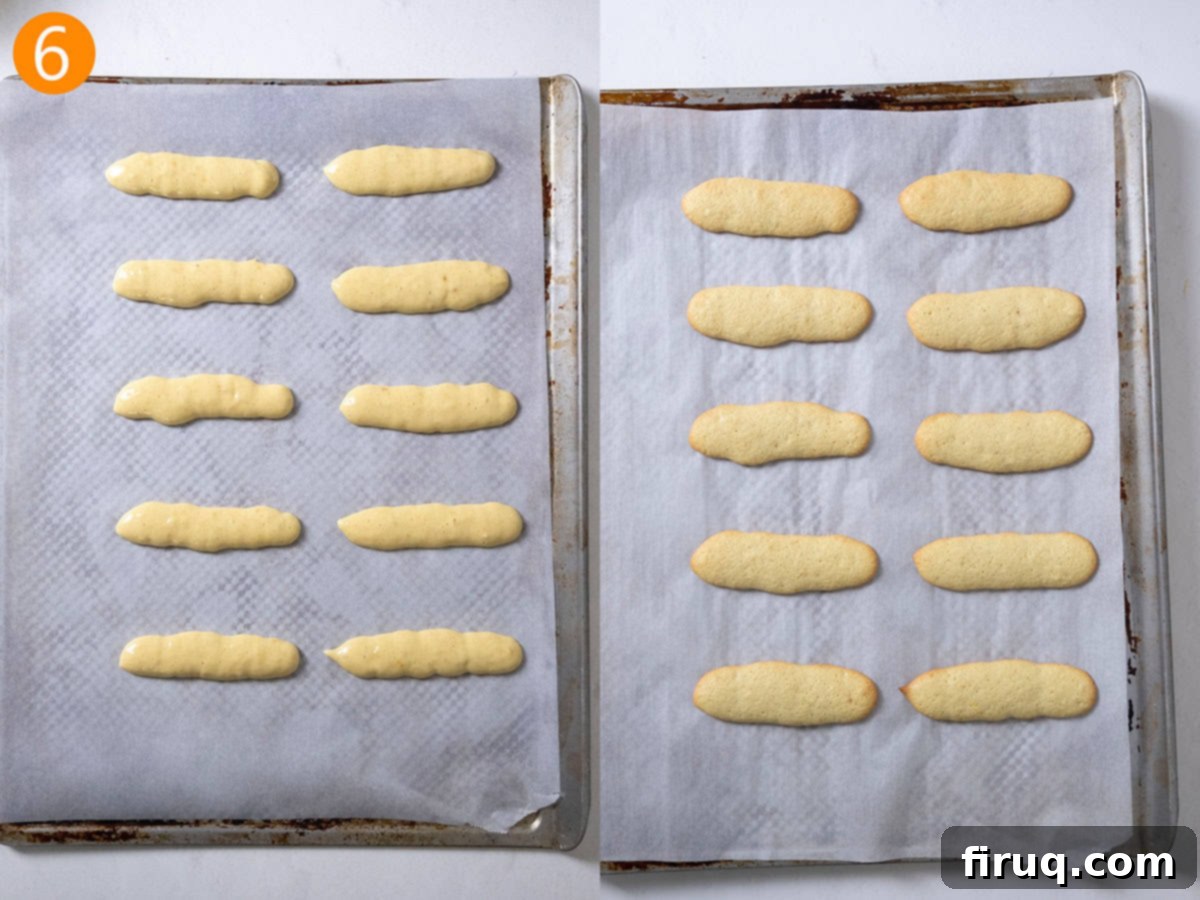
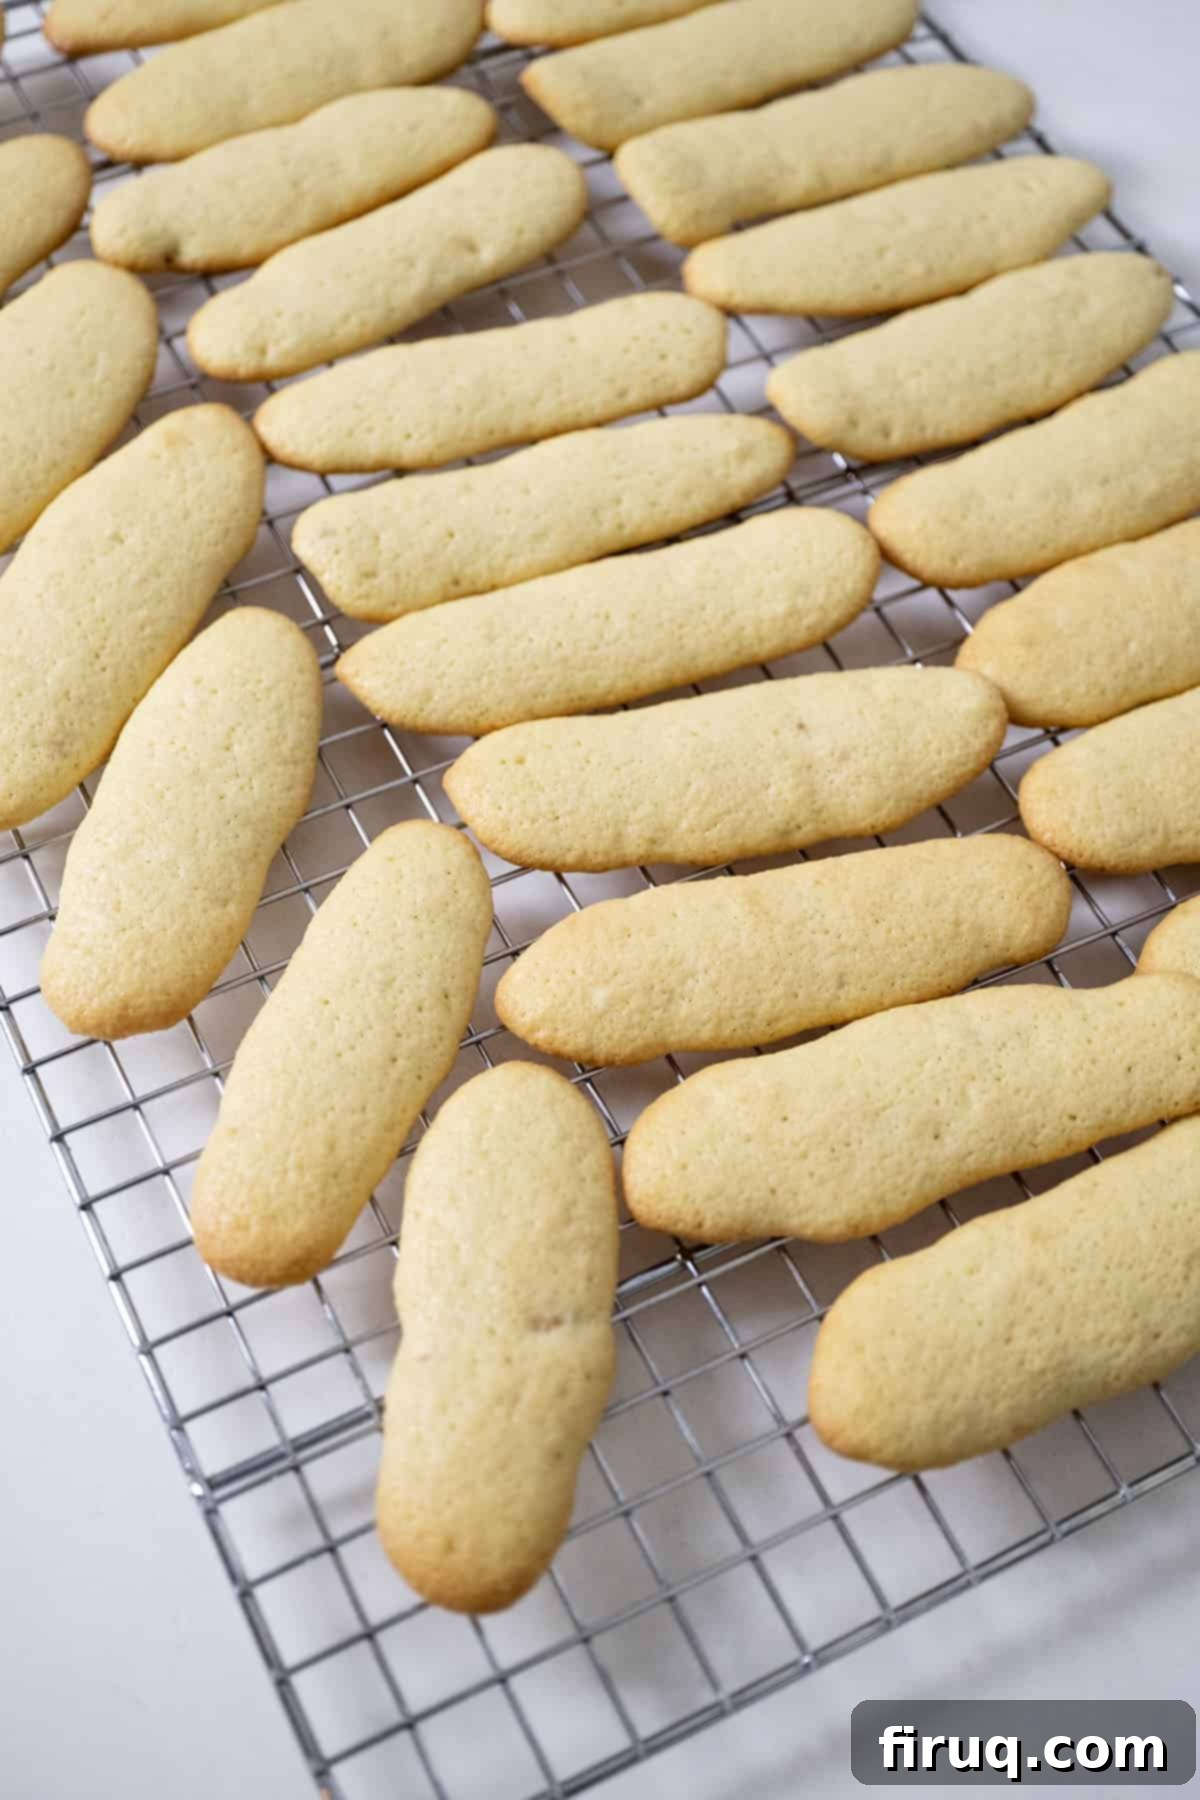
Step 6: Bake Until Golden and Cool Completely. Bake your piped ladyfingers in the preheated oven for 10-12 minutes. This timeframe is a guideline; ovens vary, so keep a close eye on them. You are looking for the edges to turn a beautiful, delicate golden brown, indicating they are baked through and have developed their characteristic slight crispness. Once baked, remove the baking sheet from the oven and carefully transfer the ladyfingers to a wire cooling rack. Allow them to cool completely before using them in your Tiramisu or enjoying them as a standalone treat. Thorough cooling ensures they maintain their shape and achieve the perfect texture for optimal flavor absorption.
Pro-Tips for Ladyfinger Perfection
Achieving bakery-quality ladyfingers at home is more accessible than you think, especially with a few expert tricks up your sleeve. These pro-tips will ensure your homemade Savoiardi turn out perfectly light, airy, and ready to be the star of your next Tiramisu or any other delightful dessert:
- Consistent Piping Size is Crucial: When piping the ladyfingers onto the parchment paper, aim for a consistent length of approximately 4 inches and a width no larger than an inch and a half. Remember, these delicate cookies will expand slightly during baking, so resist the urge to make them too large initially. Uniform sizing ensures that all your ladyfingers bake evenly and present beautifully in your final dessert.
- Vigilant Baking Watchfulness: It’s essential to keep a close eye on the edges of your ladyfingers while they are baking. The ideal outcome is to achieve a delicate, subtle golden-brown hue around the edges, indicating they are thoroughly cooked but not over-baked. Over-baking can result in overly hard ladyfingers that are less absorbent, while under-baking will leave them too soft and prone to crumbling. Oven temperatures can vary, so adjust your baking time as needed.
- Master the Art of Delicate Folding: The ultimate secret to achieving incredibly fluffy and airy ladyfingers lies in employing a gentle folding technique. When you combine the meticulously beaten egg whites with the egg yolk mixture, and subsequently when adding the dry ingredients (flour, cornstarch, salt, and vanilla), use a very light hand with your spatula. This careful folding preserves the precious air that you worked so hard to incorporate into the egg whites, which is absolutely essential for creating that signature airy, delicate texture. Vigorous stirring or over-mixing will deflate the batter and lead to flat, dense ladyfingers.
- Use Room Temperature Eggs: For the best results when whipping both egg whites and yolks, always use eggs that are at room temperature. They separate more easily, and, critically, the whites will whip up faster, achieve greater volume, and form a more stable foam, all of which contribute to the lightness of your ladyfingers.
- Ensure Impeccably Clean Equipment: Any trace of grease or oil, no matter how small, can be the enemy of perfectly whipped egg whites. Make sure all your mixing bowls, beaters, and spatulas are impeccably clean and completely dry. You can even wipe them down with a lemon wedge or a little white vinegar to ensure they are grease-free before starting.
- Dusting for a Traditional Finish: For an extra touch of elegance and a slightly crispier exterior, which is characteristic of traditional Savoiardi, you can lightly dust the piped ladyfingers with a mixture of powdered sugar and granulated sugar just before they go into the oven. This creates a fine, sugary crust that adds to both texture and appearance.
Frequently Asked Questions About Homemade Ladyfingers
Curious about ladyfingers or encountering a common baking question? We’ve got answers to help you master these delightful Italian cookies and ensure your success.
Ladyfingers, also famously known as Savoiardi, are most recognized as the quintessential base for a classic Italian Tiramisu. Their light, delicate, and sponge-like texture, combined with their excellent ability to absorb liquids, makes them incredibly versatile. Beyond Tiramisu, they are frequently used as the foundation for various other delicate desserts like elegant strawberry shortcakes, traditional Charlotte Russe cakes, no-bake cheesecakes, or layered fruit trifles. They are also simply wonderful to enjoy on their own, perhaps dipped into a cup of coffee or tea, much like a biscotti.
If you find yourself without ladyfingers or prefer an alternative, several options can work in a pinch, though it’s important to note that the texture and flavor of your dessert will differ slightly. Good substitutes include harder biscotti (which will provide a firmer texture and require longer soaking), stale panettone slices, or even thinly sliced pieces of a plain sponge cake or pound cake. For a quicker, more accessible option when you’re truly desperate, plain vanilla wafer cookies can also be used, although they will provide a different crumb density and absorb liquids less efficiently than traditional ladyfingers.
While some dessert recipes might call for harder, crispier ladyfingers, we strongly advocate for using a softer, freshly made variety, much like the ones produced by this recipe, especially for Tiramisu. The soft texture allows them to soak up the espresso and liqueur beautifully and evenly, infusing every layer of the Tiramisu with rich flavor without becoming overly mushy or falling apart. When properly chilled, these soft, homemade ladyfingers provide excellent structure to hold the Tiramisu together. In our opinion, their fresh taste, delicate crumb, and superior absorption capacity make them far more delicious and ideal for an authentic and truly memorable Tiramisu experience.
Once your homemade ladyfingers have cooled completely, it’s best to store them in an airtight container at room temperature. They will typically remain fresh, delicate, and slightly crisp for up to 3 to 5 days. For longer storage, you can freeze them for up to 1-2 months. To do this, arrange them in a single layer or stack them with sheets of parchment paper in between, inside a freezer-safe, airtight container. Thaw them at room temperature before using them in your recipes.
Flat ladyfingers are a common issue, and it’s almost always a result of deflating the egg whites. This can happen for several reasons: if the egg whites weren’t whipped to sufficiently stiff peaks (meaning they were under-whipped), or if they were over-mixed or roughly folded into the egg yolk mixture and dry ingredients. To prevent this, ensure your mixing bowls and beaters are impeccably clean and free of any grease, whip the egg whites until they are truly stiff and glossy, and then fold all ingredients together very gently and deliberately to preserve that precious air. Humidity can also play a small role, but proper whipping and folding technique are the main factors.
Explore More Delicious Homemade Cookie Recipes
If you’ve enjoyed the rewarding process of making these delicate ladyfingers from scratch, you’re sure to love exploring our other homemade cookie creations. Dive into more scratch-made desserts that are perfect for any occasion, from cozy nights in to festive gatherings:
- Chewy White Chocolate Macadamia Nut Cookies
- Cranberry Orange Shortbread Cookies
- Dark Chocolate Peppermint Sugar Cookies
- Chewy Pumpkin Chocolate Chip Cookies
If you’ve had the pleasure of trying this homemade ladyfingers recipe, we would be absolutely thrilled to hear your thoughts! Please consider leaving a comment and a star rating in the recipe card below. Your feedback helps us continually improve our recipes and inspires other home bakers in our community. Don’t forget to tag us on Instagram @vindelgiudice to share your beautiful homemade ladyfingers creations with us!
📖 Recipe

Homemade Ladyfingers (Savoiardi) for Tiramisu
Vincent DelGiudice
Pin Recipe
Equipment
-
1 baking sheet
-
parchment paper
-
hand mixer
-
piping bag and tip
Ingredients
Ladyfingers
- 4 large eggs, separated
- ½ cup granulated sugar
- 1 teaspoon vanilla extract
- 1 tablespoon corn starch
- 1 cup all-purpose flour
- ½ teaspoon salt
Instructions
Ladyfingers
-
Preheat your oven to 375°F (190°C) and line a baking sheet with parchment paper. Carefully separate the egg yolks and egg whites into two clean, separate bowls. Begin beating the egg whites with a hand-held mixer on medium-high speed until they form soft peaks. Then, gradually add ¼ cup of the granulated sugar, continuing to beat until stiff, glossy peaks develop (approximately 4-5 minutes).
-
In the separate bowl with the egg yolks, beat them with the remaining ¼ cup of sugar until the mixture is pale yellow and fluffy. Gently fold the beaten egg whites into the egg yolk mixture in two or three additions to maintain volume. Then, add the vanilla extract, cornstarch, all-purpose flour, and salt. Continue to fold delicately until all ingredients are just combined, being careful not to over-mix, which can deflate the batter. The consistency should be a light, custardy batter.
-
Transfer the batter into a piping bag fitted with a round or star tip (a ½-inch tip works well). Pipe uniform 4-inch long cookies onto the prepared baking sheet, leaving about 2 inches between each. Bake for 10-12 minutes, or until the edges are beautifully golden brown. Remove from the oven and allow to cool completely on a wire rack before using in your favorite dessert or enjoying as is.
Notes
- When piping the ladyfingers, aim for them to be no bigger than an inch and a half wide, as they will expand slightly in the oven.
- Keep a close watch on the edges of the ladyfingers during baking. You want them to be just golden brown, not dark, to ensure optimal texture and absorption.
- Be very delicate while folding the egg yolks and egg whites together, and when adding the dry ingredients (flour, cornstarch, salt, and vanilla). Gentle folding is crucial for maintaining their signature fluffy texture.
- For the best egg white volume and stability, ensure your eggs are at room temperature and your mixing bowl and beaters are completely grease-free.
- For an extra traditional touch, lightly dust the piped ladyfingers with powdered sugar before baking. This creates a slightly crispier, appealing finish.
Nutrition
