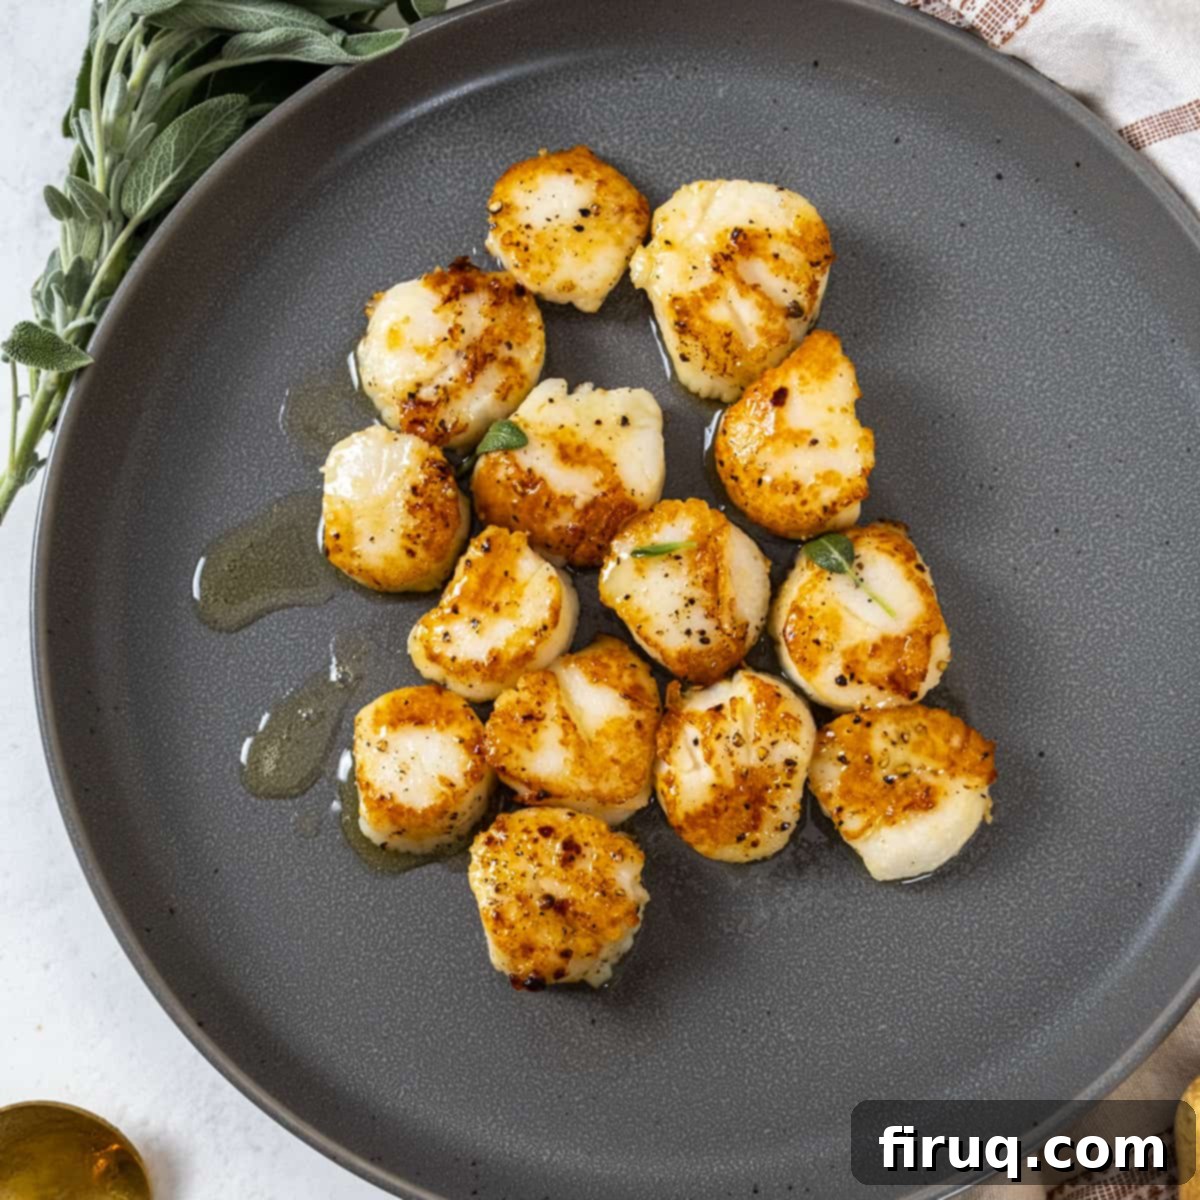
Perfectly Seared Garlic Sage Scallops: An Elegant 10-Minute Seafood Recipe
Seafood is a true delight to cook, known for its incredible flavor and often surprisingly quick preparation. Among the vast ocean of options, Garlic Sage Seared Scallops stand out as a premier choice for those seeking both elegance and efficiency in the kitchen. This exceptional recipe can be mastered in less than 10 minutes, making it not just a weekday hero but also a fantastic, stress-free option for special occasions and holiday gatherings. Imagine serving a sophisticated dish that tastes like it took hours, but was actually ready in a flash! These succulent scallops, infused with aromatic garlic and fresh sage, promise a culinary experience that is both simple to achieve and utterly delicious.
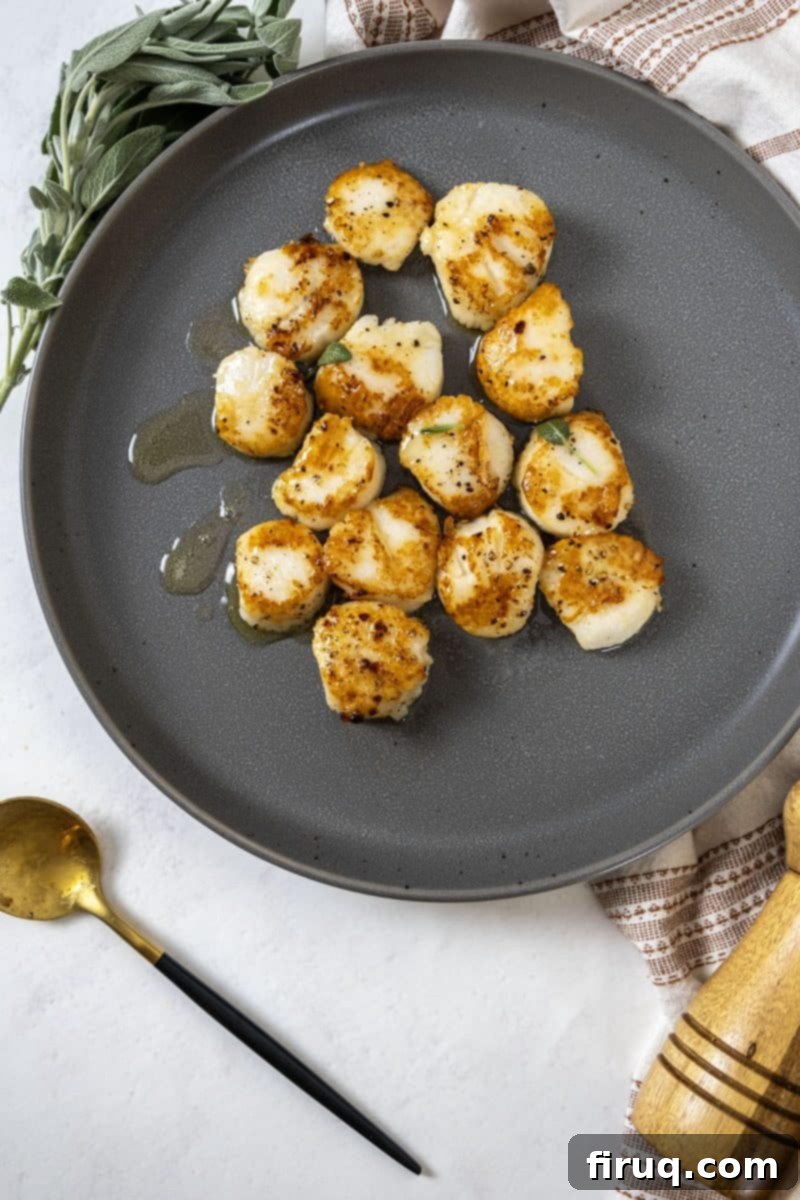
Eager to explore more quick and easy seafood recipes that bring gourmet flavors to your table without the fuss? Don’t miss our tantalizing Pan-Seared Vermillion Snapper, Lemon Garlic Broiled Flounder, or the indulgent Creamy Pesto Shrimp Pasta. Each recipe is designed to deliver maximum flavor with minimal effort, perfect for any home cook.
[feast_advanced_jump_to]Ingredient Notes and Expert Substitutions for Your Seared Scallops
Crafting truly exceptional seared scallops begins with understanding your ingredients. While this recipe is incredibly straightforward, a few key considerations will elevate your dish from good to unforgettable.
Scallops: The Star of the Show. When it comes to scallops, freshness is paramount. I always advocate for sourcing your scallops the very day you intend to cook them. A high-quality scallop will have a sweet, ocean-like aroma, not a strong “fishy” smell. They should be plump, firm, and have a beautiful, slightly iridescent off-white to light pink color. Avoid any that look dry, dull, or have discolored edges. If possible, opt for “dry” scallops, which haven’t been treated with phosphates (a common practice that makes them absorb water, leading to a rubbery texture and difficulty in searing). You can ask your fishmonger to remove the small, tough muscle attached to the side, or you can easily do it yourself – a process we’ll detail below. Removing this muscle ensures an even cook and a uniformly tender bite throughout the scallop.
Garlic and Sage: The Aromatic Duo. The combination of fresh garlic and fragrant sage provides a warm, earthy, and incredibly complementary flavor profile to the sweet scallops. This pairing creates a rich, infused butter that coats each scallop beautifully. While these are my preferred aromatics, feel free to experiment! Thyme or rosemary are fantastic alternatives, offering different herbaceous notes. For a brighter touch, consider adding a hint of lemon zest with the sage, or a pinch of red pepper flakes for a subtle kick. The key is to use fresh herbs and garlic, as their vibrant flavors make all the difference in this quick-cooking dish.
Butter and Olive Oil: The Perfect Sear. We use a combination of olive oil and butter for a reason. Olive oil has a higher smoke point, which is crucial for achieving that beautiful, golden-brown crust on the scallops without burning the fats. Once the scallops are seared, the butter is introduced along with the aromatics. This allows the butter to melt, foam, and absorb the garlic and sage flavors, creating a luscious basting liquid that moisturizes the scallops and infuses them with rich taste. Unsalted butter is generally preferred, as it gives you more control over the overall seasoning of your dish.
Salt and Pepper: Simple Seasoning, Big Impact. A generous seasoning of salt and freshly cracked black pepper is all your scallops truly need. The inherent sweetness of the scallop, combined with the garlic and sage, shines through beautifully with just these basic seasonings. Use good quality sea salt for the best flavor.
Mastering the Sear: Step-by-Step Directions to Perfect Scallops in Just 15 Minutes!
While the actual searing of scallops is incredibly fast – often just 6 minutes from pan to plate – a little thoughtful preparation makes all the difference in achieving that perfect golden crust and tender, juicy interior. Let’s break down each step to ensure your garlic sage seared scallops are absolutely phenomenal.
The Essential First Step: Removing the Muscle. Before you even think about seasoning, inspect your scallops. On one side of each scallop, you’ll find a small, tough, crescent-shaped piece of tissue. This is the adductor muscle, and while it is edible, it has a distinctly different texture than the main body of the scallop. It’s much tougher and takes significantly longer to cook. When aiming for a quick sear of just a minute or two per side, leaving the muscle on will result in an overcooked, chewy muscle and potentially an unevenly cooked scallop. Therefore, the muscles absolutely need to be removed for a perfectly tender and uniformly cooked scallop.
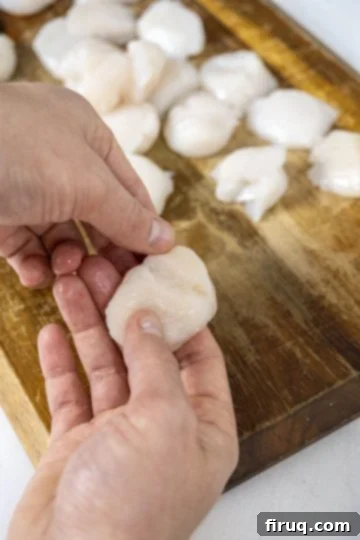
Step 1: Removing the Muscle. Locate the muscle on one of the edges of the scallop. It’s usually a small, tough, off-white piece of tissue that looks distinct from the smooth, translucent body. Gently grasp it between your thumb and forefinger, and it should peel right off with minimal effort. Discard the muscle. After removing the muscles, pat the scallops thoroughly dry with paper towels. This is a critical step for achieving a perfect sear, as any excess moisture will steam the scallops instead of searing them.
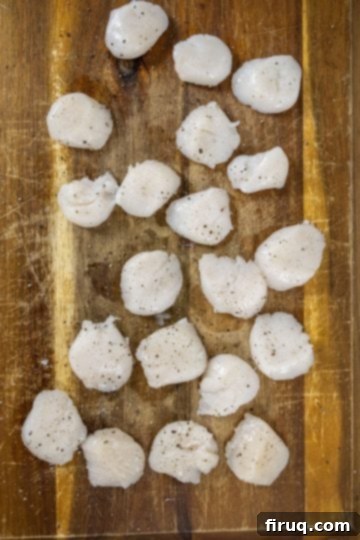
Step 2: Seasoning Your Scallops. Once the muscle is removed and the scallops are completely dry, generously salt and pepper both sides of each scallop. Don’t be shy with the seasoning; this is the primary flavor you’ll be imparting directly to the scallop itself. The simple elegance of salt and pepper allows the natural sweetness of the scallop to shine, beautifully complemented by the rich butter, garlic, and sage that will be added later.
Now that your scallops are prepped, it’s time to get your aromatics ready. Roughly chop or prepare a handful of fresh sage leaves. Crush 2-4 cloves of fresh garlic – you can mince it, but crushing it releases its oils and flavor effectively without risking burning tiny pieces. Have these ingredients, along with a ¼ cup of butter, placed right next to your frying pan, ready to go. Speed is key once the searing begins.
Heat a large, heavy-bottomed frying pan (cast iron works wonderfully here) to medium-high heat. Add the olive oil. The pan is ready when the oil begins to shimmer, indicating it’s hot enough to create that coveted golden crust.
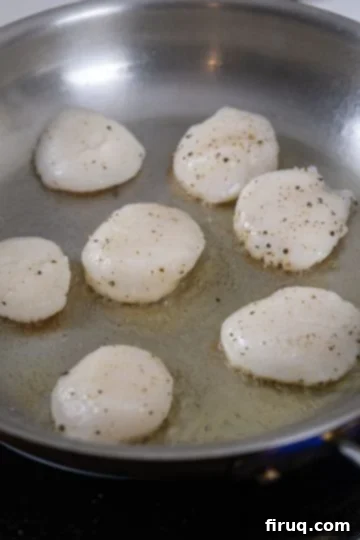
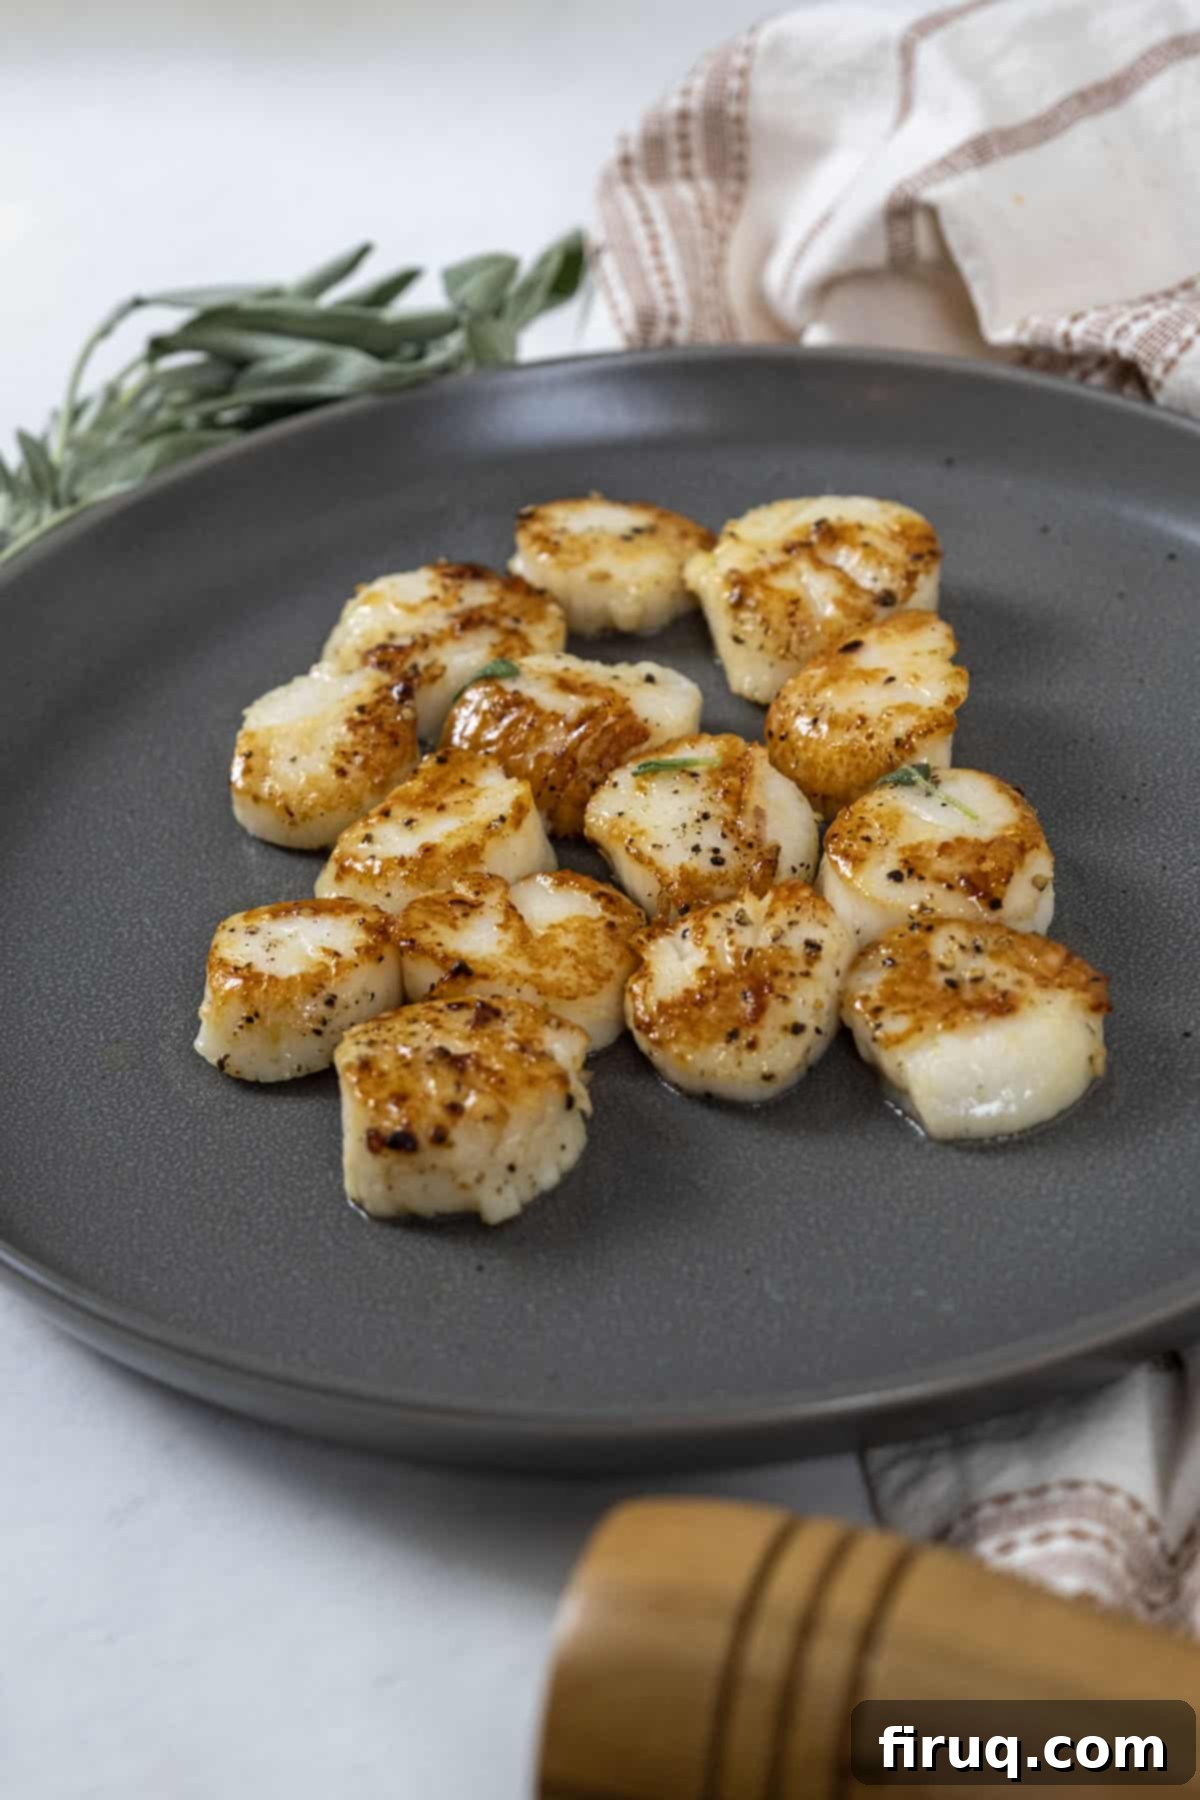
Step 3: The Initial Sear. Once the pan is smoking slightly and the oil is shimmering, it’s go time! Add your scallops one at a time, placing them flat side down directly into the hot oil. Ensure they are spread out evenly, leaving ample space between each one. If your pan is crowded, the temperature will drop, and the scallops will steam instead of sear, preventing that beautiful crust. Work in batches if necessary to avoid overcrowding. Cook for approximately 1-2 minutes on the first side, or until a deep, golden-brown crust forms on the bottom. You should see the edges beginning to turn opaque about one-third of the way up the side of the scallop.
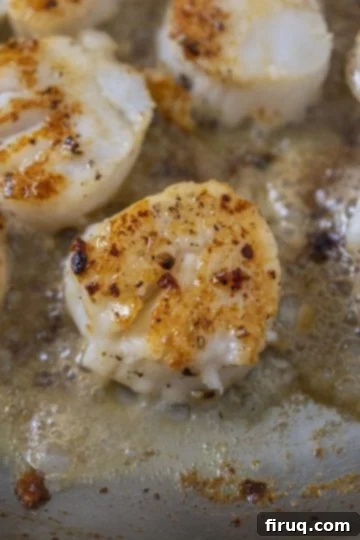
Step 4: Flipping and Second Sear. At the 90-second mark, or as soon as you see that beautiful golden crust, carefully flip the scallops. I find a very small spatula or butter knife works best for this delicate task. You can even use a butter knife and gently hold the top of the scallop with one finger to flip them without damaging the crust or shape. Resist the urge to move or poke them before this point, as it interferes with the searing process. Once flipped, continue to cook on the second side.
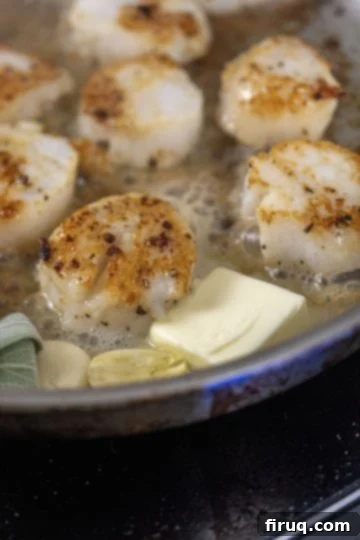
Step 5: Infusing with Flavor. Wait another 60 seconds after flipping. At this 60-second mark, the bottom of the scallop should also have developed a rich, golden brown crust. If it looks a little pale, allow it another 30 seconds, but be vigilant! Overcooked scallops are tough. Once both sides are beautifully seared, immediately add the butter, garlic, and sage to the pan. The residual heat will quickly melt the butter and start infusing the aromatics.
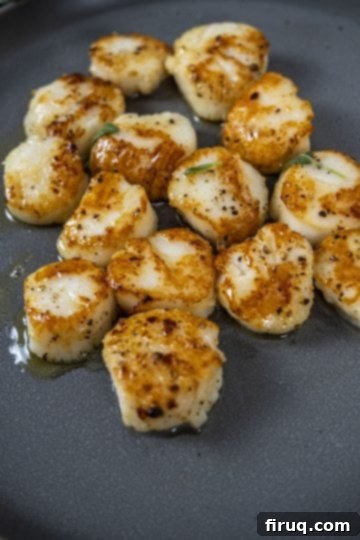
Step 6: The Basting Finish and Immediate Serve. For maximum flavor penetration and moisture, I like to turn the pan slightly on its edge. This pools the butter, allowing it to melt and foam beautifully. While the butter is foaming, it rapidly absorbs the incredible flavors of the garlic and sage. Using a spoon, spoon this fragrant butter generously over the scallops, repeating for about 30 seconds. This basting technique ensures every inch of the scallop is coated in rich, aromatic butter. As soon as the basting is complete, remove the scallops from the pan and arrange them on your serving plate. Drizzle any remaining garlic-sage butter from the pan over them. Scallops should be served immediately to enjoy their delicate texture and full flavor. For an extra touch of brightness, add a squirt of fresh lemon juice on top if that’s your preference. Pair this exquisite dish with a crisp, large glass of sauvignon blanc for a truly memorable meal.
Pro-Tips for Perfectly Seared Scallops Every Time
Achieving restaurant-quality seared scallops at home is surprisingly simple, but a few professional tricks can make all the difference. Keep these expert tips in mind for consistently perfect results:
- DO NOT WALK AWAY FROM THE PAN. This cannot be emphasized enough. Scallops cook incredibly fast, and their delicate texture can go from perfectly tender to tough and rubbery in mere seconds. Unless you have a precise timer set, remain vigilant. Even 30 seconds to 1 minute of extra cooking time can easily destroy this delicate seafood. If you leave them for 2 extra minutes, you might as well throw them away and start over. Watch them closely for the visual cues of a golden crust.
- Pat Them Dry, Dry, Dry! Before seasoning, use paper towels to thoroughly pat down each scallop. Any surface moisture will prevent the scallop from searing and instead cause it to steam, resulting in a less desirable, softer texture without that beautiful golden crust. This is perhaps the most crucial step for a great sear.
- Use a Very Thin Spatula or Fish Turner. Scallops are delicate once cooked. A thin, flexible spatula or a fish-turner allows you to slide easily under them without tearing or breaking the delicate crust. I often even use a butter knife for precision, as it’s thin enough to get under the edge. This makes it easy to turn them without letting the skin stick to the pan or damaging their shape.
- Don’t Overcrowd the Pan. As mentioned in the steps, searing in batches is essential. Overcrowding cools down the pan significantly, reducing the heat needed for a proper sear. This leads to steamed, grey scallops rather than beautifully caramelized ones. Give each scallop its space.
- High Heat is Your Friend (Initially). Begin with a properly preheated pan and medium-high heat. The pan should be hot enough for the olive oil to shimmer before you add the scallops. This initial high heat is what creates that quick, impressive crust.
- Consider a Cast Iron Skillet. Cast iron pans retain heat exceptionally well, providing a consistent high temperature that is ideal for searing. If you have one, this is the perfect opportunity to use it.
Recipe FAQs: Your Questions About Seared Scallops Answered
The true secret to perfectly seared scallops lies in a combination of factors: your undivided attention, proper pan temperature, and not overcrowding the pan. Always ensure your scallops are completely dry before they hit the pan. As long as you watch them closely, waiting for the bottom to develop a beautiful golden-brown crust and start to slightly curl in on the edges, you will turn them at precisely the right time. High heat and minimal handling are key for that irresistible crust.
Absolutely! Scallops are an excellent choice for a healthy diet. They are incredibly high in lean protein, making them a fantastic option for muscle building and satiety. Beyond protein, scallops are a great source of Vitamin B12, zinc, selenium, and omega-3 fatty acids, all of which contribute to overall well-being. They’re also low in calories and fat. This makes them a perfect quick meal or snack after the gym. If you defrost them and meticulously remove the muscle in advance, the scallops can be stored in the fridge for up to 24 hours. Then, a quick salt and pepper, a hot frying pan, and you can have a nutritious and delicious lunch ready in less than 10 minutes!
Unfortunately, no. Scallops are best enjoyed immediately after cooking. Their delicate texture and flavor rapidly diminish upon reheating, often becoming rubbery and losing their sweetness. For the absolute best flavor and texture, they need to be served and eaten right away. If you have leftovers, they might be acceptable cold in a salad, but reheating in a pan or microwave is not recommended.
Yes, you can, but fresh is always preferred. If using frozen scallops, ensure they are fully thawed in the refrigerator overnight. Once thawed, it is CRUCIAL to thoroughly pat them dry with paper towels to remove all excess moisture. Frozen scallops tend to release more water, so drying them meticulously is even more important than with fresh ones to achieve a good sear.
Scallops are fully cooked when they reach an internal temperature of 130-140°F (54-60°C). However, because they cook so quickly, using a thermometer isn’t practical. Instead, rely on visual cues: they should be opaque throughout, with a firm yet tender texture, and a beautiful golden-brown crust on both sides. Avoid cooking beyond this point to prevent toughness.
Delicious Pairings: What to Serve with Your Garlic Sage Seared Scallops
These exquisite garlic sage seared scallops are incredibly versatile and can be the highlight of any meal, whether as a sophisticated appetizer or a luxurious main course. Their rich flavor and delicate texture pair beautifully with a variety of sides, making them perfect for almost any occasion.
For celebratory meals, especially during the holidays, these are a star dish for the Feast of Seven Fishes. They make an impressive appetizer, setting a refined tone for the rest of your feast. As a main course, serve them simply over fluffy rice or alongside crisp asparagus. To elevate the experience even further, consider drizzling a creamy hollandaise sauce over blanched asparagus, then topping it with these perfectly seared garlic sage scallops – a truly indulgent and complete meal!
Beyond traditional pairings, scallops can also be served with a decadent mushroom truffle risotto, where their sweet notes beautifully complement the earthy richness of the rice. For a lighter, healthier option, plate them on the side of some sautéed Tuscan Kale or a fresh, vibrant arugula salad with a light vinaigrette. They are particularly wonderful as an appetizer, allowing you to share a few scallops with friends or family right before the main dinner, sparking conversation and delighting palates.
No matter how you choose to serve them, these scallops are guaranteed to impress. And of course, always remember to leave some room for a delightful dessert like our crisp and citrusy Cranberry Orange Shortbread Cookies to round off your meal!
Watch & Learn: Garlic Sage Seared Scallops Video Recipe
Explore More Fantastic Seafood Recipes
If you’ve enjoyed the simplicity and deliciousness of these seared scallops, you’re in for a treat! Our collection of seafood recipes is designed to bring the best of the ocean to your home kitchen, with easy-to-follow instructions and incredible flavors. Dive into these other favorites:
- Steamed Mussels in White Wine
- Italian Stuffed Baked Clams
- The Best Homemade Shrimp Cocktail
- Shrimp Scampi Without Wine
We absolutely love hearing from you! Please leave a comment and a star rating below in the recipe card to let us know what you think of our recipes. Your feedback is invaluable. Feel free to tag us on Instagram @vindelgiudice and share your culinary creations!
📖 Recipe
Garlic Sage Seared Scallops
Vincent DelGiudiceEquipment
- 1 Large Frying Pan (preferably cast iron)
Ingredients
- 1 dozen large sea scallops, muscles removed and patted dry
- 2 tablespoons high-heat olive oil or other neutral oil
- ¼ cup unsalted butter
- 1 handful fresh sage leaves, roughly chopped
- 4 cloves garlic, crushed or thinly sliced
- sea salt and freshly ground black pepper, to taste
- Optional: Lemon wedges for serving
Instructions
- Prepare Scallops: Begin by thoroughly patting your scallops dry with paper towels. Locate and remove the small, tough adductor muscle found on the side of each scallop; it’s typically a bit whiter and should peel off easily. Discard the muscle. Generously season all sides of the prepared scallops with sea salt and freshly ground black pepper.
- Sear the Scallops: Heat the olive oil in a large, heavy-bottomed frying pan (preferably cast iron) over medium-high heat until it shimmers. Carefully place the seasoned scallops into the hot pan, ensuring they are spread out evenly in a single layer without overcrowding. If necessary, cook in two batches to maintain pan temperature. Sear for about 90 seconds, or until a beautiful deep golden-brown crust forms on the bottom. Carefully flip each scallop using a small spatula or butter knife. Sear on the opposite side for another 60-90 seconds, or until golden brown.
- Baste with Flavor: Once both sides are seared, immediately add the ¼ cup of butter, fresh sage leaves, and crushed garlic to the pan. Slightly tilt the pan to pool the melting butter. As the butter foams and absorbs the aromatics, use a spoon to continuously baste the scallops, spooning the fragrant butter over them for about 1 minute to infuse them with rich flavor.
- Serve Immediately: Remove the perfectly seared scallops from the pan and arrange them on serving plates. Drizzle any remaining garlic-sage butter from the pan over the scallops. Serve immediately, perhaps with a squeeze of fresh lemon juice, and enjoy!
Notes
-
- DO NOT WALK AWAY FROM THE PAN. Unless you have a timer on. Any extra cooking time can easily destroy this delicate fish. 2 extra minutes and you might as well throw them away.
- Use a very thin spatula or fish-turner. I even use a butter knife. The scallops are delicate and this makes it easy to turn them without letting the skin stick to the pan.
- Pat Scallops DRY: This is arguably the most important step for a good sear. Moisture leads to steaming, not searing, resulting in a rubbery texture and no golden crust.
- Don’t Overcrowd the Pan: Give each scallop space. Cook in batches if necessary to maintain high pan temperature for proper searing.
