Flaky Greek Yogurt Biscuits: Your Ultimate Buttermilk Substitute for Dreamy Homemade Goodness
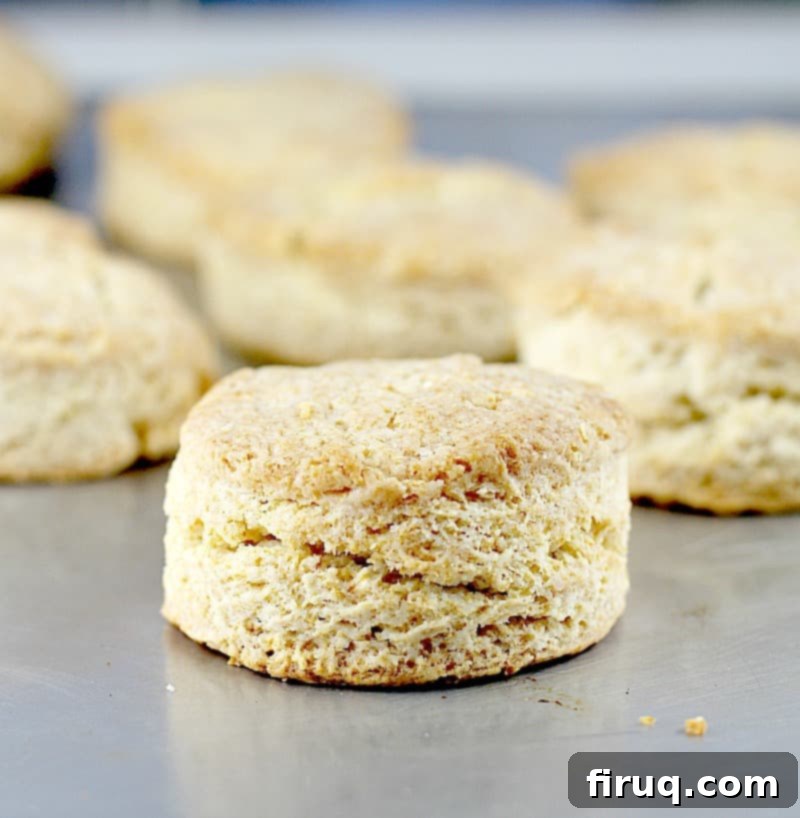
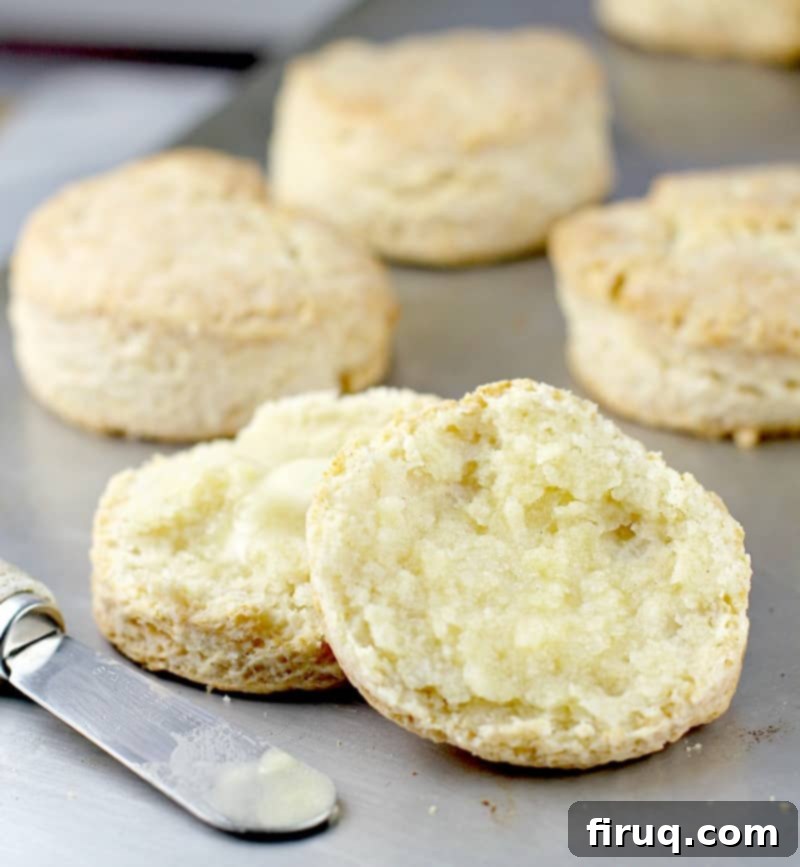
Buttery, flaky, and wonderfully light, these biscuits are a true revelation, made with creamy Greek yogurt as a brilliant substitute for traditional buttermilk. When that craving for warm, fresh biscuits strikes, but your fridge is missing buttermilk, these Flaky Yogurt Biscuits come to the rescue, delivering everything you expect from a quick and easy homemade biscuit. Get ready to discover your new go-to recipe for perfect, tender biscuits every time.
Have you ever found yourself with an undeniable hankering for a batch of warm, fluffy biscuits, only to open your refrigerator and realize the buttermilk carton is empty? It’s a common culinary dilemma that can feel like a road block to biscuit bliss. Many home bakers resort to the classic trick of curdling regular milk with lemon juice or vinegar. While this method can technically work in a pinch, it often leaves a subtle, unwanted acidic aftertaste that just doesn’t quite hit the mark. The unique tang and richness of true buttermilk are hard to replicate perfectly. That’s precisely why I embarked on a mission to find a better, more authentic-tasting alternative, and the answer was surprisingly simple: Greek yogurt. The reward was a batch of incredibly flaky, utterly delicious biscuits, so good that no one would ever suspect they weren’t made with buttermilk.


Why Greek Yogurt is Your Secret Weapon for Amazing Biscuits
The beauty of using Greek yogurt in this biscuit recipe lies in its unique properties. It brings both the essential acidity and a creamy richness that closely mimics buttermilk. The acidity in Greek yogurt reacts beautifully with the baking soda and baking powder, creating a powerful leavening action that results in incredibly high-rising, airy biscuits. Unlike the slightly watery consistency of milk curdled with lemon or vinegar, Greek yogurt’s thicker texture contributes to a more tender and moist crumb, preventing the biscuits from becoming dry or dense. This substitution isn’t just a workaround; it’s an enhancement, ensuring your biscuits are not only light and fluffy but also boast a delicate tang and a truly satisfying texture. Plus, plain Greek yogurt is a pantry staple for many, making these biscuits accessible on a moment’s notice.
My Unwavering Love for the Perfect Biscuit
Oh, how I adore a truly magnificent biscuit! Biscuits, especially handmade buttermilk biscuits from scratch, hold a special place in my culinary heart. They are, without a doubt, on the very short list of foods I simply cannot say no to. Let’s take a quick look at my personal “must-have” list, in no particular order, for context:
- Pizza. From classic pepperoni to gourmet vegetarian, I’m in!
- Popovers, biscuits, and any form of freshly baked bread. The aroma alone is enough to reel me in.
- Deliciously stuffed bites like cheesy jalapenos, savory mushrooms, and delicate tartlets.
- Creamy Boursin cheese (or a fantastic homemade copycat!).
- Rich, creamy pasta dishes, especially a decadent Macaroni and Cheese.
These are the culinary delights that, regardless of where I am, when it is, or how full I might feel, I will absolutely indulge if they are available. I’m that person at a church potluck who will sample every single mac and cheese, even if there are ten versions, each lovingly prepared by a different grandmother. And the same fervent enthusiasm applies to biscuits. My commitment to enjoying a good biscuit runs deep, which is why finding a reliable substitute for buttermilk was so important.
The Birth of a Brilliant Biscuit Recipe
So, my point is this: while I still hold a special reverence for classic Southern biscuits made with buttermilk, the reality is that buttermilk isn’t always readily available in my fridge. Or, if it is, I often embark on the “Oh-I’ve-got-some-oh-wait-no-I-don’t” emotional rollercoaster, discovering it’s past its prime. However, I almost always have a small container of plain Greek yogurt on hand. And when you absolutely *need* a biscuit, you simply *must* have a biscuit. Thus, out of necessity and a desire for consistent biscuit satisfaction, this ingenious recipe for Greek Yogurt Biscuits was born.
This recipe diverges slightly from my traditional Southern Buttermilk Biscuit recipe in a couple of key ways. Beyond the obvious substitution of yogurt for buttermilk, we also incorporate a touch more leavening from baking soda. This extra boost works synergistically with the yogurt’s acidity to doubly ensure these biscuits achieve an impressive, lofty rise. Every other aspect of this recipe adheres to standard, time-tested biscuit-making science and techniques, ensuring the quintessential texture and flavor. The result is consistently flaky, beautifully crispy biscuits with that melt-in-your-mouth soft, buttery inside. These aren’t just good biscuits; they’re GREAT biscuits, offering fantastic flavor and serving as a perfect, reliable alternative for those moments when buttermilk simply isn’t an option.
Mastering the Art of Flaky Yogurt Biscuits: Pro Tips for Success
Creating truly spectacular flaky biscuits involves a few crucial techniques that ensure those coveted layers. First and foremost, cold butter is non-negotiable. The tiny pockets of cold butter melt during baking, releasing steam that pushes apart the dough layers, creating flakiness. Dicing the butter and chilling it in the freezer for a few minutes before adding it to the flour mixture is a brilliant trick. When you incorporate the butter, whether by hand or with a food processor, aim for pea-sized pieces. This ensures that the butter is evenly distributed but still distinct, rather than fully blended into the flour.
Secondly, do not overwork the dough. Overmixing develops gluten, which leads to tough, chewy biscuits instead of tender, flaky ones. The dough for these yogurt biscuits will initially appear quite crumbly; this is exactly what you want. When forming the disk, handle it gently and quickly. For extra flakiness, try a simple fold-and-press technique: after forming your initial disk, fold it in half, gently press it down, and repeat this process once or twice. Each fold creates additional layers that will separate beautifully in the oven.
Finally, when cutting your biscuits, use a sharp biscuit cutter and press straight down without twisting. Twisting seals the edges of the biscuit, preventing them from rising to their full potential. Place the cut biscuits relatively close together on the baking sheet; this helps them rise taller as they support each other. The high oven temperature of 450F is also critical, ensuring a quick, powerful rise and a golden-brown crust while keeping the interior moist and tender.

Flaky Yogurt Biscuits
Print
Pin
Rate
Ingredients
- ½ cup cold unsalted butter diced
- 2 cups all-purpose flour
- 1 Tbs baking powder
- ½ tsp baking soda
- 1 tsp kosher salt
- 1 5.3 oz container plain Greek yogurt, undrained
- 2 Tbs unsalted butter melted
Instructions
-
Preheat your oven to 450°F (232°C). This high temperature is crucial for a quick rise and golden crust.
-
Place the diced cold butter into the freezer for at least 5 minutes. Keeping the butter extremely cold is key to achieving those desirable flaky layers.
-
In the bowl of a food processor, combine the all-purpose flour, baking powder, baking soda, and kosher salt. Pulse a couple of times to ensure these dry ingredients are well combined. Add the chilled diced butter to the flour mixture. Pulse or process until the butter is thoroughly crumbled into the flour, resembling coarse meal with some pea-sized pieces remaining. Be careful not to over-process.
-
Add the plain Greek yogurt to the food processor. Process for approximately 10 seconds until the mixture just starts to come together into a shaggy dough. Do not overmix. Transfer the dough to a cool, clean surface, such as a stone cutting board or a lightly floured countertop. Gently bring the mixture together and form it into a disk about 1 to 1-1/2 inches thick. It will be quite crumbly at this stage, which is perfectly normal and desired.
-
Using a 2-inch biscuit cutter, cut out 10 biscuits. Press straight down and lift; avoid twisting the cutter, as this can seal the edges and prevent rising. Gather any scraps, gently re-form, and cut additional biscuits until all dough is used. Arrange the biscuits on an ungreased baking sheet. Bake for 10 minutes at 450°F. After 10 minutes, remove from the oven, brush generously with the melted unsalted butter, and return to the oven for another 5 minutes, or until the tops are golden brown and beautiful. Yields: 10 delicious biscuits.
Notes
Nutrition
~✿♥✿~
Serving Suggestions and Delicious Variations
Once your Flaky Yogurt Biscuits emerge from the oven, golden and fragrant, the possibilities for serving are endless. For a classic breakfast or brunch, enjoy them warm with a dollop of butter, your favorite fruit jam, honey, or maple syrup. They are also absolutely delightful split and served with sausage gravy for a hearty Southern meal. Consider pairing them with scrambled eggs, bacon, or a fresh fruit salad for a complete and satisfying spread. Beyond breakfast, these versatile biscuits can elevate any meal. Serve them alongside a warm bowl of chili, stew, or soup for a comforting touch.
Feeling adventurous? Try some delightful variations:
- Cheesy Biscuits: Fold in ½ cup of shredded cheddar or Gruyere cheese with the dry ingredients for a savory twist.
- Herbed Biscuits: Add 1-2 tablespoons of finely chopped fresh herbs like chives, rosemary, or thyme to the flour mixture.
- Sweet Biscuits: For a slightly sweeter treat, add 1-2 tablespoons of granulated sugar and a teaspoon of lemon zest to the dry ingredients. These are perfect with berries and whipped cream.
- Garlic Parmesan: Mix in a teaspoon of garlic powder and ¼ cup of grated Parmesan cheese for a delightful side to Italian meals.
Storage and Reheating for Optimal Freshness
While these biscuits are undoubtedly best enjoyed fresh from the oven, any leftovers can be stored to maintain their deliciousness. Allow them to cool completely before placing them in an airtight container at room temperature for up to 2-3 days. For longer storage, freeze cooled biscuits in a freezer-safe bag for up to 1 month. To reheat, wrap frozen biscuits loosely in foil and warm in a 300°F (150°C) oven for about 15-20 minutes, or until heated through. If reheating from room temperature, a few minutes in a toaster oven or microwave (though the microwave might soften their crisp exterior) will do the trick.

So, there you have it, folks! Flaky Yogurt Biscuits are your perfect solution for when that biscuit craving hits, and you just need a delicious, homemade biscuit without the buttermilk. This recipe is simple, reliable, and delivers results that will make you a believer in the power of Greek yogurt in baking. Enjoy the buttery, tender, and incredibly flaky goodness that awaits!
