Irresistible Sweetened Condensed Milk Marshmallows: A Corn Syrup-Free Delight
Prepare to elevate your homemade marshmallow game with these incredibly rich-tasting Sweetened Condensed Milk marshmallows. Unlike traditional recipes that often rely on corn syrup, this unique variation delivers a beautifully creamy color and a distinct, subtle caramel flavor that will enchant your taste buds. Get ready for a dessert experience that is both familiar and wonderfully new.
Did you know it’s possible to craft delectable marshmallows using sweetened condensed milk? It was a revelation for me too! After successfully making classic marshmallows for the first time, my culinary curiosity was piqued. I began to ponder how I could enhance them further, seeking a way to introduce new depth and character to the beloved fluffy treat.
Most marshmallow recipes traditionally call for corn syrup, granulated sugar, and gelatin. My quest for an alternative to corn syrup led me to consider sweetened condensed milk. Its consistency is remarkably similar to corn syrup, making it an ideal candidate, and its inherent sweetness and rich milky flavor promised an exciting twist. The thought of infusing that luscious sweetness into marshmallows was simply too enticing to ignore.

A quick search online for “sweetened condensed milk marshmallows” yielded surprisingly few existing recipes. This discovery fueled my experimental spirit, and I embarked on a journey to develop my own version. Fortunately, with a few tweaks and some trial and error, the results were overwhelmingly positive! These marshmallows turned out (mostly) perfect, offering a rich flavor and satisfying texture that set them apart.
Why Choose Sweetened Condensed Milk for Your Marshmallows?
While there is limited scientific evidence to suggest that corn syrup is inherently harmful when consumed in moderation, the primary reason to make these sweetened condensed milk marshmallows isn’t about avoiding an ingredient. It’s about embracing an entirely new and superior flavor profile! These marshmallows boast a uniquely rich, caramel-like flavor that is simply unparalleled by their corn syrup counterparts. Furthermore, they develop a denser yet still wonderfully soft and fluffy texture, making them a truly luxurious treat. If you’re looking for a homemade marshmallow experience that goes beyond the ordinary, the distinct taste and mouthfeel of sweetened condensed milk marshmallows are the true motivators.
Is Corn Syrup Truly “Bad” for You? Understanding the Nuances.
It’s a common misconception that all corn syrup is “bad.” Many individuals avoid it in home cooking and packaged foods due to this belief. However, the reality is more intricate.
When you hear negative health discussions surrounding “corn syrup,” the term usually refers to high-fructose corn syrup (HFCS), which is a common ingredient in many commercially processed foods. This is distinct from the regular corn syrup you purchase in a bottle at the grocery store for baking and confectionery. The corn syrup available for home use is not high-fructose.
Furthermore, while high-fructose corn syrup has been linked to various health concerns, such as increased risks of obesity and diabetes, the scientific evidence remains inconclusive and often debated. Many studies suggest that the body processes HFCS similarly to other types of sugar, and that overall sugar intake, regardless of its source, is the more significant factor in health outcomes.
Ultimately, consuming excessive amounts of any type of sugar can elevate health risks. There’s limited conclusive evidence to suggest that corn syrup, in any form, behaves fundamentally differently in the body compared to other sugars when consumed in comparable quantities. When making marshmallows, the choice to use sweetened condensed milk over corn syrup is more about achieving a unique flavor and texture profile rather than a definitive health advantage.
Crafting Sweetened Condensed Milk Marshmallows: Step-by-Step
This delightful spin-off of homemade marshmallows begins in a similar fashion to many classic recipes. The fundamental difference lies in the substitution of corn syrup with an equal measure of sweetened condensed milk. Beyond this key ingredient swap, the method remains largely the same, making it accessible for anyone familiar with basic marshmallow making.
The cooking process involves heating the sugar mixture while diligently monitoring its temperature with an instant-read thermometer. This precision is vital for achieving the correct consistency.
One notable difference you’ll observe with this recipe is that the mixture boils up significantly frothier compared to a corn syrup-based recipe. This increased frothing is primarily due to the protein content present in the milk. You can clearly see the difference in liquid heights in the comparison of the two images above. Had I used a smaller pot than my 1.9 quart/1.7 liter one, I would have faced a considerable mess! Therefore, I cannot stress enough: **DO NOT use a pot smaller than this capacity** if you attempt this recipe!
During my initial experimentation, I encountered a slight issue with scorching the sugar mixture, a concern I had anticipated. Approximately 30 seconds after the thermometer registered 240°F (in hindsight, I should have removed it from the heat a little sooner), I detected a faint burning aroma. Upon pouring, the very bottom of the saucepan indeed showed a black layer. However, by carefully avoiding pouring the burnt section into the stand mixer, the final product miraculously did not exhibit any burnt taste or appearance. This highlights the importance of immediate removal from heat once the target temperature is reached.
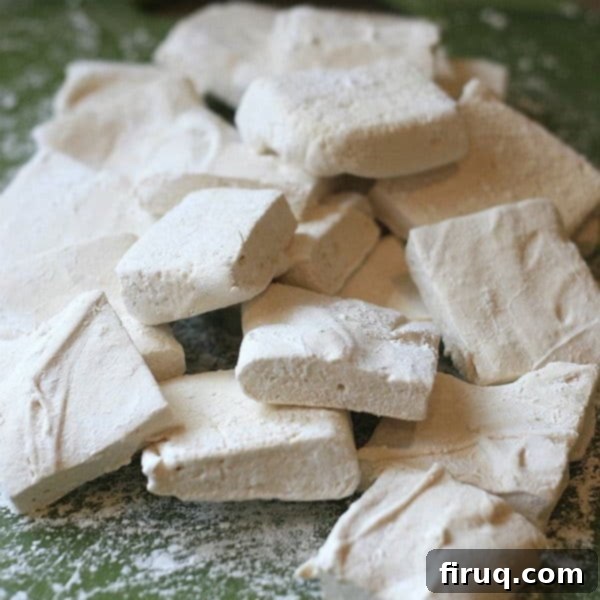
After being whipped, the marshmallow mixture takes on a distinct creamy, slightly beige hue, a natural result of the color of the sweetened condensed milk. I also noticed that it didn’t achieve the same stiffness as a corn syrup-based marshmallow. I’m curious if an extended whipping time might have remedied this, or if it’s simply a characteristic of the sweetened condensed milk base. Nevertheless, its soft and creamy texture was incredibly appealing.
The finished marshmallows were truly exceptional, featuring a wonderful, subtly milky, and pronounced caramel flavor. Again, their color was noticeably creamier than that of standard white marshmallows. They presented a slightly flatter and denser profile compared to regular marshmallows, but this characteristic actually contributed to their unique charm and chewiness. Perhaps a longer whipping duration could yield a lighter, airier result, but their current form was utterly delightful. They proved to be especially exquisite when coated in chocolate.
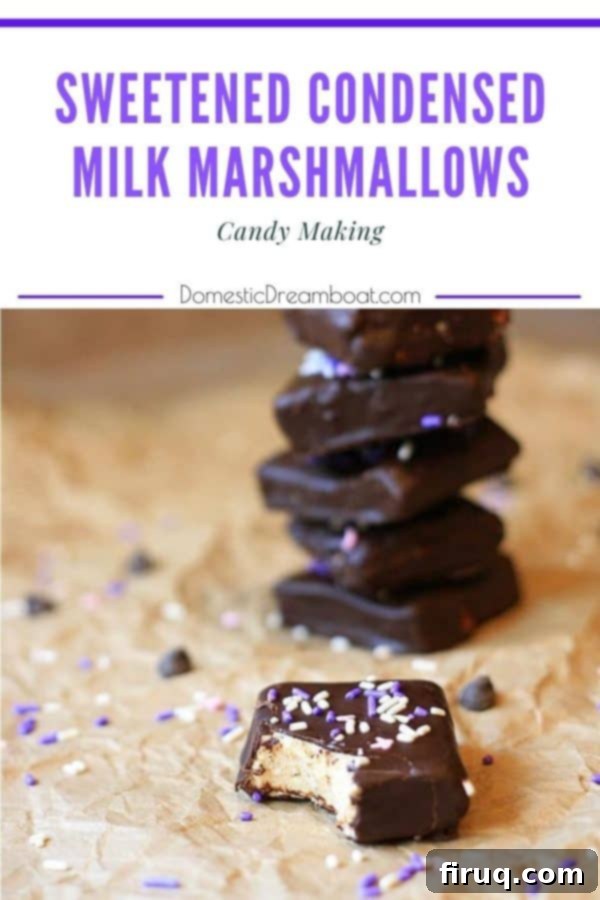
To coat these delightful treats in chocolate, simply melt your preferred type of chocolate (dark, milk, or white) with a small amount of coconut oil or shortening. This can be done conveniently in a double boiler or a heat-proof bowl placed over a pot of gently simmering water. Once the chocolate is smooth and melted, dip each marshmallow into the mixture, allowing any excess to drip off, and then place them on a baking sheet lined with wax paper. For an added festive touch or visual appeal, sprinkle them with your favorite decorations while the chocolate is still wet.
Overall, these sweetened condensed milk marshmallows provided a wonderful and refreshing departure from standard marshmallows. Their richer, deeper flavor profile makes them a standout treat. However, I wouldn’t consider them a complete replacement for all marshmallow needs. For certain applications where a perfectly white, super-airy marshmallow is desired, a traditional recipe might still be preferred. Nevertheless, for a truly decadent and unique experience, this recipe is a must-try.
I can confidently say that these marshmallows would be absolutely divine melting into a hot cup of hot chocolate. Their creamy texture and caramel notes would create an unparalleled beverage experience. They are, without a doubt, a new favorite addition to my treat repertoire!
Craving More Homemade Marshmallow Recipes?
If you’ve enjoyed making these unique marshmallows, you might be interested in exploring other delightful homemade marshmallow creations. Mastering homemade marshmallows opens up a world of possibilities for unique desserts and treats.
Sweetened Condensed Milk Marshmallow: Important Nutrition Notes
When considering these delectable sweetened condensed milk marshmallows, it’s important to be aware of their nutritional characteristics and dietary considerations. The most significant distinction between this recipe and traditional homemade marshmallows is that these contain dairy. This means they are not suitable for individuals with a milk allergy or intolerance.
On the positive side, these marshmallows are naturally gluten-free, making them a safe and enjoyable treat for those following a gluten-free diet. However, it’s crucial to note that neither this recipe nor standard homemade marshmallows are suitable for anyone adhering to a vegan diet, as gelatin, a key ingredient for setting, is derived from animal products. Always check ingredient labels if catering to specific dietary needs.
Sweetened Condensed Milk Marshmallows

Save
Saved!
Print Recipe
Pin Recipe
36 pieces
Candy
Universal
124
Gluten Free, Nut Free
15 minutes
15 minutes
1 hour
1 hour 30 minutes
Prevent your screen from going dark
Equipment
Method
Nutrition
Equipment
-
Instant-Read Thermometer or candy thermometer
-
Medium saucepan (at least 1.9 quart/1.7 liter)
-
9×13″ Baking Pan
-
Stand Mixer
Ingredients
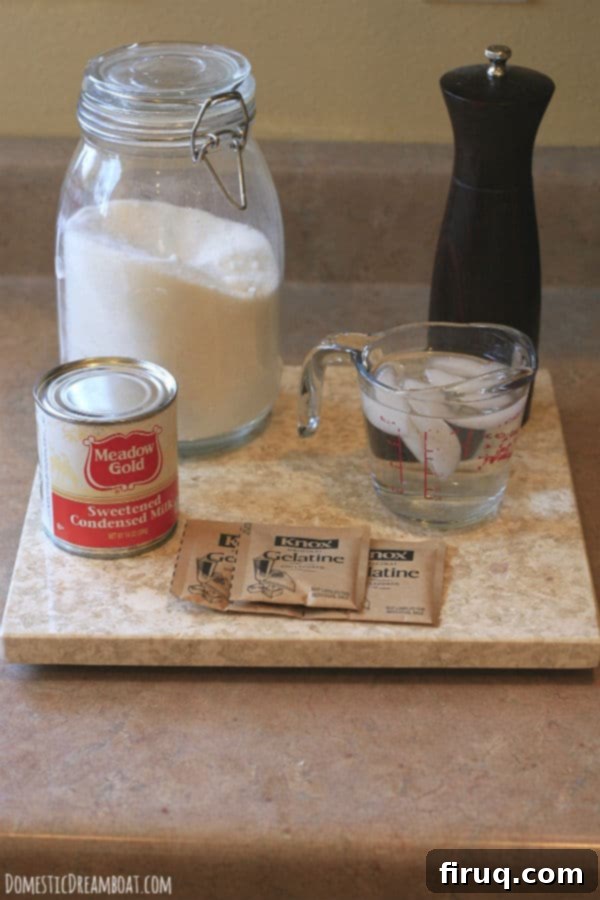
- 2 1/2 Tablespoons unflavored gelatin (3 packets)
- 1 cup ice cold water divided
- 12 ounces granulated sugar about 1.5 cups
- 1 cup sweetened condensed milk
- 1 teaspoon vanilla extract
- Canola oil spray
- 1/4 cup powdered sugar
- 1/4 cup cornstarch
- 12 ounces chocolate dark or milk
- 1 Tablespoon coconut oil or shortening
Instructions
-
Prepare a 9×13″ baking pan as follows: lightly spray the interior of the pan with canola oil. In a small bowl, thoroughly mix 1/4 cup powdered sugar and 1/4 cup cornstarch. Pour this mixture into the prepared baking pan, then gently tilt and rotate the pan to ensure it’s evenly coated with the cornstarch mixture. Carefully pour any excess mixture into a separate dish and set aside for later use (do not discard, as it will be needed again).
-
In the bowl of your stand mixer, sprinkle 2 1/2 Tablespoons (21 g) unflavored gelatin evenly over 1/2 cup of the ice-cold water. Allow this mixture to sit undisturbed for about 5-10 minutes, or until the gelatin has “bloomed” and softened, absorbing the water to form a thick paste. This step is crucial for the gelatin to properly dissolve and set the marshmallows.
-
In a medium saucepan (ensure it has a capacity of at least 1.9 quarts or 1.7 liters to prevent overflow from frothing), combine 12 ounces (340.2 g) granulated sugar, 1 cup sweetened condensed milk, and the remaining 1/2 cup cold water. Place the saucepan over medium-high heat, cover it, and allow it to cook for 3-4 minutes. This initial covered period helps dissolve the sugar. After this time, remove the lid and clip an instant-read thermometer to the side of the pan, making sure it doesn’t touch the bottom. Continue cooking, stirring occasionally, until the mixture reaches a precise temperature of 240°F (115°C). The mixture will boil vigorously and froth significantly before reaching this temperature. Be attentive to prevent burning.
-
Once the sugar mixture reaches exactly 240°F (115°C), **immediately** remove the saucepan from the heat. This quick action is crucial as the sugar can scorch if left on the hot burner for even a few extra seconds. Turn your stand mixer on its lowest speed. Carefully and slowly pour the hot sugar mixture down the side of the mixer bowl into the bloomed gelatin. This slow pour prevents the hot syrup from splashing and ensures even incorporation. Once all the syrup has been added, increase the mixer speed to high. Continue whipping the mixture for about 10-15 minutes, or until the marshmallow transforms into a thick, glossy, white (or creamy beige, in this case) consistency and cools to a lukewarm temperature. Finally, add 1 teaspoon vanilla extract and continue mixing for one more minute to fully incorporate the flavor.
-
Working quickly, pour the whipped marshmallow mixture into your prepared baking pan. Use an oiled spatula to spread it evenly into all corners of the pan. Lightly sprinkle the top surface of the marshmallow with a portion of the leftover cornstarch mixture saved from step 1, reserving some for later. Leave the pan uncovered at room temperature for a minimum of 4 hours, or ideally overnight, to allow the marshmallows to fully set and firm up.
-
Once the marshmallow is completely set and firm to the touch, invert it onto a large cutting board lightly dusted with the cornstarch mixture. Grease a sharp knife or cookie cutters with a little oil before cutting into your desired shapes and sizes. After cutting, gently toss each marshmallow piece with the remaining cornstarch mixture to ensure they are fully coated and prevent stickiness. Store in an airtight container at room temperature for up to two weeks.
-
To coat in chocolate: Melt your desired chocolate (dark, milk, or even white chocolate) in a double boiler (or in a heat-proof bowl set over a pot with a small amount of simmering water) along with 1 Tablespoon coconut oil or shortening. The oil/shortening helps to thin the chocolate slightly for a smoother coating and a better snap once set. Dip individual marshmallows into the melted chocolate, shaking off any excess. Place the chocolate-coated marshmallows on a baking sheet lined with wax paper or parchment paper. If desired, decorate immediately with sprinkles or other small candies before the chocolate sets. Allow the chocolate to fully harden at room temperature or in the refrigerator before storing.
Nutrition
Calories: 124kcal
Carbohydrates: 21g
Protein: 2g
Fat: 4g
Saturated Fat: 3g
Cholesterol: 3mg
Sodium: 14mg
Potassium: 59mg
Fiber: 1g
Sugar: 20g
Vitamin A: 23IU
Vitamin C: 1mg
Calcium: 27mg
Iron: 1mg
Tried this recipe?
Please Consider Leaving a Review!

