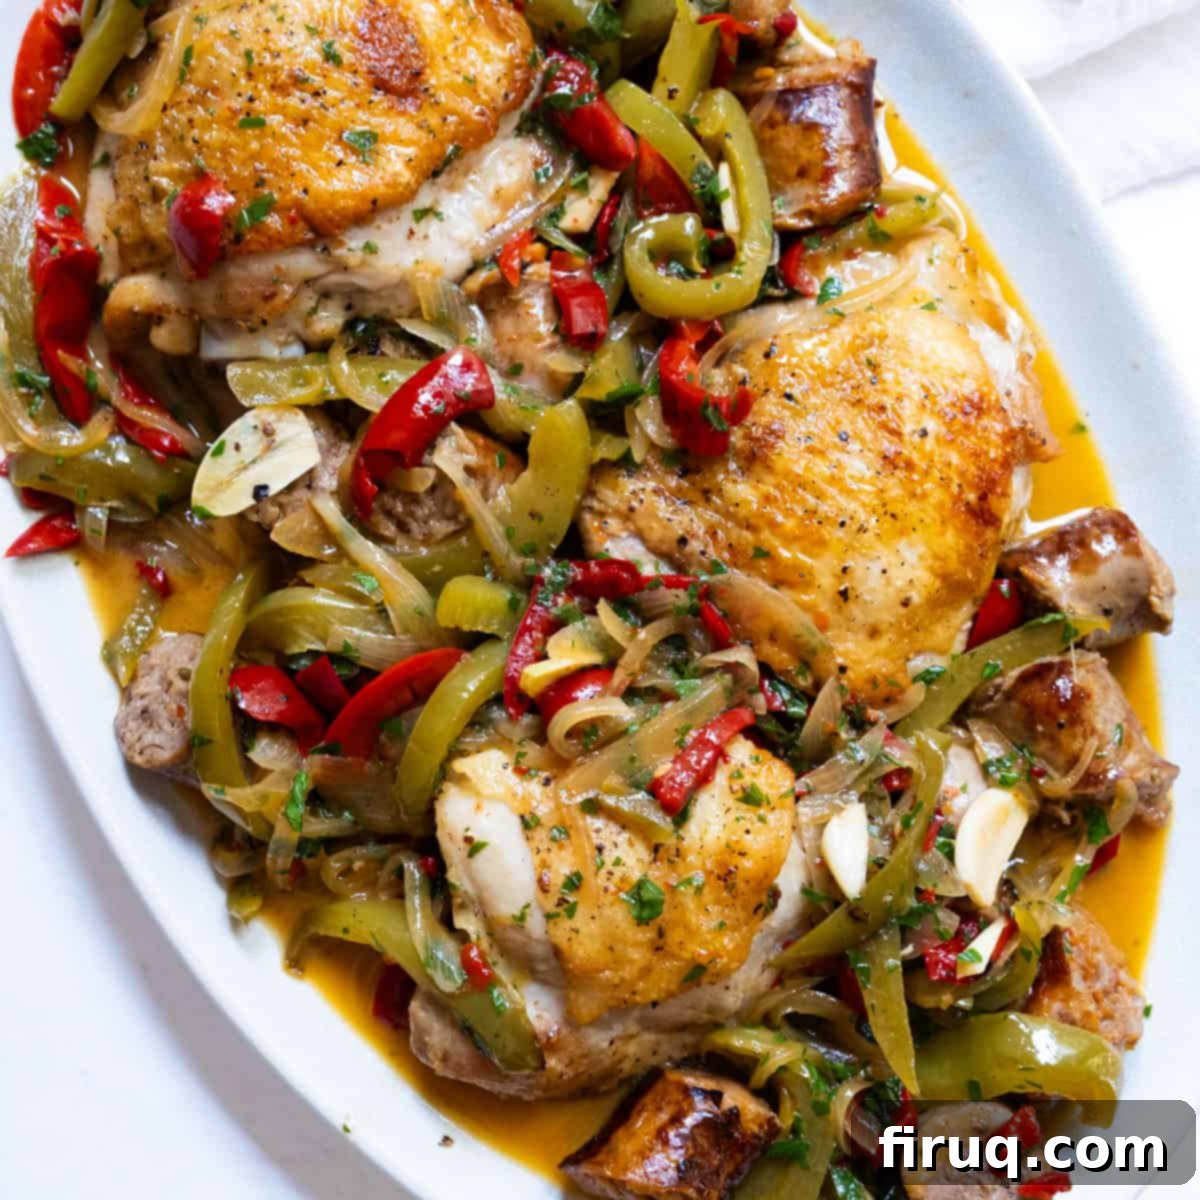
Authentic Chicken Scarpariello: A Sweet, Tangy, and Spicy Italian Classic
Prepare to fall in love with one of the most irresistible Italian-American dishes: Chicken Scarpariello. This vibrant, sweet, and slightly sour chicken and sausage creation is a true culinary masterpiece, celebrated for its bold flavors and comforting appeal. Imagine succulent pieces of bone-in, skin-on chicken and savory Italian sausage, all nestled in a rich, tangy sauce with tender peppers and onions. It’s the kind of meal that demands a generous loaf of crusty Italian bread, perfect for soaking up every last drop of that “liquid gold” sauce. This recipe brings the authentic taste of a classic New York Italian kitchen straight to your home.
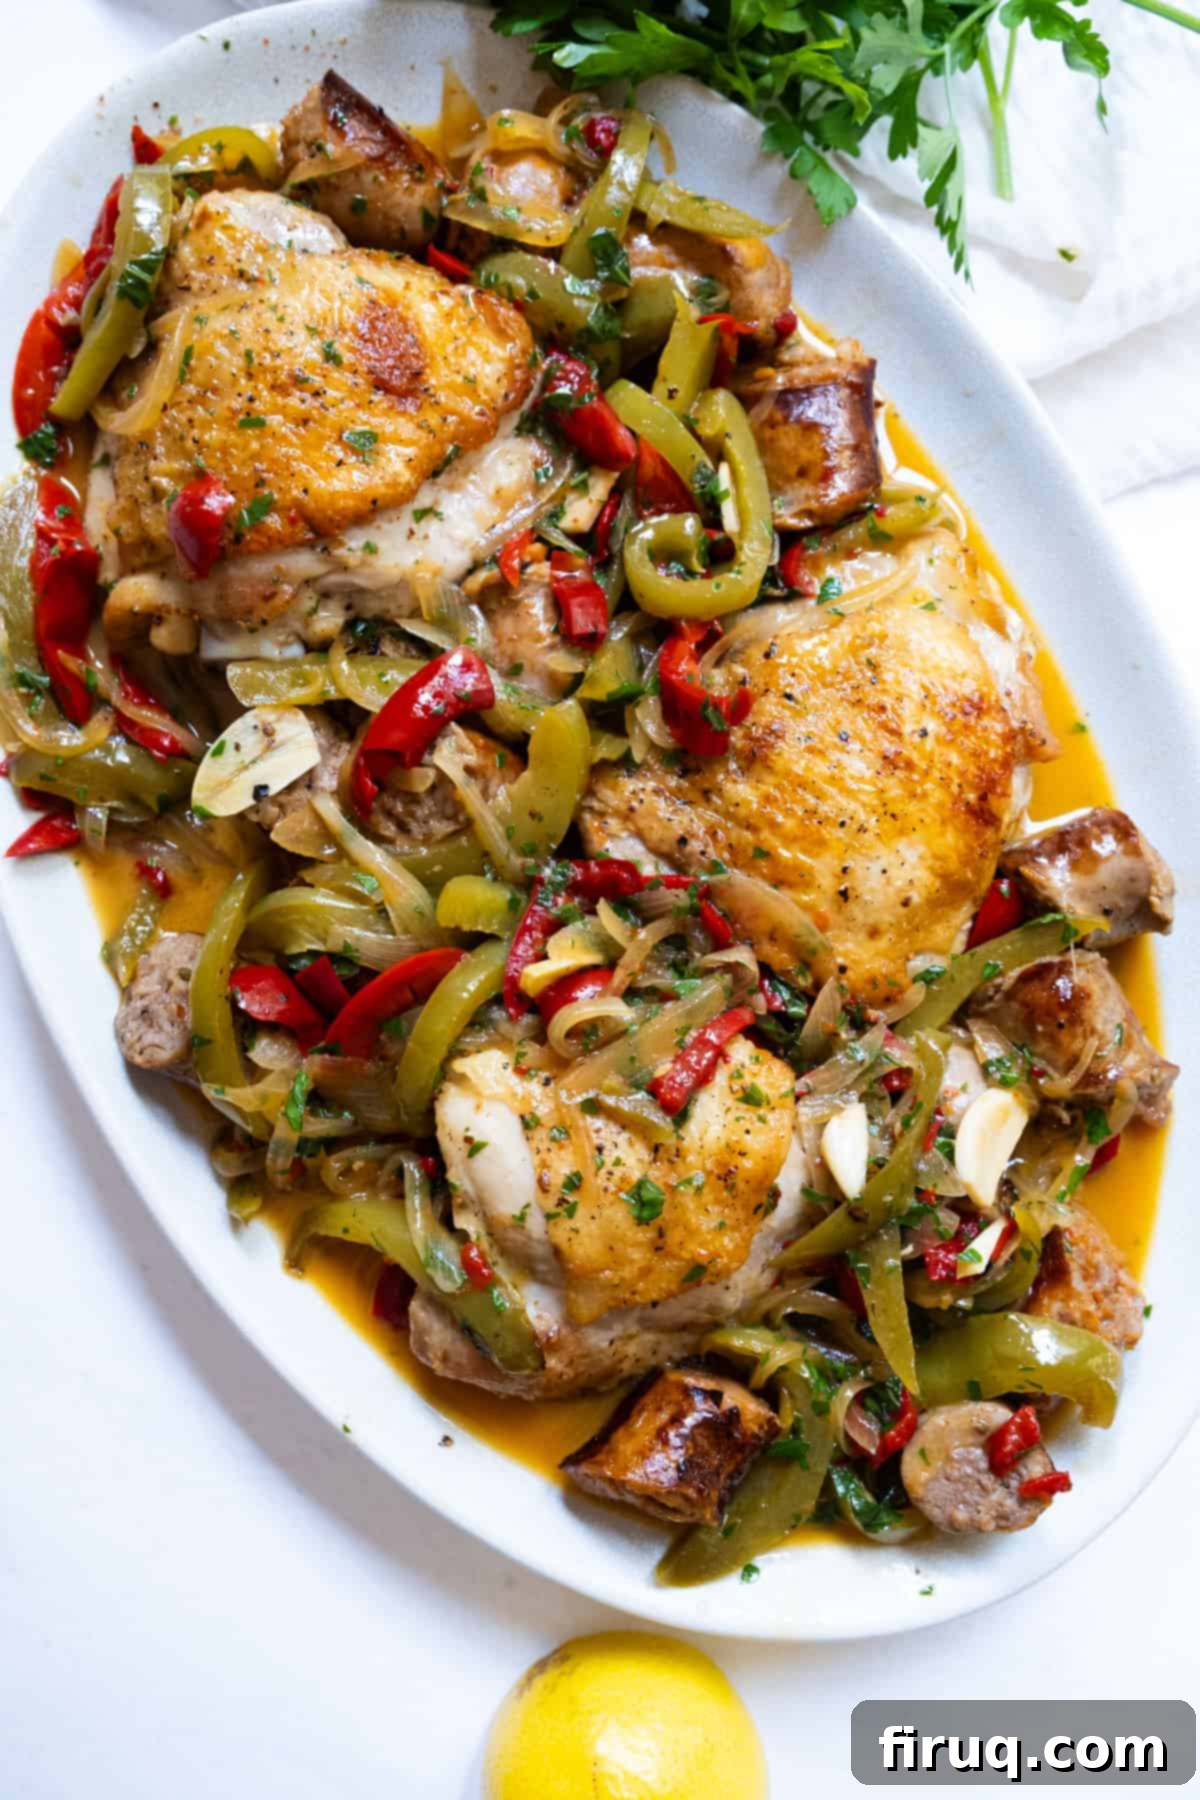
If you savor classic Italian chicken dishes with incredible sauces, you’ll undoubtedly enjoy these other restaurant-style meals as well: Chicken Pizzaiola, Restaurant-Style Chicken Marsala, or Restaurant-Style Chicken Saltimbocca.
What is Chicken Scarpariello? A New York Italian Staple
Chicken Scarpariello, often simply called “Scarpariello,” is a beloved classic in New York Italian-American cuisine. The name “Scarpariello” translates to “shoemaker’s chicken,” with various folklore attempting to explain its origin – some suggesting it refers to the dish being “cobbled together” from available ingredients, much like a shoemaker works with scraps. Regardless of its etymology, this dish is a testament to resourceful and flavorful cooking, combining robust ingredients into a harmonious one-pot meal.
At its heart, Chicken Scarpariello features a delightful medley of tender chicken, savory Italian sausage, and a colorful array of peppers, all brought together in a distinctive sweet and sour sauce. What truly sets it apart is its unique flavor profile, characterized by a vinegar-forward tang that is balanced with subtle sweetness and, depending on your choice of peppers, a delightful spicy kick. Unlike the more overtly spicy Spicy Chicken Saltimbocca, Scarpariello offers a nuanced heat that complements its tangy undertones, reminiscent of the bright acidity found in Chicken Piccata but with added depth from the braised meats and vegetables.
This dish masterfully combines two of my personal favorite elements: the rich, juicy flavor of Italian sausage and the satisfying crunch of perfectly crispy chicken skin. It embodies the essence of comfort food and traditional Italian gatherings, much like a hearty bowl of Escarole and Bean Soup. It’s a dish so profoundly satisfying and flavorful that it often leaves guests begging for the recipe to recreate for their own friends and family. The sauce, truly a “liquid gold,” is an essential component, and serving this meal without a hearty loaf of Italian bread or some Crispy Garlic Parmesan Potatoes to soak it all up would indeed be a culinary sin!
Essential Ingredients & Smart Substitutions
Crafting the perfect Chicken Scarpariello begins with understanding the role each ingredient plays. While this recipe calls for specific components that create its signature flavor, there’s always room for personal preference and smart substitutions to make it your own.
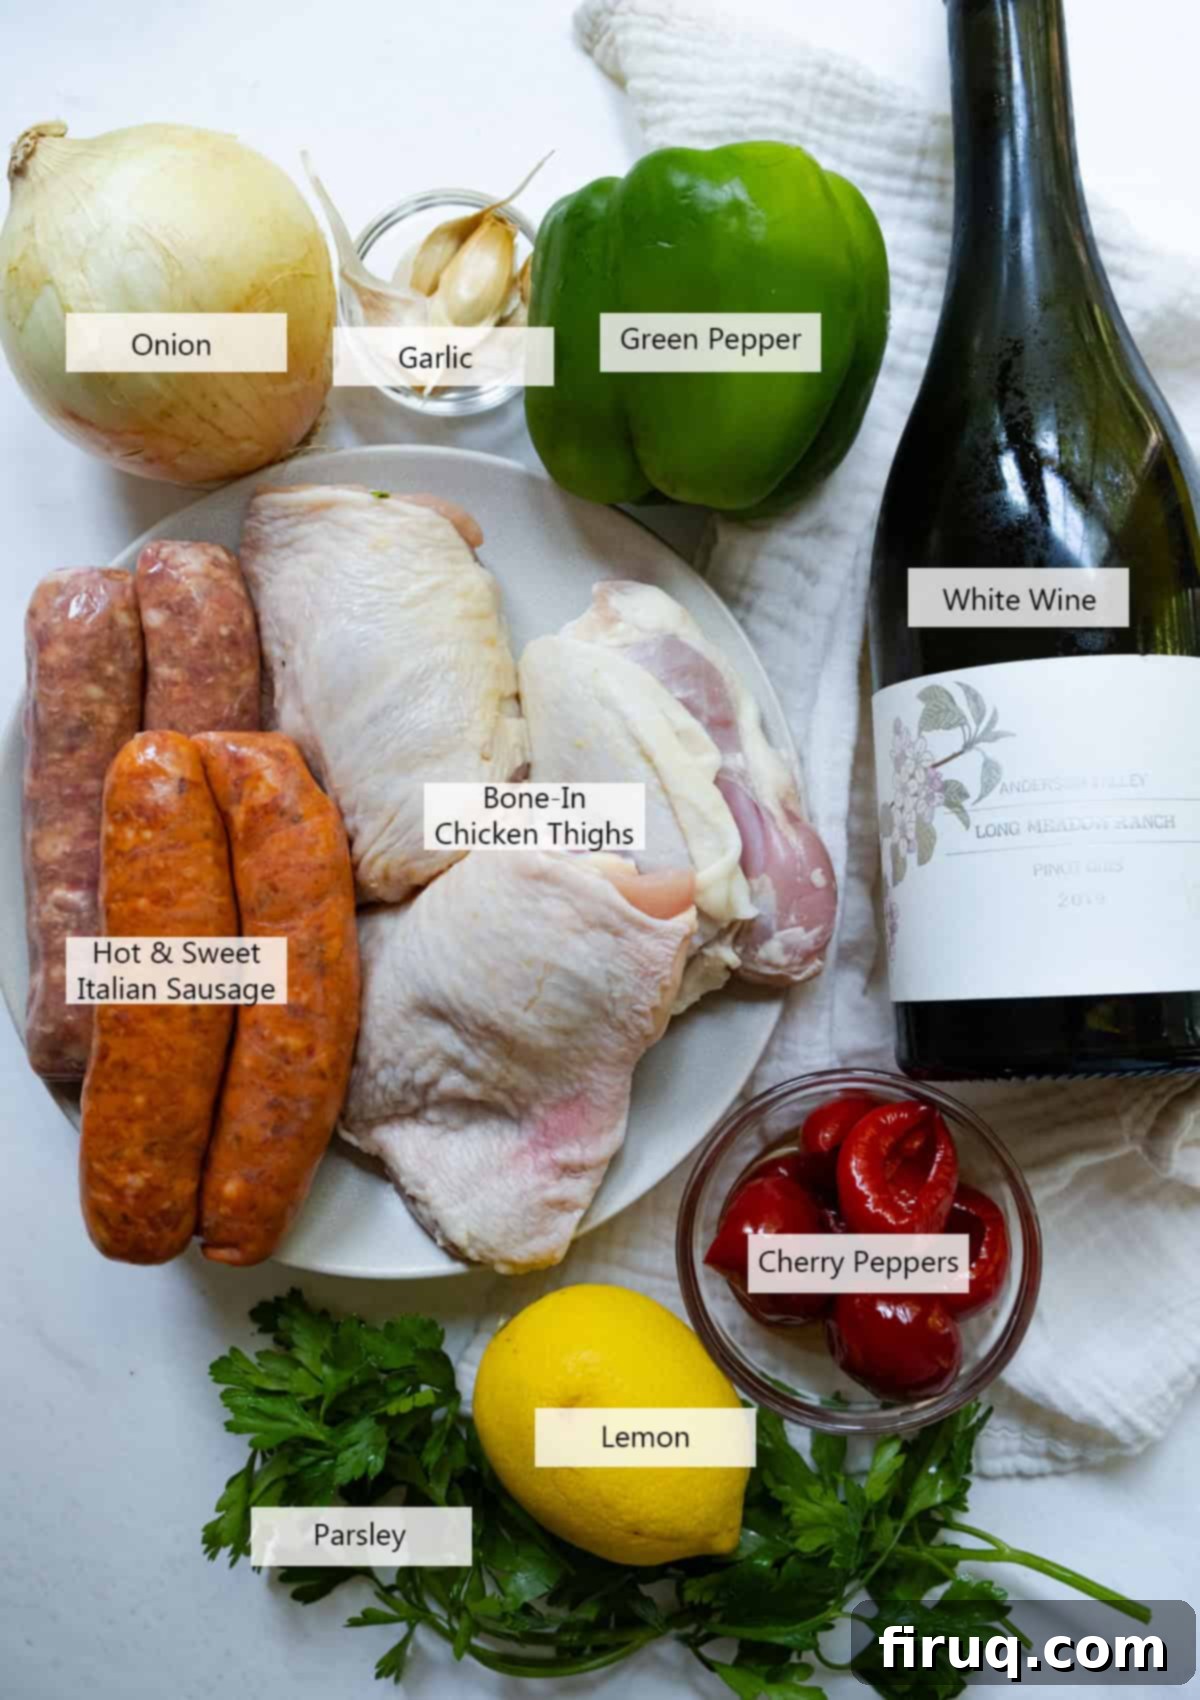
- Vinegar. The unique sweet and sour profile of Scarpariello heavily relies on the right vinegar. I highly recommend using the brine from your jar of cherry peppers. This not only adds a wonderful depth of flavor and a natural spicy element, echoing the approach seen in recipes like the one on Serious Eats, but it also minimizes waste. If you prefer a milder dish or want to avoid the extra kick, white wine vinegar is an excellent alternative that still provides the necessary tanginess.
- Peppers. The choice of peppers significantly influences the final taste and heat level. During the recipe testing phase, I experimented with various types, including classic bell peppers, sweet peppadew peppers, and even homemade pickled Italian peppers. My personal preference leans towards a mix of sweet and hot cherry peppers. This choice brings back fond memories of my mom’s cooking, especially her Spicy Chicken Riggies during winter. Feel free to use your preferred type or what you have on hand; bell peppers offer a sweeter, milder contrast, while hot cherry peppers deliver a fiery punch.
- Chicken. This dish truly shines with skin-on, bone-in chicken thighs. The bone imparts incredible flavor to the sauce as it braises in the oven, while the skin crisps up beautifully, adding texture and richness. Furthermore, bone-in thighs remain incredibly juicy and tender throughout the cooking process, preventing them from drying out—a similar benefit found in recipes like Easy Chicken Cacciatore. If you absolutely must, boneless, skinless thighs can be used, but adjust cooking times accordingly to prevent overcooking and consider adding a splash more chicken broth for moisture.
- Sausage. Italian sausage is a crucial component, adding a robust, savory counterpoint to the chicken and tangy sauce. I often use a combination of sweet (mild) and hot Italian sausage to achieve a balanced flavor profile, offering a gentle heat alongside classic fennel and herb notes. This is entirely a matter of preference; you can opt for all mild, all hot, or even a different variety of sausage if you wish, such as chicken sausage for a lighter alternative.
- **Aromatics (Onion & Garlic).** These foundational ingredients create the aromatic base for the sauce. A medium yellow onion, thinly sliced, will caramelize slightly, adding sweetness, while fresh garlic cloves, also sliced, infuse the dish with their pungent, savory essence. Do not skimp on the fresh garlic; it makes a huge difference!
- **White Wine.** A dry white wine, such as Pinot Grigio or Sauvignon Blanc, is used to deglaze the pan, lifting all the flavorful browned bits (fond) from the bottom of the Dutch oven. This adds complexity and depth to the sauce. If you prefer to cook without alcohol, a good quality chicken broth can be used in its place.
- **Fresh Herbs (Parsley & Basil).** A sprinkle of fresh minced parsley and julienned basil at the end brightens the entire dish, adding a burst of fresh, herbaceous flavor and a vibrant visual appeal. Always add fresh herbs at the very end to preserve their delicate aroma and color.
*Please see more information about quantities and detailed instructions below in the recipe card.
How to Make Restaurant-Style Chicken Scarpariello: A Step-by-Step Guide
Creating Restaurant-Style Chicken Scarpariello at home is surprisingly straightforward, especially since it’s a wonderful one-pan Italian dish that’s perfect for both intimate family dinners and feeding a larger crowd. The key is to build layers of flavor through proper searing and patient simmering.
Achieving Crispy Chicken Thighs: The Foundation of Flavor
The secret to exceptional Scarpariello starts with perfectly seared chicken thighs. To achieve that coveted crispiest chicken skin, begin by trimming any excess skin from the chicken thighs so it neatly covers only the top portion. Next, and this step is crucial, thoroughly pat the chicken dry with paper towels. Any residual moisture will steam rather than sear, preventing a crispy crust from forming. Once dry, generously season both sides of the chicken thighs with salt and freshly ground black pepper.

Step 1: Sear the Chicken. Heat your Dutch oven on the stovetop over medium-high heat. Add a tablespoon of olive oil. Once the oil is shimmering, carefully place the chicken thighs into the pot, skin side down. This initial sear is critical for rendering fat and developing a deep, golden-brown, crispy skin. Let them sear undisturbed for about 8 minutes. Resist the urge to move them! Once flipped, the skin should be beautifully golden. Sear the other side for another 3-4 minutes, then remove the chicken and set it aside on a plate. (Don’t worry, the chicken will not be cooked through at this point; it will finish cooking in the oven later.)

Step 2: Brown the Sausage. In the same Dutch oven, place the Italian sausage links. Sear them for approximately 3 minutes per side, rolling them to ensure even browning on all edges, as shown in the image. This browning develops a delicious crust and renders some of the fat, which will add incredible flavor to the sauce. Once browned, remove the sausage and set it aside with the chicken. (Like the chicken, the sausage will not be fully cooked at this stage.)
Once your chicken and sausage are seared, Preheat your oven to 400℉ (200°C) in preparation for braising.
Building the Flavorful Sauce: Peppers, Aromatics, and Tangy Goodness
With the meats seared, the next step is to build the rich, sweet-and-sour sauce right in the same Dutch oven, capitalizing on all the flavorful fond left behind.
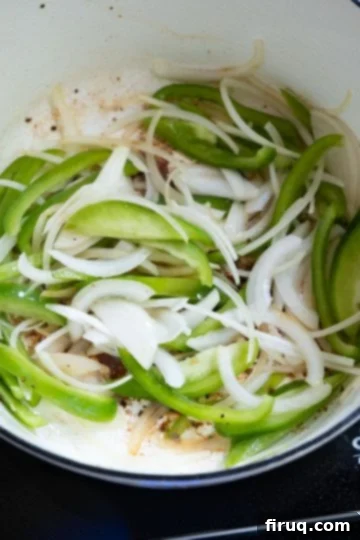
Step 3: Sauté Aromatics. Lower the heat to medium. If needed, add a touch more olive oil to the pan, though typically there will be enough rendered fat from the sausage and chicken. Add your sliced green bell pepper and onion. Sauté these vegetables, stirring occasionally, until they become soft and slightly translucent, which usually takes about 5 minutes. This step draws out their natural sweetness and softens their texture, preparing them to absorb the sauce’s complex flavors.
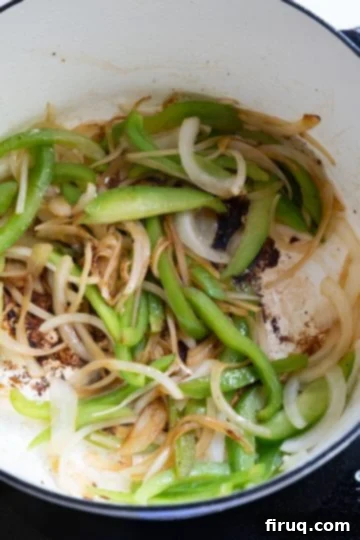
Step 4: Add Garlic. Introduce the sliced garlic to the softened peppers and onions. Sauté for just one more minute until fragrant. Be careful not to burn the garlic, as it can turn bitter quickly.
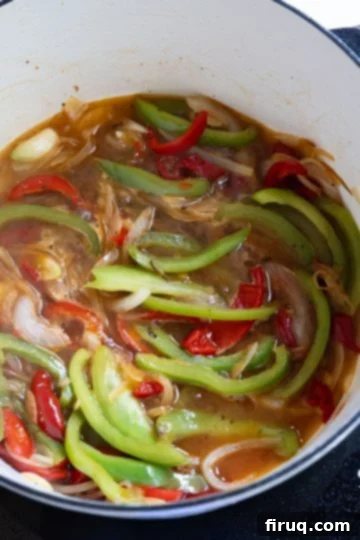
Step 5: Deglaze and Build the Sauce. Stir in the cherry peppers and the chosen vinegar (either the spicy cherry pepper juice or milder white wine vinegar). This step is crucial for the dish’s distinctive tang. Add 2 tablespoons of fresh lemon juice for brightness and then pour in the white wine. Bring the mixture to a gentle simmer, allowing the alcohol to cook off and the flavors to meld for about 5 minutes. Use a wooden spoon to scrape up any browned bits from the bottom of the Dutch oven – this “fond” is packed with flavor.
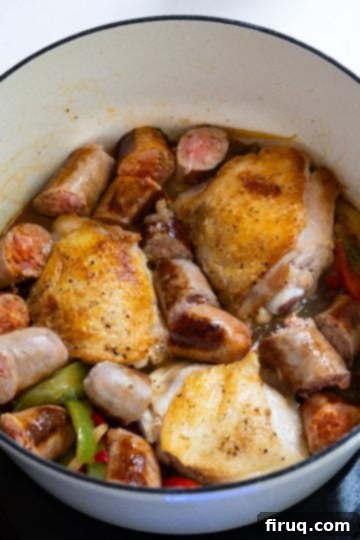
Step 6: Combine and Braise. Once the sauce has simmered, return the seared chicken thighs to the pan, nestling them into the sauce. Cut the browned sausage links into thirds and add them back to the sauce as well. The sauce should ideally come halfway up the chicken thighs; if it looks a bit low, add a splash of chicken broth to ensure everything braises properly. Cover the Dutch oven and transfer it to your preheated 400℉ oven. Allow it to braise for about 20 minutes, or until the chicken reaches an internal temperature of 165℉ (74°C) using an instant-read thermometer.
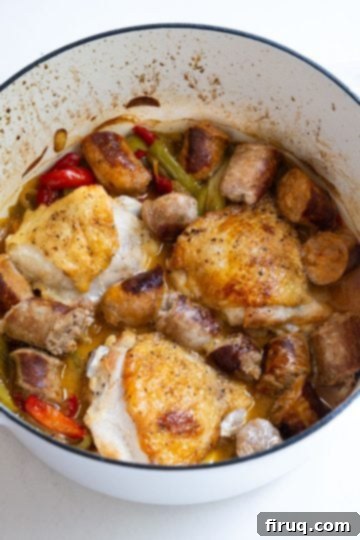
Step 7: Check for Doneness. Carefully remove the Dutch oven from the oven. It’s important to always check the internal temperature of the chicken using a reliable meat thermometer to ensure it’s safely cooked through to 165℉ (74°C). The chicken should be incredibly tender and the sauce should be fragrant and rich.
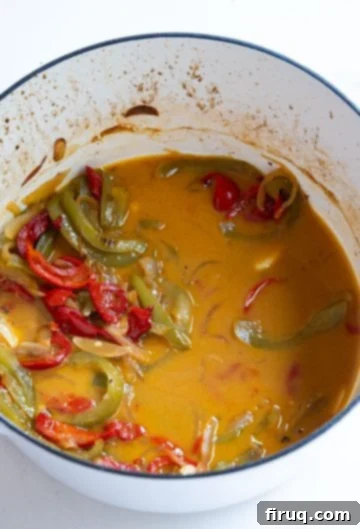
Step 8: Finish the Sauce. Remove the chicken and sausage from the Dutch oven and set them aside. To enrich the sauce, add cold butter and whisk vigorously to combine. The cold butter will emulsify into the hot sauce, making it slightly opaque, glossy, and wonderfully smooth, as depicted in the image. This technique adds richness and a luxurious mouthfeel.
Finally, stir in the fresh minced parsley and julienned basil, along with another squeeze of fresh lemon juice to brighten all the flavors. Pour the aromatic sauce, brimming with tender peppers and onions, generously over the chicken and sausage. Serve this exquisite dish immediately with plenty of crusty Italian bread to mop up every last drop, or alongside perfectly roasted potatoes for a complete and satisfying meal. If you’re looking for another fantastic one-pan meal, be sure to try our delicious Italian Cast Iron Pork Tenderloin!
Pro-Tips for Perfect Chicken Scarpariello
Elevate your Chicken Scarpariello from good to absolutely outstanding with these professional tips:
- Mastering the Sear: The secret to truly crispy chicken skin lies in preparation and patience. Before searing, ensure your chicken thighs are meticulously patted dry with paper towels to eliminate all surface moisture. Moisture turns to steam, which prevents browning. When searing, place the chicken skin-side down in a hot pan and resist the urge to move it for the first 8 minutes. This uninterrupted contact allows a beautiful, golden-brown crust to develop. Keep an eye on the heat; if you notice excessive smoking, which usually indicates burning, slightly lower the heat and check the chicken. A perfect sear sets the stage for deeply flavorful chicken.
- Controlling the Spice Level: Chicken Scarpariello’s characteristic kick comes primarily from the cherry peppers and, more intensely, from their brine. If you love heat, using the vinegar from the cherry pepper jar will deliver that robust spice. However, if you or your family (especially children) prefer a milder dish, I highly recommend substituting white wine vinegar for the pepper brine. Be aware that the dish tends to become spicier on the second day as the meat continues to absorb the flavorful juices overnight. This deepens the flavor wonderfully for adults but might be too intense for sensitive palates. Always be mindful of the spice level when serving to diverse groups.
- The Magic of Leftovers: Like many braised and sauce-based dishes, Chicken Scarpariello often tastes even better the next day. The flavors have more time to meld and deepen, creating a more cohesive and rich experience. This makes it an ideal meal for meal prepping or entertaining, as you can prepare it in advance and enjoy even more delicious leftovers.
- Don’t Overcrowd the Pan: When searing chicken and sausage, ensure there’s enough space in your Dutch oven for proper browning. Overcrowding will lower the pan temperature and cause the meat to steam rather than sear, resulting in less flavorful, less crispy results. If necessary, sear the chicken and sausage in batches.
- Temperature is Key: While the chicken and sausage are seared to develop color and flavor, they will not be fully cooked through at this stage. It is crucial to finish cooking them in the oven, ensuring they reach an internal temperature of 165℉ (74°C). Always use an instant-read thermometer for accuracy to guarantee food safety and optimal tenderness.
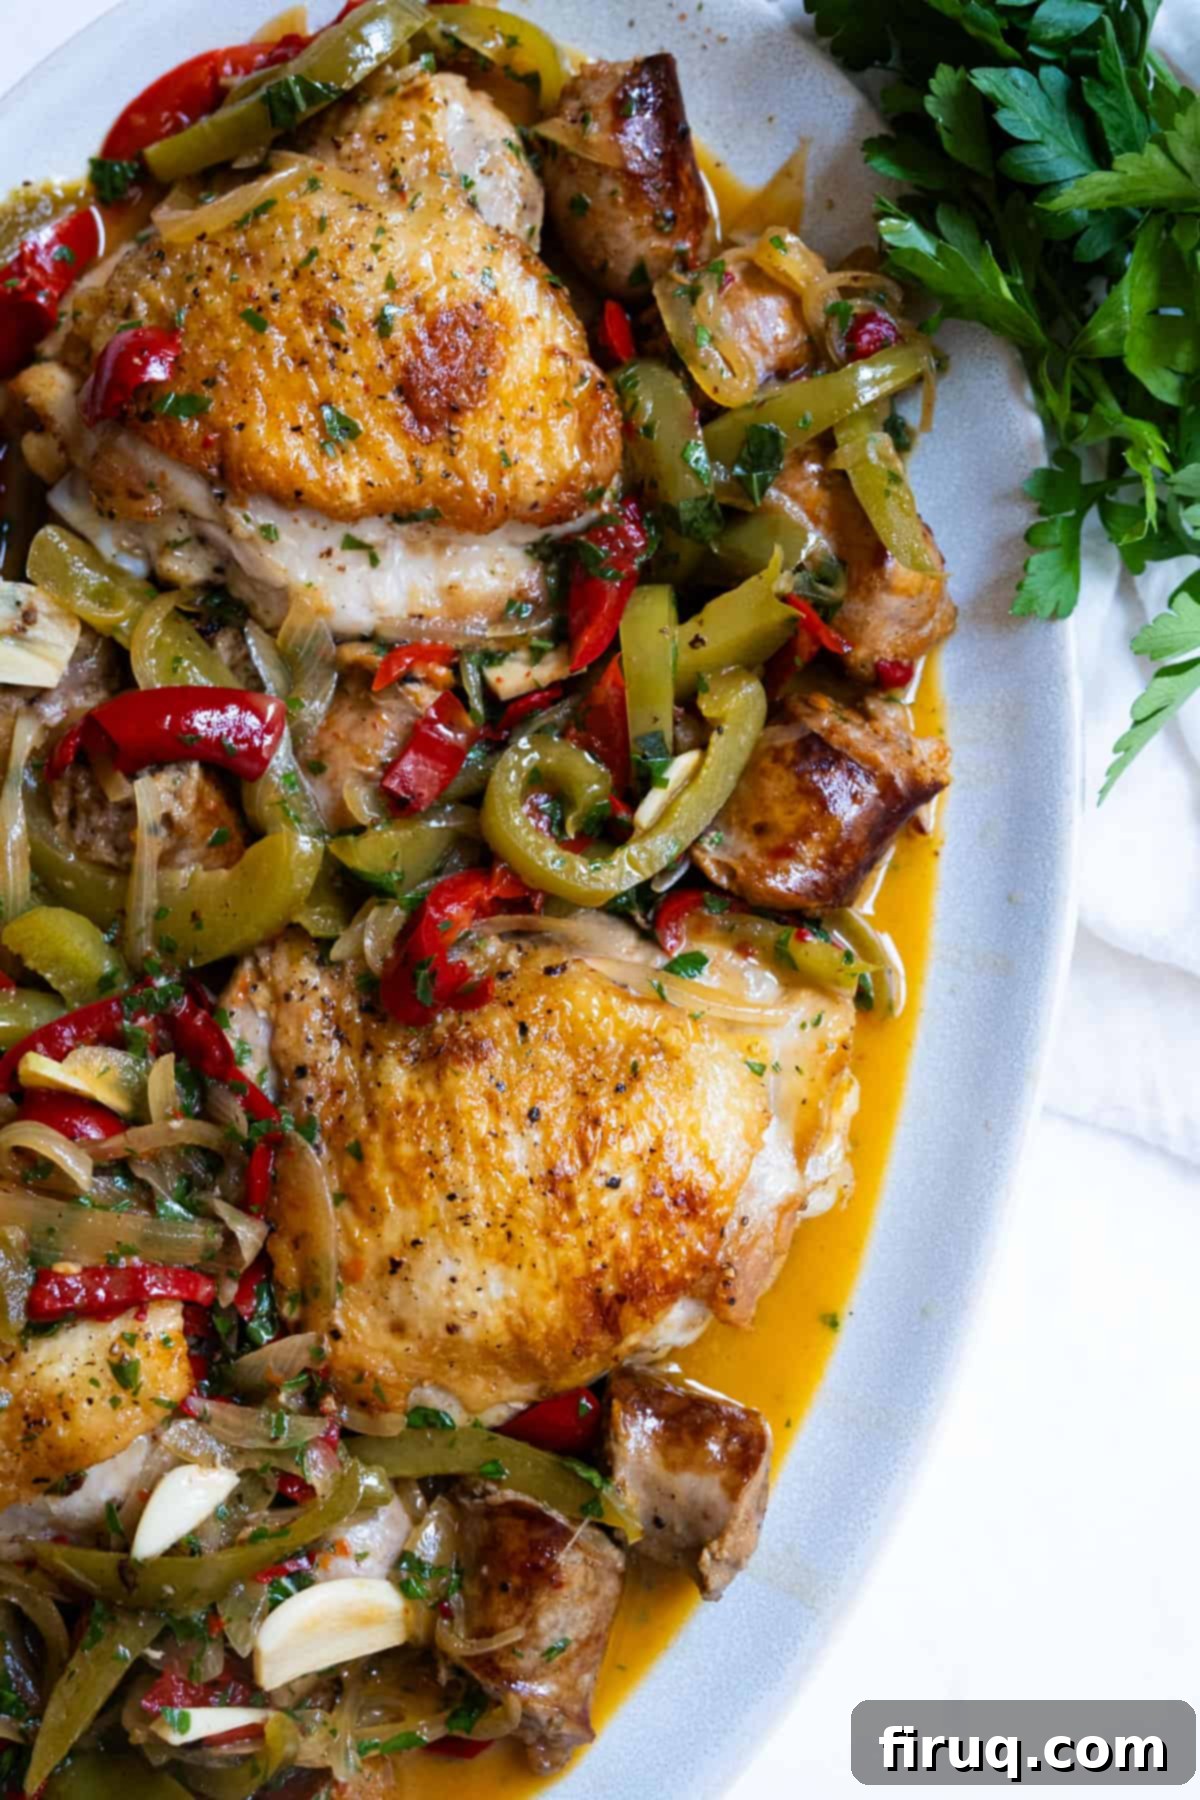
Scaling Up: Serving Chicken Scarpariello for a Large Group
Chicken Scarpariello is a fantastic dish for entertaining, but adapting it for a large group requires a slight modification to the cooking process, especially if your Dutch oven isn’t large enough to accommodate all the chicken and sausage at once. The goal is to maintain the quality and flavor that a single-batch recipe delivers.
If you need to cook more chicken thighs and sausage than your Dutch oven can comfortably hold without overcrowding, here’s how to proceed: Follow the searing steps for the chicken and sausage as described in the recipe, performing these steps in batches. This ensures each piece gets a proper, golden-brown crust. Once all the meat is seared and set aside, continue with the recipe to build the sauce in your Dutch oven, simmering the peppers, onions, garlic, wine, and vinegar as directed.
Instead of returning all the meat to the Dutch oven for braising, arrange the seared chicken and sausage (cut into thirds) on one or more large baking trays. Pour a generous amount of the simmering sauce and peppers over the meat on the trays. Cook the chicken and sausage in the oven for 15-20 minutes, or until the chicken reaches an internal temperature of 165℉ (74°C). Meanwhile, keep the remaining sauce simmering gently on the stovetop in the Dutch oven to concentrate its flavors.
Once cooked, transfer the oven-braised chicken and sausage to a large serving dish or a clean aluminum tray for easy transport. Pour the remaining rich, hot sauce from the Dutch oven over the entire assembly. This method ensures all the components are perfectly cooked and coated in the delicious sauce, making it ideal for big gatherings. This approach is similar to how I prepare other crowd-pleasing Italian classics like Restaurant-Style Chicken Francese, Chicken Rollatini, or Restaurant-Style Chicken Marsala when catering for a significant number of guests.
Chicken Scarpariello FAQs
Scarpariello translates to “shoemaker’s chicken”. The exact origin of this name is a bit of a culinary mystery, but it’s a topic many Italian-Americans will enthusiastically debate! Some popular theories suggest it implies the dish was “cobbled together” from simple ingredients, much like a shoemaker would fashion shoes from available materials, making it a humble yet satisfying meal. Others believe it refers to the shoemaker’s wife making a quick and delicious meal from leftovers. Regardless, the name evokes a sense of rustic, traditional Italian cooking.
Absolutely not! The spiciness of Chicken Scarpariello is entirely customizable and depends on your choice of peppers and vinegar. If you enjoy a fiery kick, opt for hot cherry peppers and use the spicy brine from their jar. However, if you prefer a milder, sweeter flavor profile, simply use sweet cherry peppers (or even bell peppers for no heat at all) and substitute white wine vinegar for the pepper brine. This will ensure you get all the delicious sweet and sour notes without the heat.
Yes, Chicken Scarpariello is an excellent dish for making ahead! In fact, many believe it tastes even better on the second day as the flavors have more time to meld and deepen. You can fully prepare the dish, allow it to cool, then refrigerate it in an airtight container for up to 3-4 days. To reheat, gently warm it on the stovetop or in the oven until heated through. If the sauce has thickened too much, you can add a splash of chicken broth or white wine to loosen it.
The rich, tangy sauce of Chicken Scarpariello is perfect for pairing with absorbent side dishes. A crusty loaf of Italian bread is practically mandatory for soaking up every last drop! Beyond that, roasted potatoes (especially Crispy Garlic Parmesan Potatoes), creamy polenta, or even a simple pasta like rigatoni or orecchiette would be excellent choices. A light green salad with a vinaigrette dressing can also provide a refreshing contrast to the hearty flavors of the main dish.
More Restaurant-Style Italian Classics You’ll Love
If you enjoyed the robust flavors and simple elegance of this Chicken Scarpariello, then you’ll definitely want to explore more of our beloved Italian classics that bring that restaurant-quality experience right into your home kitchen. Each recipe is crafted to deliver authentic taste with approachable steps.
- Restaurant-Style Chicken Saltimbocca
- Restaurant-Style Chicken Marsala
- Chicken Breast in Lemon Butter Sauce
- Pasta with Sausage and Broccoli Rabe
We absolutely love hearing from you! Please leave a comment and a star rating below in the recipe card to let us know what you think of our recipes. Your feedback helps us grow and improve. And don’t forget to tag us on Instagram @vindelgiudice when you share your delicious creations!
📖 Recipe
Chicken Scarpariello
Vincent DelGiudice
Pin Recipe
Equipment
-
1 dutch oven
-
Instant-read thermometer
Ingredients
- 4 bone-in skin-on chicken thighs
- 4 Italian sausage, mild or hot
- 1 green bell pepper, sliced
- 1 medium onion, sliced
- 4 cloves garlic, sliced
- 4 sweet or hot cherry peppers (canned/jarred)
- ½ cup dry white wine(e.g., Pinot Grigio)
- 1 lemon, juiced
- 2 tablespoon fresh parsley, minced
- 10 fresh basil leaves, julienned
- ¼ cup white wine vinegar or brine from the cherry peppers
- Salt and freshly ground black pepper to taste
- 1 tablespoon olive oil
- 2 tablespoon cold unsalted butter
- Optional: ½ cup chicken broth if sauce needs thinning
Instructions
-
Trim any excess skin from the chicken thighs and pat them thoroughly dry with paper towels. Season liberally with salt and freshly ground black pepper on both sides. Heat the olive oil in your Dutch oven over medium-high heat until shimmering. Place the chicken thighs in the pot, skin-side down, and sear for 8 minutes without moving to achieve a golden-brown, crispy skin. Flip and sear the other side for 3-4 minutes. Remove the chicken and set aside on a plate; it will not be cooked through at this point.
-
Preheat your oven to 400℉ (200°C). Add the Italian sausage to the Dutch oven and sear for 3 minutes per side, rolling to brown all edges. Remove the sausage and set it aside with the chicken.
-
Lower the heat to medium. Add a little more olive oil if needed, though some fat from the meats should remain. Add the sliced green bell pepper and onion, and sauté until soft, about 5 minutes. Stir in the sliced garlic and sauté for another minute until fragrant. Add the cherry peppers and your chosen vinegar (cherry pepper brine for spicy, white wine vinegar for mild). Stir in 2 tablespoons of lemon juice and the white wine, deglazing the pan by scraping up any browned bits from the bottom.
-
Bring the sauce to a gentle simmer and let it cook for 5 minutes. Return the seared chicken thighs to the pan, nestling them into the sauce. Cut the sausage into thirds and add it back to the sauce. If the sauce doesn’t come halfway up the chicken thighs, add some chicken broth. Cover the Dutch oven and transfer it to the preheated oven. Braise for 20 minutes, or until the chicken reaches an internal temperature of 165℉ (74°C).
-
Carefully remove the Dutch oven from the oven. Remove the chicken and sausage and set aside. Add the cold butter to the sauce and whisk vigorously until it emulsifies and the sauce becomes slightly opaque and glossy. Stir in the minced parsley, julienned basil, and a final squeeze of lemon juice. Pour the flavorful sauce with peppers and onions generously over the chicken and sausage. Serve immediately with crusty Italian bread or roasted potatoes.
Notes
- When searing chicken thighs, it is best not to move them at all during the process to develop the best crust. Be mindful of the smoking though. If the chicken appears to be creating a lot of smoke, it is likely burning. Lower the heat and check the chicken immediately.
- None of the meat will be cooked through until it goes into the oven. Always use an instant-read thermometer to ensure the internal temperature of the chicken reaches 165℉ (74°C) for food safety.
- The sauce can be very spicy if you use the brine from the cherry peppers. If your family does not like spicy food, I highly recommend using white wine vinegar instead. My son found the spicy version too intense.
- This dish often gets spicier and more flavorful on day two, especially the meat. As the meat sits in the juices overnight, the flavors meld beautifully, but the spice level can intensify. Be mindful of this if serving to children or those sensitive to heat.
